Shower Valve Replacement: The Complete Homeowner’s Guide
Quick answer
Most shower valve problems end at the cartridge — the small part inside the valve that mixes hot and cold. A cartridge swap takes an hour or so, needs no permit, and costs a fraction of a full valve job. Only replace the whole valve body when it is cracked, corroded, or out of parts — and that job needs a permit and a licensed plumber in most places.
Do I need a new cartridge or a whole new valve?
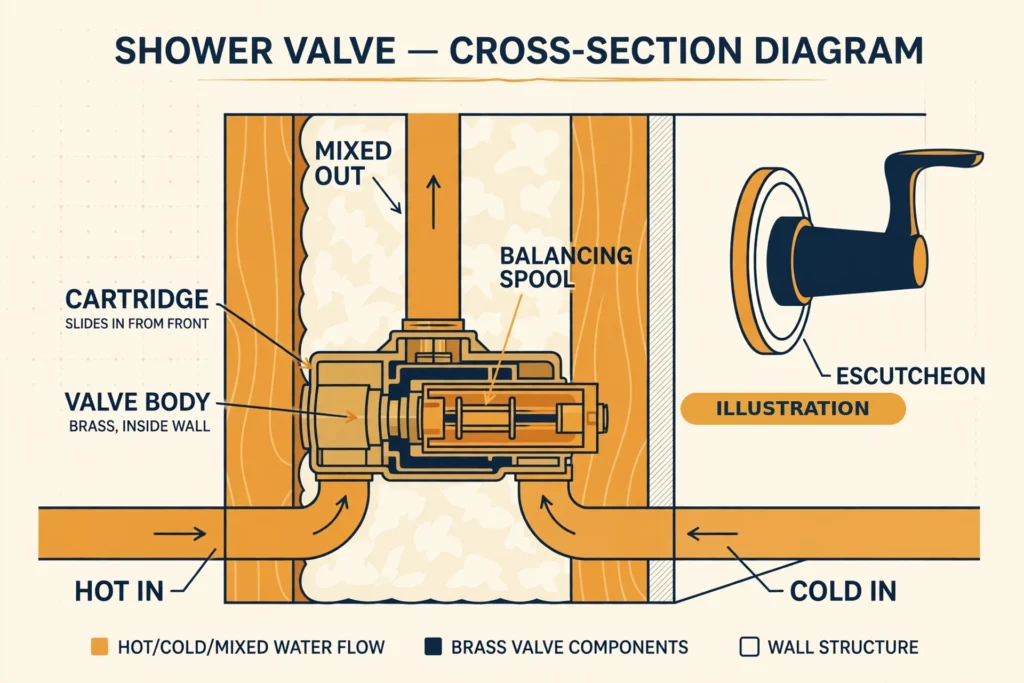
Start with the cartridge, not the valve body. The valve body is the brass fitting inside the wall that the pipes connect to. The cartridge slides into it from the front and does the mixing and shutoff. Most problems start in the cartridge.
| Symptom | Likely cause | Fix |
|---|---|---|
| Drips from the showerhead after shutoff | Worn cartridge seals or O-rings; seat not closing | Cartridge swap; if the drip persists, the body or seat is damaged → pro |
| Temperature swings when the toilet flushes | Balancing spool stuck with scale or debris; cartridge worn | Cartridge swap; if it still swings after a new cartridge, the balancing device in the body is damaged → full valve |
| Only hot, or only cold | One supply stop partly closed; limit stop set too far; spool stuck; cartridge installed 180° off | Check stops fully open; check limit stop and cartridge orientation; if the sink also lacks hot water, the problem is upstream, not the valve |
| Low pressure, shower only | Debris or scale in the cartridge or inlet ports | Clean or swap the cartridge; soak it 50/50 vinegar-water for 24 hours for scale |
| Stiff or grinding handle, or handle spins free | Mineral buildup seizing the cartridge; stem rounded off; set screw loose | Penetrating oil soak, then cartridge swap; if the stem is stripped, new cartridge |
| Water from tub spout AND showerhead at once | Diverter failing (a small trickle from the spout while diverted is normal) | Diverter repair or replacement; if the diverter is integral to the valve, cartridge or body work |
| Hot and cold reversed at the handle | Cartridge installed 180° off, or supplies piped backwards | Rotate the cartridge 180°; if the piping is reversed and inaccessible, that is a pro job |
| No water at all | Both supplies not on, or cartridge fully blocked | Open both supplies; check stops; cartridge service |
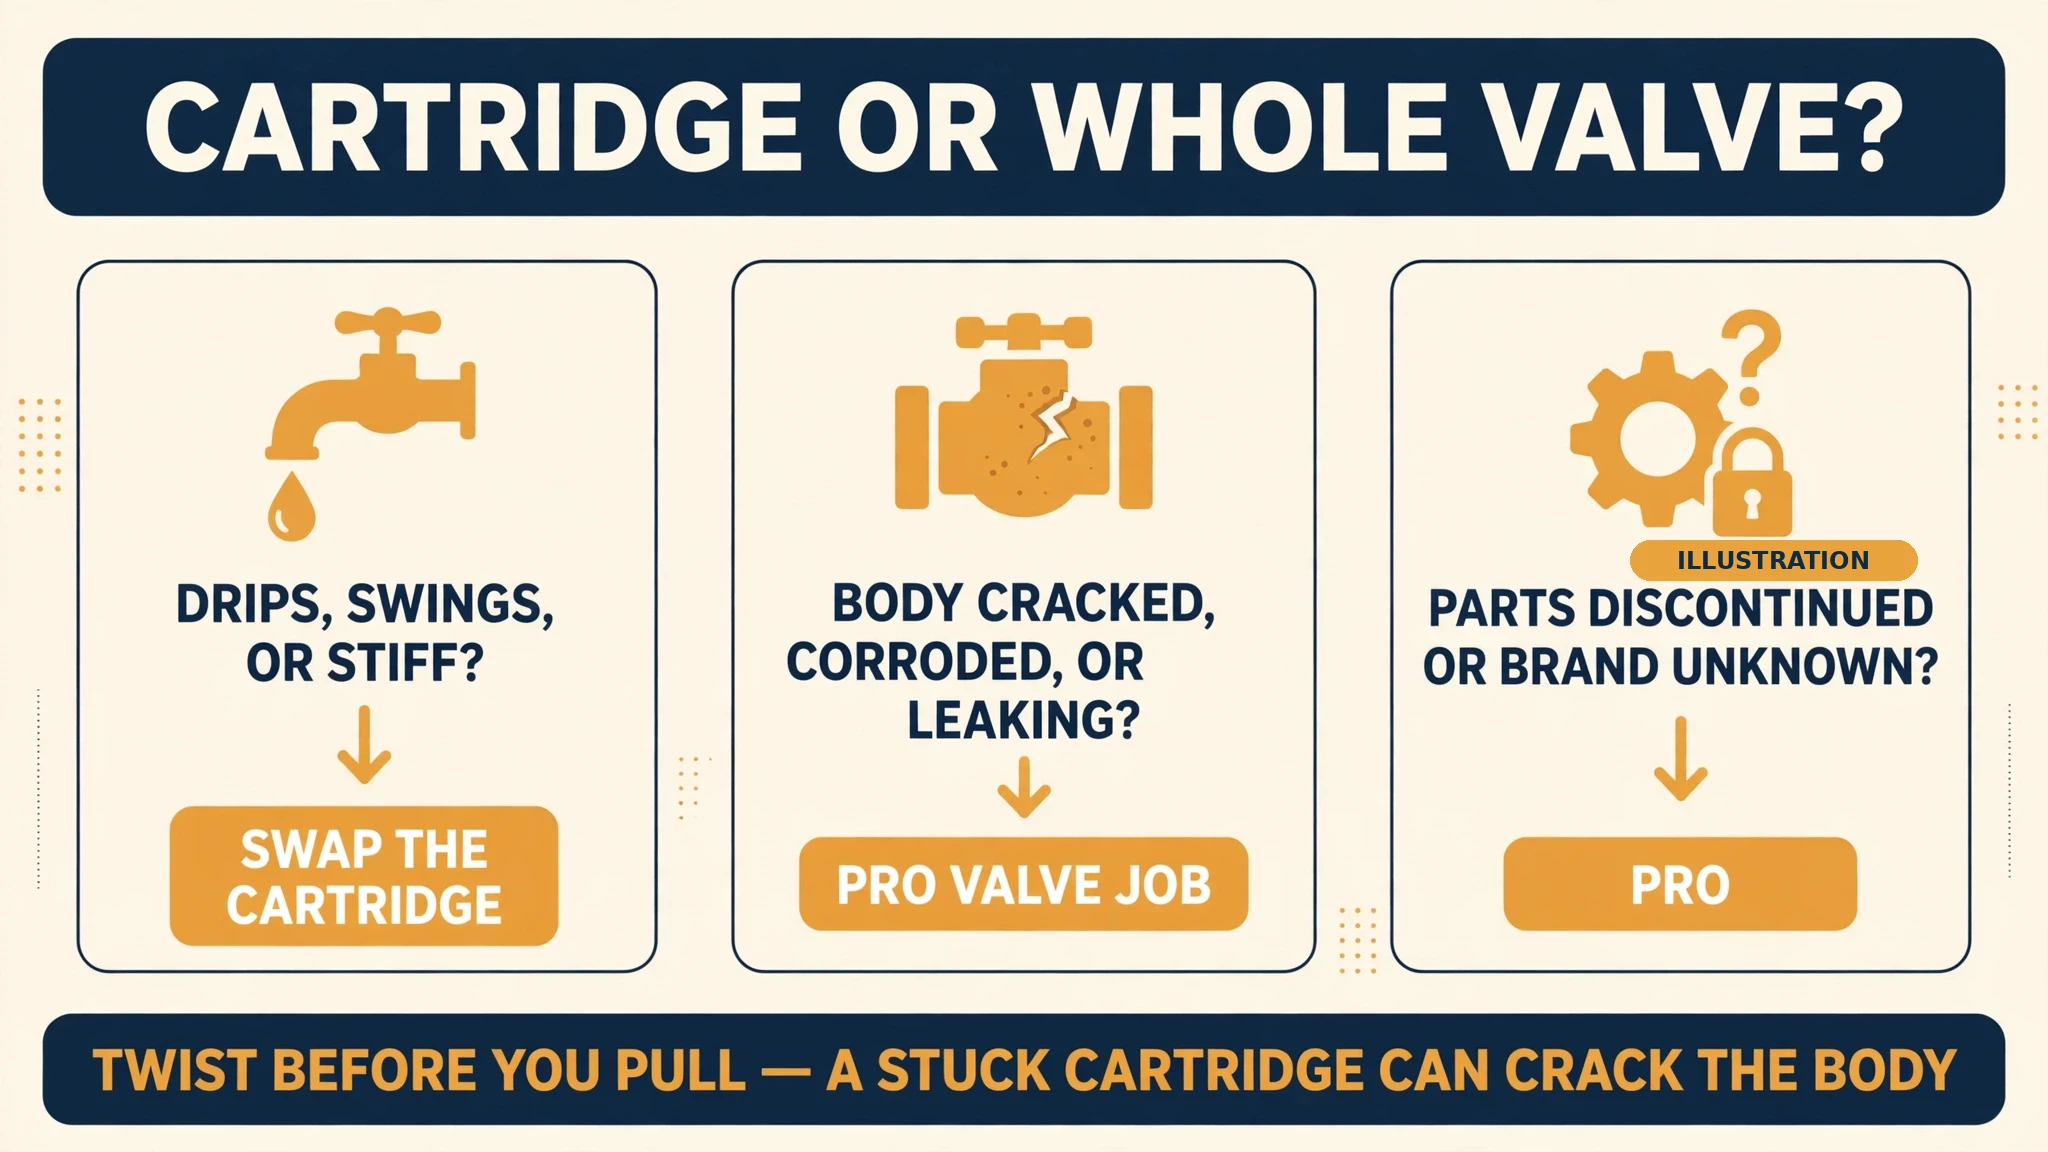
Swap the cartridge when the shower drips, the handle is stiff or loose, the temperature swings, or the flow is low on one side only. Replace the whole valve body when the body itself is cracked, corroded, or leaking. Or when the solder joints or threaded inlets are damaged, parts are discontinued and the brand is unknown, or you are upgrading the valve type.
A stuck cartridge forced out can crack the body. That turns a roughly $30 fix into a $600+ valve replacement. Twist before you pull, and use a puller tool if it will not move.
One homeowner described the classic failure plainly:
“The handle sits in the middle, where it always gave you a warm shower, and the water comes out cold.”
Low pressure in the shower alone has several causes, and the valve is only one of them.
[LINK → How to Fix Low Water Pressure in a Shower: the full diagnosis, from the showerhead to the supply.]
How do I tell what type of shower valve I have?
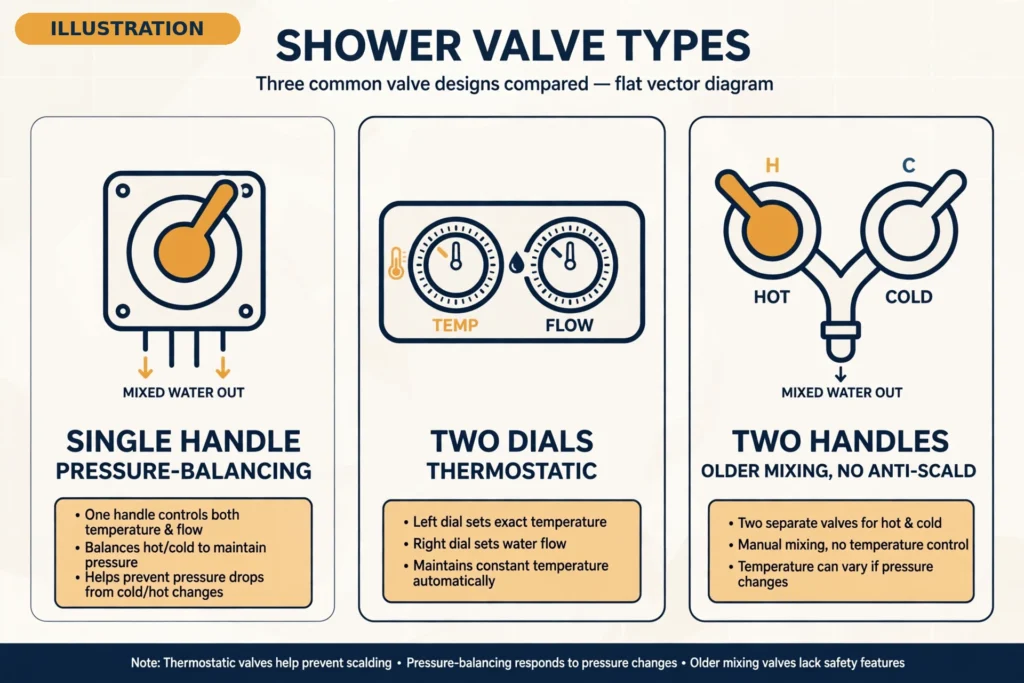
| Type | How it works | How to spot it |
|---|---|---|
| Pressure-balancing (Type P, ASSE 1016) | Senses hot and cold inlet pressure; a spool throttles one side to hold the mix ratio. Reacts to pressure, not temperature. | Single handle controlling flow and temperature together. Most common; standard in homes built or remodeled after the early to mid 1990s. |
| Thermostatic (Type T, ASSE 1016) | A wax or bimetallic element senses mixed-water temperature and holds it. Reacts to pressure and temperature swings. | Separate temperature dial and volume control. Common in remodeled primary baths, multi-outlet showers, and homes with tankless heaters. |
| Diverter | Directs flow between outlets, tub spout to showerhead. | Pull arm on the tub spout, or a third handle or dial. |
| Transfer | Directs flow among several outlets, rain head, handheld, body sprays. | Dial with several positions; large or multi-outlet showers. |
| Mixing, two-handle (older) | Two separate stems mix hot and cold by hand. No anti-scald protection. | Two handles, one hot and one cold. Pre-1980s homes. Replace on sight during a remodel — an upgrade, not a like-for-like repair. |
Identify yours in order. Count the handles. Check the back of the trim plate for a series number — a Delta T14 is pressure-balancing, a T17 is thermostatic. Pull the escutcheon and look for a brand stamp on the body or cartridge. If it is still unknown, photograph the cartridge and take it, or the photo, to a plumbing supply house, not a hardware store. A master plumber’s advice, quoted by Angi: “You’re going to do way better at the local supply house.”
Cartridges are brand-proprietary and not interchangeable. Common ones: Moen 1222 (Posi-Temp), Delta RP46074 (MultiChoice 13/14 series) and RP19804 (Monitor 1300/1400), Kohler GP500520 (Rite-Temp). Universal rough-in systems — Delta MultiChoice R10000, Moen M-PACT, Hansgrohe iBox Universal Plus — let the trim and cartridge change later without touching the body.
Two checks worth knowing. With the cartridge out, turn it to full mix and shake it. Delta’s own check: rattle means functional, no rattle means replace the housing assembly. On Moen pressure-balancing valves, the notched flat on the cartridge stem must point up in the mixed position. Installed 180° off, it reverses hot and cold.
Before you begin
Tools: screwdriver set, hex key set, needle-nose pliers, adjustable wrench, utility knife, plumber’s silicone grease, penetrating oil, cartridge puller (for example Moen 104421), thermometer, cloth or drain stopper, white vinegar.
Materials: the exact replacement cartridge for your valve brand and series; new O-rings if not included; PTFE tape (only if a threaded connection is touched).
Shut off the water first, and verify it. Use the fixture stops if present, else the house main. On a well system, switch the pump breaker off. Open the handle after shutoff to drain the line and confirm zero pressure. A pressurized line fights every removal.
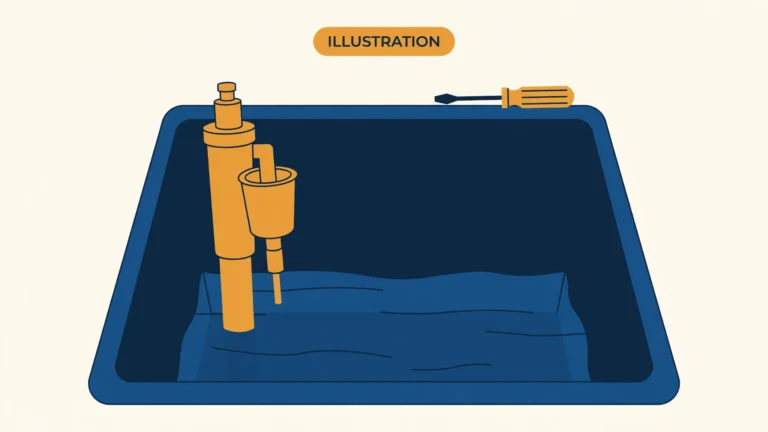
Cover the drain before you start. A cloth or stopper over the drain catches the screws and clips that otherwise vanish down it.
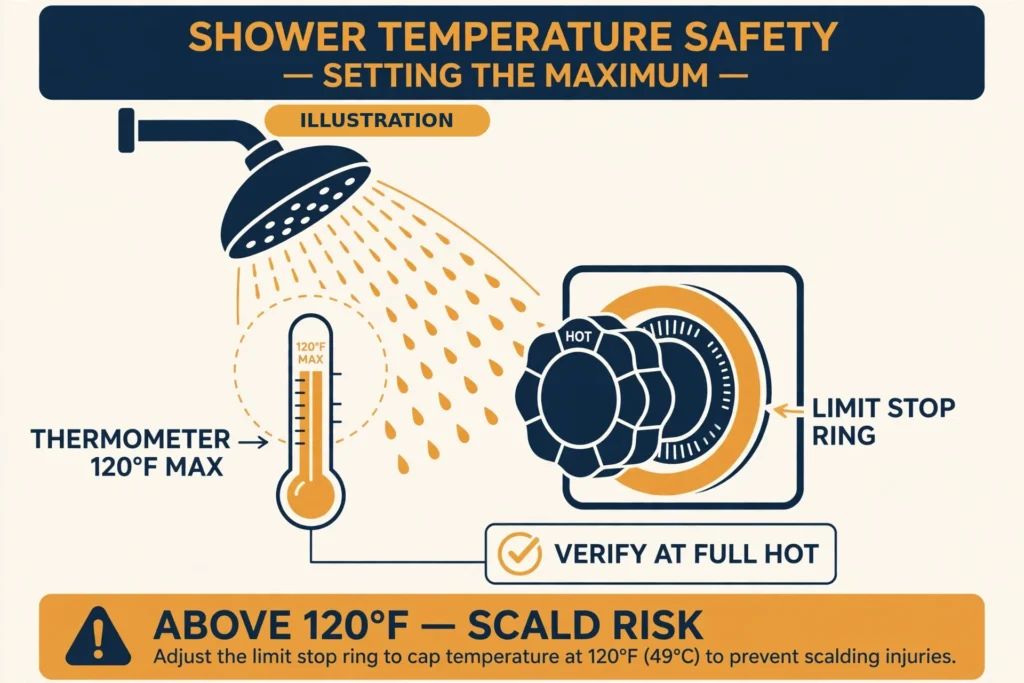
Safety — scald risk is the core hazard. Most adults suffer third-degree burns from 150°F water in 2 seconds. At 140°F it takes 6 seconds. At 130°F, 30 seconds. Those are the CPSC’s figures.
Water heaters should be set to 120°F, and the shower outlet must be 120°F or less. The limit stop is not optional trim. Set it with a thermometer at full hot, and re-check it any time the water heater setting changes.
If a wall must be opened, the old-wall rules apply. In a pre-1978 home, cutting drywall can disturb lead paint. In a pre-1982 home, joint compound can hold asbestos. Test before cutting or sanding. The EPA’s renovation rule binds paid work, not a homeowner fixing their own wall. The lead-safe practices still apply to you, though.
The cartridge swap, step by step

- Shut off the water and drain the line. Fixture stops, or the house main. Open the handle and confirm zero pressure.
- Cover the drain. A cloth or stopper catches small parts.
- Remove the handle. Find the set screw, often under a decorative cap. Hex key or screwdriver, as fitted.
- Remove the trim and escutcheon plate. Cut any caulk with a utility knife. Clean the trim in vinegar while you work.
- Note the cartridge orientation. Photograph it. Check the “H” and “C” marks before it comes out.
- Pull the retainer clip. Needle-nose pliers on the U-clip, snap ring, or retaining nut. Don’t drop it in the wall. Moen warns the water cannot go back on until the clip is replaced.
- Twist before you pull. Twist to break the crusty O-ring seal, then pull straight. A puller tool frees a stuck cartridge. Penetrating oil and a 30-minute soak help. Never pry with a screwdriver, and never drill or screw-extract a cartridge.
- Clean and flush the valve body. Flush the lines before the new cartridge goes in — sediment destroys new cartridge seals on first use. Grease the O-rings with plumber’s silicone grease only, never petroleum.
- Install the new cartridge in the correct orientation. Re-seat the clip fully. A clip not seated can be pushed out by water pressure.
- Reassemble, turn the water on slowly, and check for leaks. Then set the temperature limit stop to a maximum of 120°F, verified with a thermometer.
Time for the swap: 30 to 60 minutes for a straightforward cartridge, 1 to 3 hours working time with a stuck one.
That is the short version of the swap. The deep version, with the stuck-cartridge fixes brand by brand, is the next article in this cluster.
How to Fix a Leaking Shower Faucet: the full cartridge swap, step by step, with the stuck-cartridge fixes.
What the full valve job involves (pro only)
A full valve-body replacement is not a DIY tutorial in this guide. It needs a permit in many US jurisdictions, concealed connections inside the wall, and anti-scald code compliance. That clears the permit line, so this section describes what the pro does — so you can hire it, price it, and verify it.
| Jurisdiction | Permit for a valve-body replacement? |
|---|---|
| Houston, TX | Yes — altering water supply lines; licensed pro or registered contractor |
| Detroit, MI | Yes — licensed contractor applies; inspection plus Certificate of Acceptance |
| Dallas, TX | Yes — modifying pipes behind walls; fees from ~$100 |
| Baltimore, MD | Yes |
| Chicago, IL | Yes — ~$150; licensed and insured contractor |
| Kansas City, MO | No, for a simple replacement with no piping changes; permit $30–$300 if complex |
| Renton, WA | Yes — a valve replaced or moved is listed; concealed pipe replacement counts as new work |
| Angi national | Permit required in many states and counties; often a faucet permit, typically $10–$25 |
There is no national rule. Five of six city sources above say yes, and the one no is explicitly limited to replacements with no piping changes. Call your building department before anyone cuts. Budget the permit: $10–$25 for a simple faucet permit, around $100–$150 in big cities. Inspection normally happens before the wall is closed — rough-in, then inspect, then close, then tile.
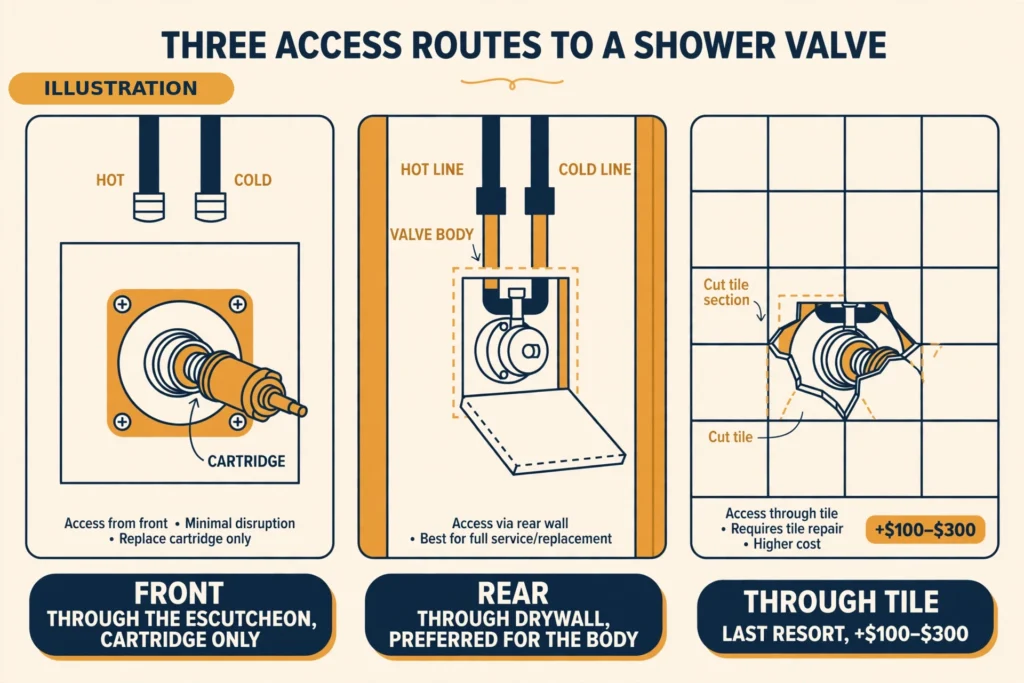
Access, easiest first. For a cartridge, through the escutcheon only. For the body, the preferred professional method is through the drywall on the back side of the shower wall. The patch is plain drywall, and the waterproofing on the shower side stays untouched. Where one exists, an existing access panel works too. Through the tile is a last resort, where a larger remodel plate can cover the enlarged hole so tile need not be replaced.
What the pro does: cut an access opening and the supply drops close to the valve. Back the body screws out of the blocking. Flush the lines for 15 seconds through the open pipe ends before the new valve goes in. Mount the new body plumb on solid blocking at the correct rough-in depth. Connect the supplies for the pipe type and install the cartridge.
Test before closing the wall — run the tub spout 15 seconds, the shower 15 seconds, then hold pressure with no leaks for at least 30 minutes. Then the limit stop is set to 120°F and the wall is closed.
Rough-in dimensions, Moen’s representative figures: valve centerline 32 in. above the tub floor for a tub and shower, 45 to 48 in. above the shower floor for a shower only, shower arm 78 in. Hot supply goes left, cold goes right. That is UPC 417.5 and manufacturer standard.
If the work opens the wall from the back, the patch is a drywall repair.
Drywall Repair: The Complete Homeowner’s Guide
One more connection note. Push-fit fittings are the one solderless option that can make front-access body work possible. The manufacturer listing approves them behind walls, but a listing is not the same as local approval. The local authority having jurisdiction decides. Best practice for a permanently sealed joint is still soldered or crimped.
What does it cost to replace a shower valve?
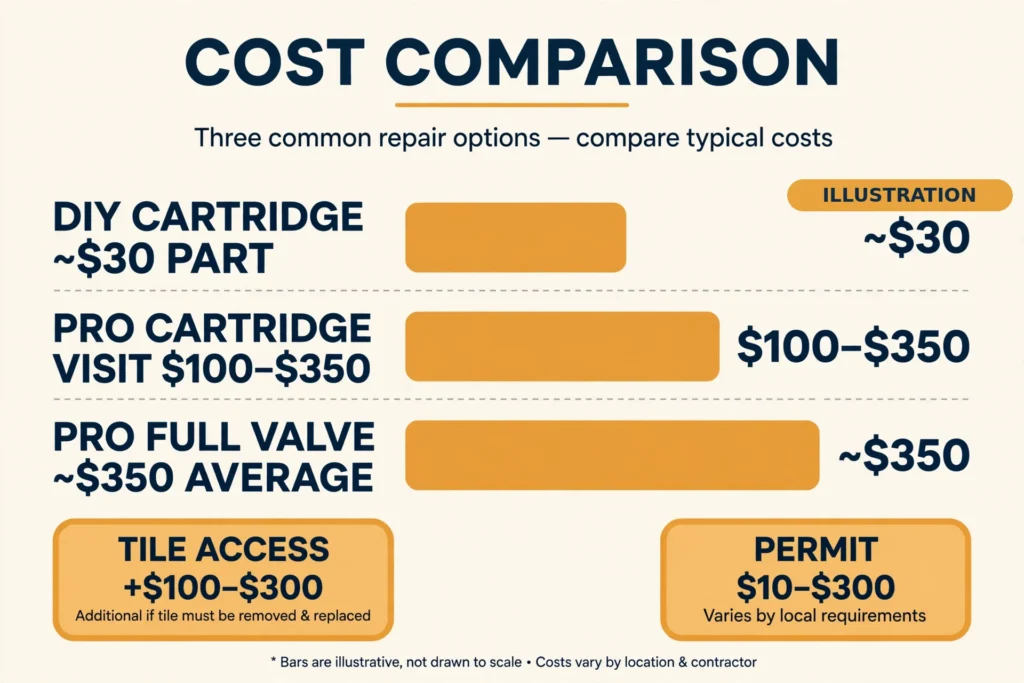
Cartridge swap (2026, US):
| Job | Cost |
|---|---|
| DIY, part only | $15–$60; Moen 1222 typically $25–$35 |
| DIY, with basic tools | $40–$120 |
| Pro cartridge swap (HomeGuide) | $100–$350 |
| Pro cartridge swap (Angi, via The Pricer) | $100–$400, average ~$275 |
| Pro cartridge swap (Western Rooter) | $150–$350 |
Full valve-body replacement, pro (2026, US):
| Source | Cost |
|---|---|
| Angi | $150–$550, average $350 |
| HomeGuide | $225–$575 |
| Fixr | $200–$650 |
| Western Rooter | $400–$900+ |
| CostToRenovate | $350–$800, average $550 |
One conflict, stated plainly: the pro full-valve range runs $150–$550 on Angi, $225–$575 on HomeGuide, $200–$650 on Fixr, and $400–$900+ on Western Rooter. The spread is access and scope, not disagreement about the same job. A front-accessible swap sits at the low end. Through-tile, thermostatic, or wall-restoration work sits at the high end. Difficult jobs run to about $900 and beyond.
Other costs:
| Item | Cost |
|---|---|
| Plumber labor alone | $45–$150 per hour (HomeGuide, Fixr); $45–$200 per hour (Angi) |
| Simple valve repair, clean and reseal (Fixr) | $75–$250 |
| Tile access adder | $100–$300 to cut through tile |
| Permit | $10–$25 simple faucet permit; ~$100 Dallas; ~$150 Chicago; $30–$300 range |
DIY parts for a full valve run $50–$100 on Modernize and Bob Vila, against $50–$250 on Angi’s how-to — Angi includes fittings, adaptors, and drywall patch. Thermostatic valve parts alone run $200–$350 on CostToRenovate against $25–$200 on Angi’s valve-type table. Angi’s table is parts-only for the valve unit; CostToRenovate is the installed upgrade. Do not mix them.
The minimum-visit pattern holds here too. A cartridge costs $15–$60 in parts, but a pro cartridge visit runs $100–$350. You are paying for the visit, the diagnosis, and the stuck-cartridge risk, not the part.
Lifespan, for the cost logic: a good brass valve lasts about 20 years; lower-quality plastic lasts 4 to 5 years. Cartridge-style valves last 5 to 15 years; ceramic disc lasts 10 to 25 years. Hard water can halve the lifespan. Consider proactive replacement after about 15 years.
Don’t do this
- Don’t force a stuck cartridge. It can crack the body and turn a roughly $30 fix into a $600+ valve replacement. Twist first, then use a puller.
- Don’t pry with a screwdriver or drill a stuck cartridge out. Both damage the body. Penetrating oil and a puller tool instead.
- Don’t install shutoffs on the valve outlets. It defeats the balancing and can create cross-flow.
- Don’t skip the limit stop. Set it to a maximum of 120°F and verify it with a thermometer. A stop left too high is a scald risk.
- Don’t close the wall without the pressure test. Run the water and hold pressure for at least 30 minutes first. A hidden joint leaks inside the wall for months before it shows.
- Don’t use petroleum grease on O-rings. Plumber’s silicone grease only. Petroleum swells the seals.
- Don’t replace a two-handle mixing valve like-for-like. It has no anti-scald protection and does not meet current code. Upgrade to a pressure-balancing or thermostatic valve.
Call a pro when
The valve body itself is cracked, corroded, or leaking. The solder joints or threaded inlets are damaged or leaking. Parts are discontinued and the brand or series is unknown. You are upgrading the valve type.
The job is a remodel or relocation. The temperature still swings after a new cartridge. There is no rear access and tile must be cut. Or a permit and inspection are needed — which, in most places, they are for a body replacement.
One homeowner asked the question that drives this whole article:
“Can I change the shower valve without taking out the tiles?”
Usually, yes — for a cartridge, through the front, with no tile touched at all. For a whole valve body, the pro goes in from the back, or covers the opening with a remodel plate. The tile stays put either way, unless the body is reached through the shower side as a last resort.
The short version
Diagnose first — cartridge or whole valve. Most problems end at the cartridge: shut the water off, pull the trim, twist and swap the cartridge, set the limit stop to 120°F. Only the body itself needs a plumber: permit, rear access, pressure test before the wall closes. The cartridge is the cheap fix. The body is the pro job.
FAQ
Can I replace a shower valve myself?
The cartridge, yes — it swaps out from the front with basic tools in about an hour. The whole valve body, no — that is wall work, a permit, and concealed connections, and it belongs to a licensed plumber in most places.
Do I need a plumber to replace a shower valve?
It depends which part. A cartridge swap is a do-it-yourself repair if you can shut the water off and follow the steps. A full valve-body replacement needs a licensed plumber for the permit, the connections inside the wall, and the inspection before the wall closes.
How much should it cost to replace a shower valve?
A cartridge swap runs $40–$120 do-it-yourself, or $100–$350 from a pro. A full valve-body replacement runs $150–$550 on Angi, $225–$575 on HomeGuide, and up to $900 or more for through-tile or thermostatic work. Tile access adds $100–$300, and a permit adds $10–$150.
Can a shower valve be replaced without removing tile?
A cartridge, always — it comes out through the front, behind the trim plate. A whole valve body, usually — the pro cuts in from the drywall on the back side, or covers the opening with a larger remodel plate. Tile only comes out as a last resort.
What is the difference between a shower valve and a shower cartridge?
The valve is the brass body inside the wall that the pipes connect to. The cartridge is the replaceable part inside it that mixes hot and cold and shuts the water off. The cartridge wears out; the body usually outlasts it by years.
Can I replace a shower valve without cutting the wall?
The cartridge, yes — no wall is cut at all. The valve body, sometimes — if there is rear access from a closet or hallway, the pro opens drywall on the back side instead. Without rear access, the opening goes through the tile, or a remodel plate covers it.
Sources
- SharkBite — Can SharkBite Be Used Behind Walls? (updated Aug 26, 2026) — https://www.sharkbite.com/ca/en/resources/blog/service-and-repair/fitting-tips-guides/can-sharkbite-be-used-behind-walls
- EPA — Lead Renovation, Repair and Painting Program — https://www.epa.gov/lead/lead-renovation-repair-and-painting-program
- Symmons Temptrol installation guide — https://www.manualshelf.com/manual/symmons/262body/installation-guide-english/page-10.html
- This Old House — How to Replace a Shower Valve (updated Jun 2, 2026) — https://www.thisoldhouse.com/bathrooms/how-to-repair-a-shower-valve
- Angi — How Much Does a Shower Valve Replacement Cost? (updated Oct 13, 2026), including city permit rules for Houston, Detroit, Dallas, Baltimore, Chicago, and Kansas City — https://www.angi.com/articles/how-much-should-it-cost-replace-bathroom-tub-valve.htm
- Western Rooter — Shower Valve Replacement: Signs, Costs, DIY vs Pro (published Sep 4, 2026) — https://westernrooter.com/shower-valve-replacement-guide/
Last verified: November 2026.