How to Replace a Shower Head
How to Replace a Shower Head
Quick answer
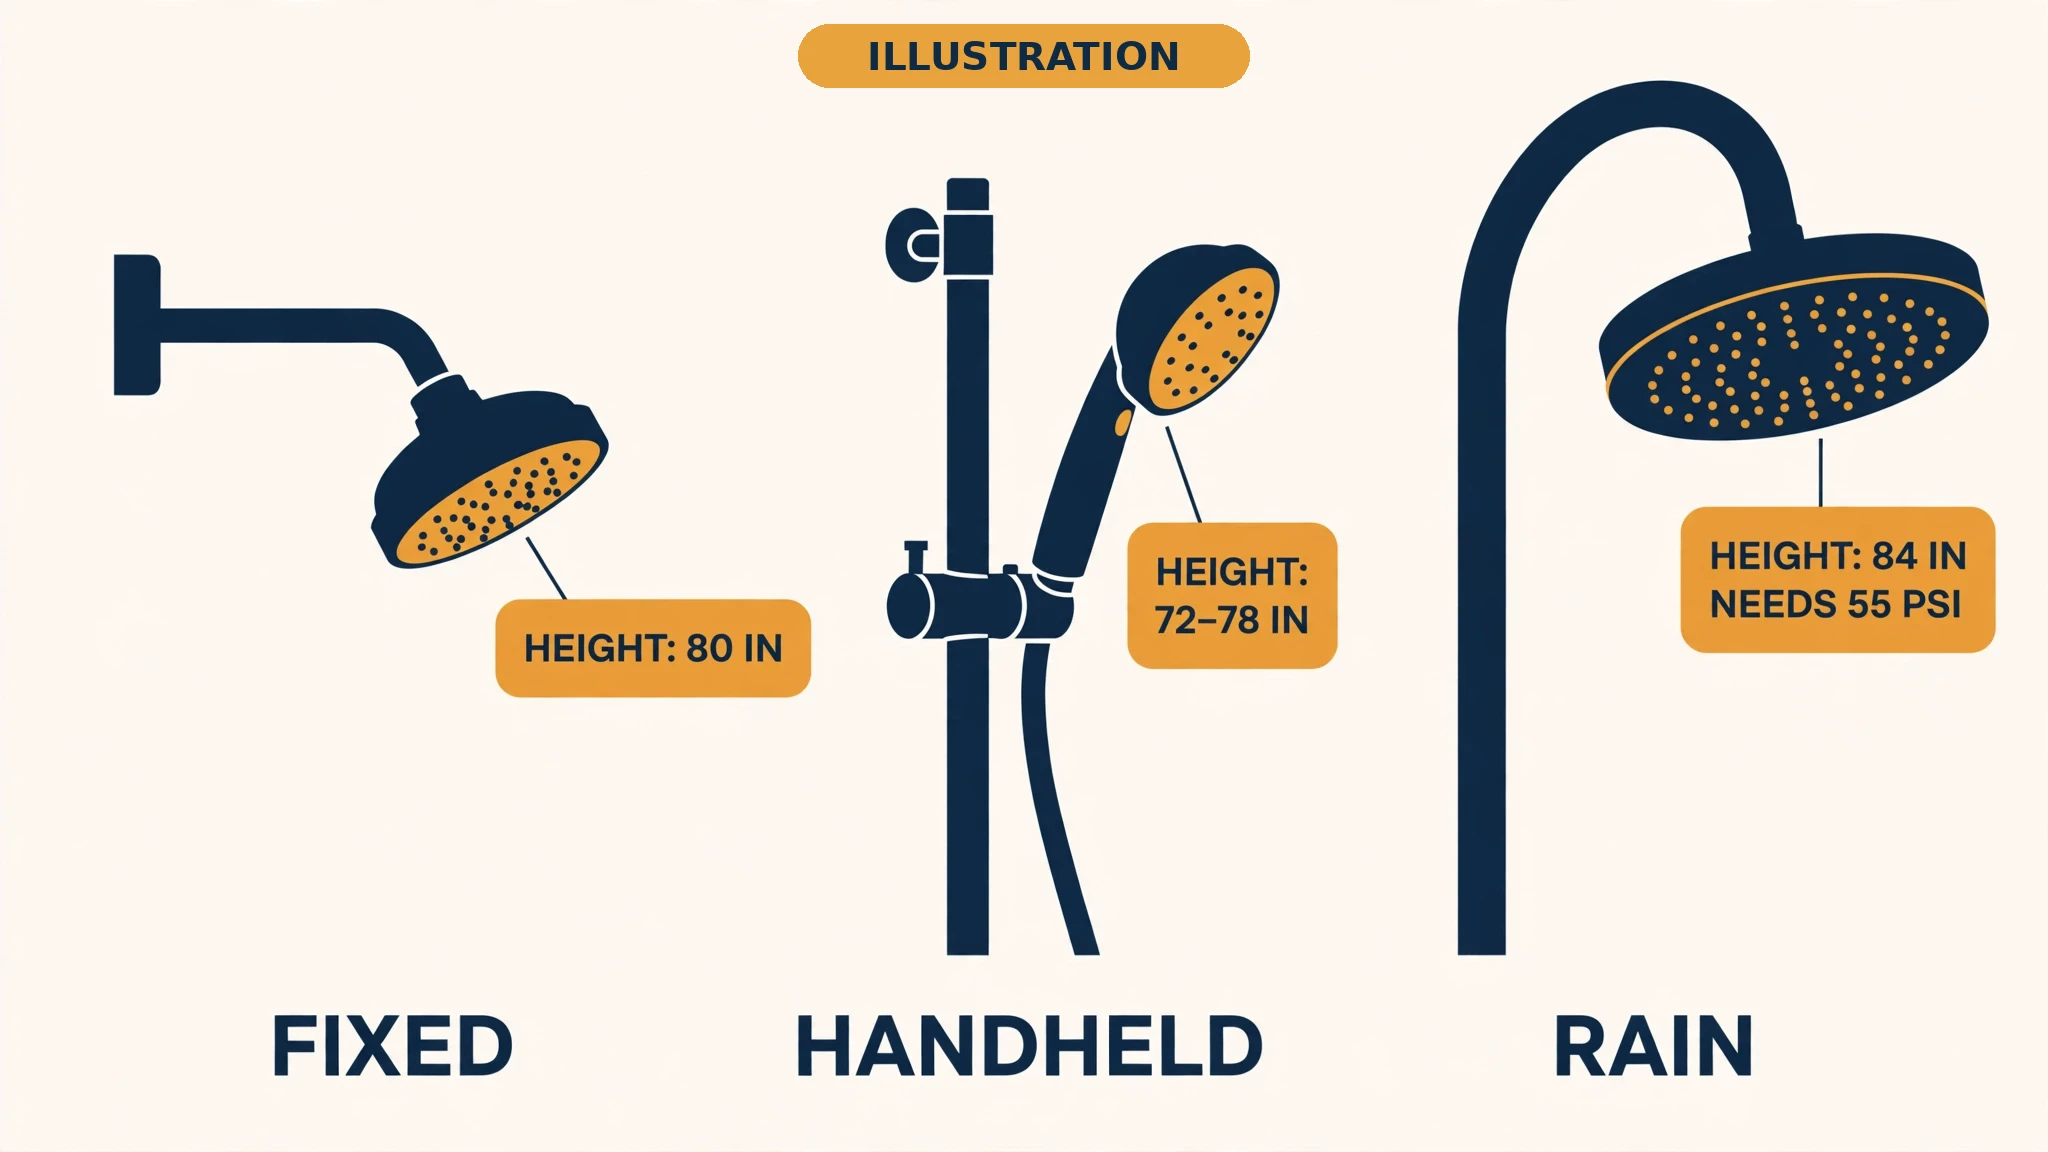
A new shower head is a 15-minute swap on a standard 1/2-inch fitting — if you pick the right one first. Match the head to your water pressure and your height, not just the price tag. A rain head needs 55 pounds of pressure and 84 inches of height, and a head too low for the tallest person is a mistake you will notice daily.
Which shower head should I buy?
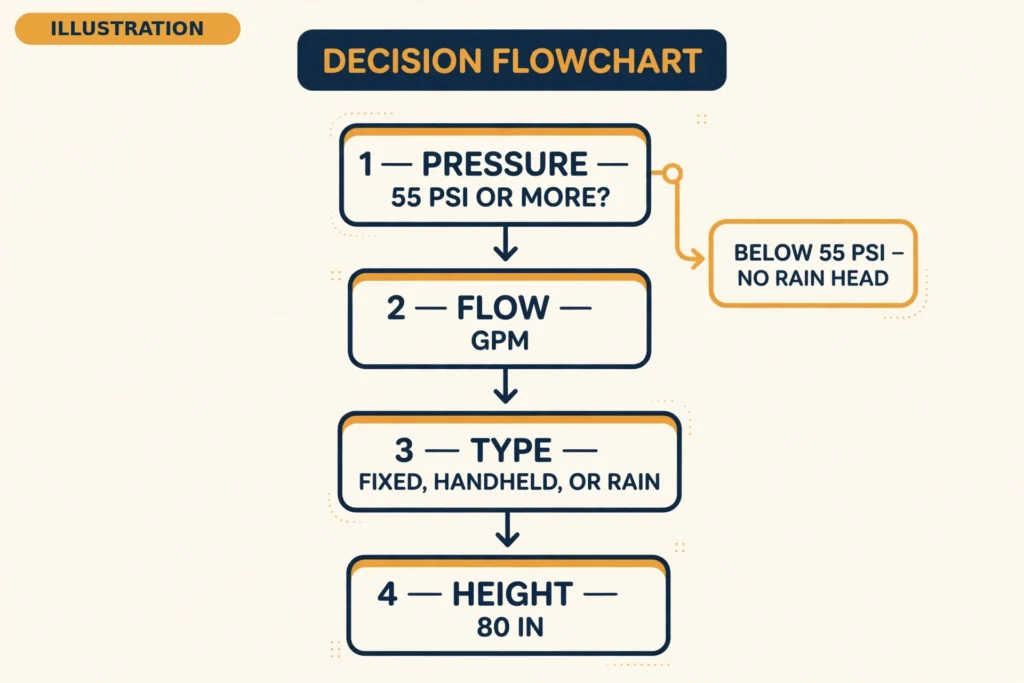
Buy in this order: pressure, then flow, then type, then height. A head cannot increase the pressure your home’s plumbing delivers. If the house pressure is low, the fix is in the pressure guide, not the head aisle.
Flow rate — the numbers that matter. The federal cap is 2.5 gallons per minute, measured at 80 psi. A WaterSense-labelled head uses 2.0 gallons per minute or less. It must still deliver at least 60% of its rated flow at a low 20 psi, and pass spray-force and coverage tests. That low-pressure test is the part no guide quotes to homeowners. A low-flow number alone does not prove certification. Check the actual label.
State caps, if you are buying in one of these places: California, Washington, and Hawaii cap new showerheads at 1.8 gallons per minute. Massachusetts, New Jersey, Maryland, New York City, and Colorado cap at 2.0.
The arithmetic that sells it: ten minutes at 1.8 gallons per minute uses 18 gallons. Ten minutes at 2.5 uses 25.
| Type | Best for | Watch out for | Typical price (2026, US) |
|---|---|---|---|
| Fixed (wall-mount) | Everyday use; cheapest, simplest, fewest parts to break | Fixed height; one spray, unless multifunction | $5–$50 |
| Handheld | Rinsing kids or pets, cleaning the shower, seated use, low tubs | Hose and mount; can droop if the mount is weak | $30–$150 |
| Rain | Overhead drenching feel | Needs at least 55 psi; needs height (84 in.) and a long arm (12–18 in.); a wide face can spray outside a small stall | Varies; premium |
| Dual (fixed + handheld) | Best of both; households with mixed needs | Most expensive; needs a diverter; slide-bar or dual install runs ~$250 pro | $100–$1,000 |
| Low-flow / WaterSense | Water and bill saving | Must carry the WaterSense LABEL, not just a low gpm number; a rain-style low-flow needs a model built for low flow, not a standard rain head with a restrictor added | $50–$100 most; basic under $20; luxury over $1,000 |
| Slide bar (handheld on a rail) | Varying heights, families, aging in place | Mounting the bar is a bigger job than a head swap | $60–$300 |
Before you buy, check your pressure. Rain heads need at least 55 psi to perform well. Run the test before buying a rain head, not after it is on the wall. A typical home runs 40 to 60 psi.
Do not remove the flow restrictor to chase pressure. Keep the product in its approved configuration. Removing or altering flow-control components can change its performance and compliance, and may affect warranty coverage. The pressure guide owns the restrictor question.
[LINK → How to Fix Low Water Pressure in a Shower: the full diagnosis, from the showerhead to the supply.]
Fix it first? If the old head only drips or sprays unevenly, the fix guide may save the purchase. A washer job is $2–$15 in parts and 15 minutes. A new head is $15–$50 before tools. This article starts at “you’ve decided to replace it.”
How to Fix a Leaking Shower Head
How high should a shower head be?
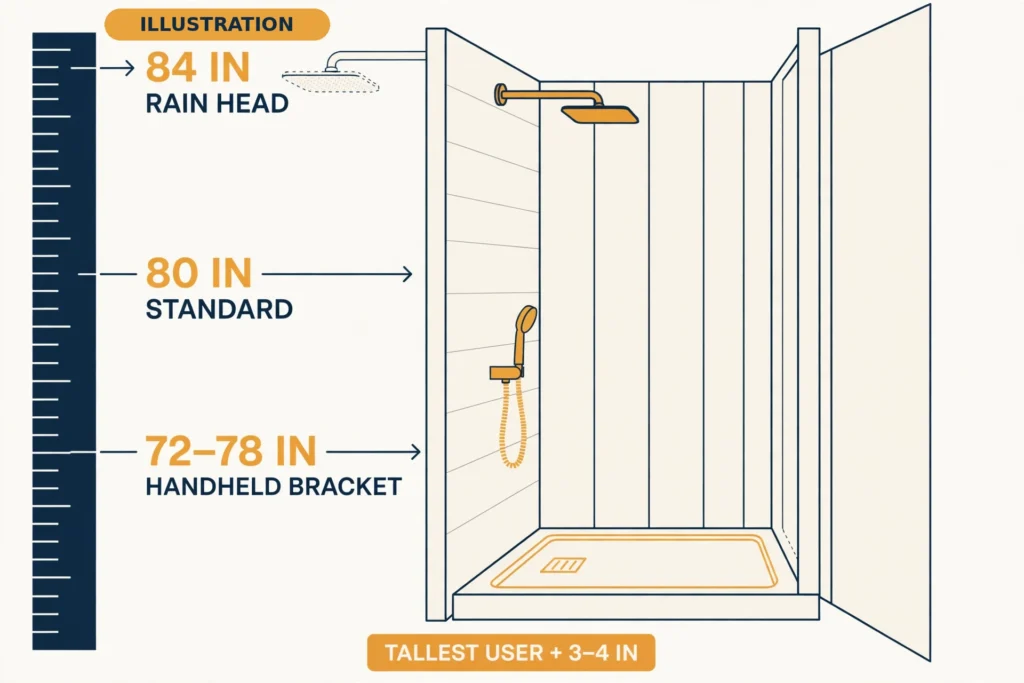
The standard rough-in height for a fixed shower head is 80 inches (6 ft 8 in.) above the finished shower floor — the industry rough-in that clears most adults. There is no strict building code dictating the exact spot. Moen’s rough-in sheet puts the shower arm at 78 inches. The arm’s upward curve adds the last inches.
Add 3 to 4 inches above the tallest regular user. Shorter users (under about 5 ft 7 in.) often prefer 76 to 78 inches.
- Fixed head: 80 inches standard.
- Rain head: about 84 inches, roughly 10 to 12 inches above the tallest user’s head.
- Handheld bracket: 72 to 78 inches. A slide bar adjusts to every user.
- ADA: controls and spray unit 38–48 in. above the floor; handheld hose at least 59 in. long.
One homeowner put the too-low problem plainly:
“You have to duck down to wash or rinse your hair every time.”
Do I need to replace the shower arm too?
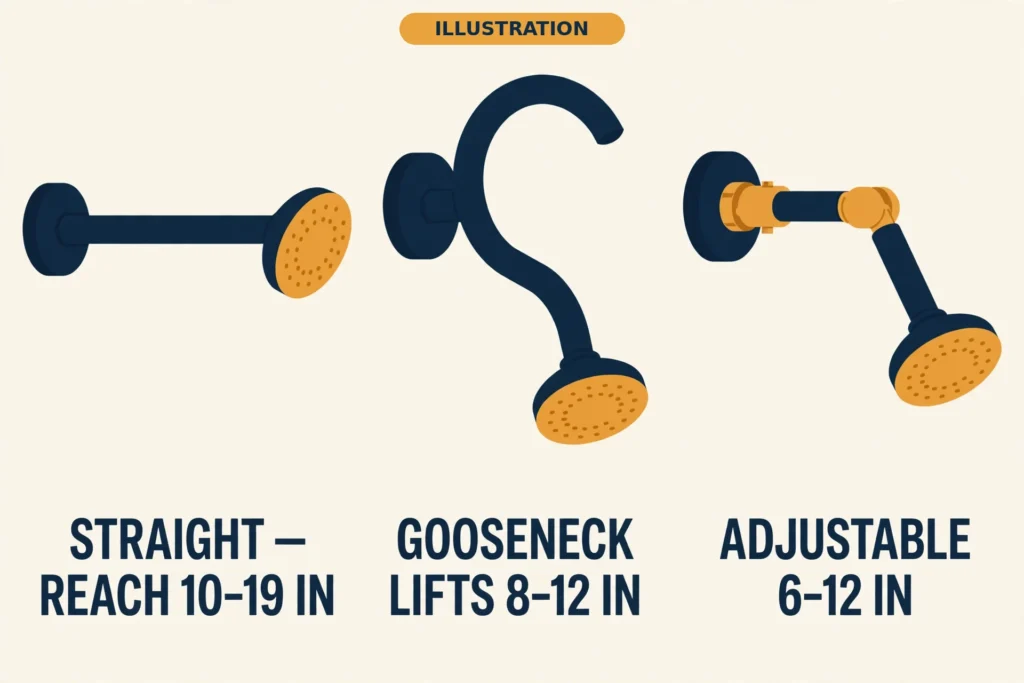
Only when the arm is the problem. Use the table.
| Situation | Fix |
|---|---|
| Head too low, wall outlet height fixed | S-shaped or gooseneck arm (lifts 8–12 in.) or adjustable arm (6–12 in.; high-quality brass up to 17 in. vertical) |
| Head too close to the wall | Longer straight arm (10–19 in. reach) |
| Head too high | Straight arm (drops the head) or lower an adjustable arm |
| Arm corroded, threads damaged, finish shot | Replace the arm like-for-like (same 1/2-in. NPT, same length, same finish) |
| Arm wiggles or spins in the wall | Stop — the drop-ear elbow is loose inside the wall; pro |
| Want a rain head overhead | 12–18 in. arm, or a ceiling arm — pro job if new pipe work is needed |
| Different heights in one household | Adjustable arm, or a slide-bar handheld |
Buy the arm in the same finish as the head if the arm is being replaced. A mismatched arm is the most visible tell of a swap.
A master plumber put the loose-fitting warning this way:
“Be careful if the original installer left it loose inside the wall, as it could move, and you’ll have to get it standing back up and straight.”
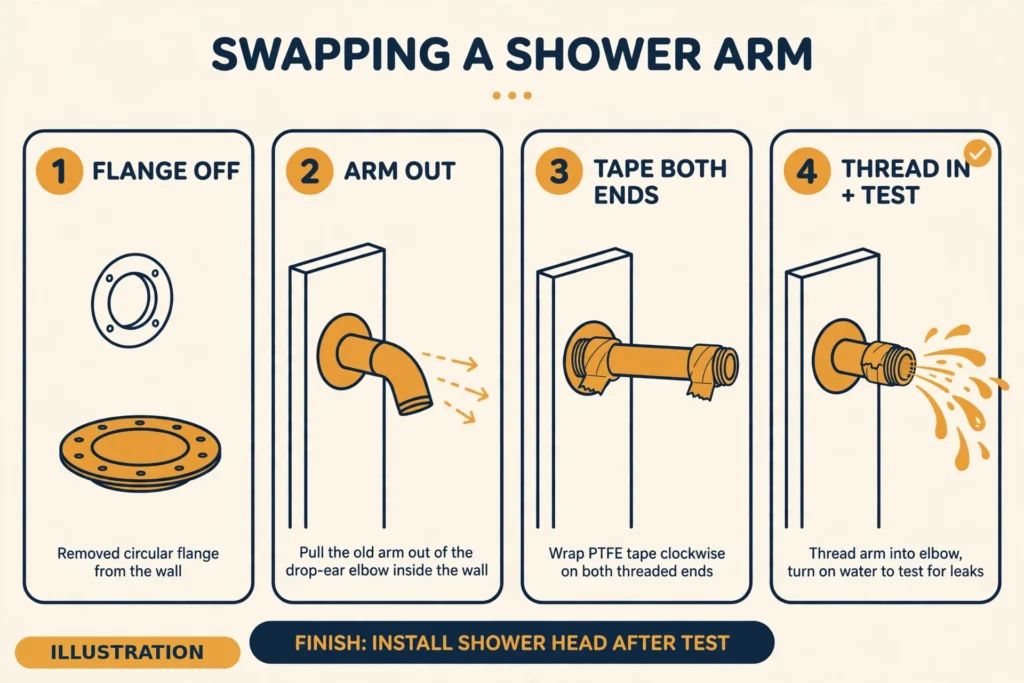
The swap, step by step
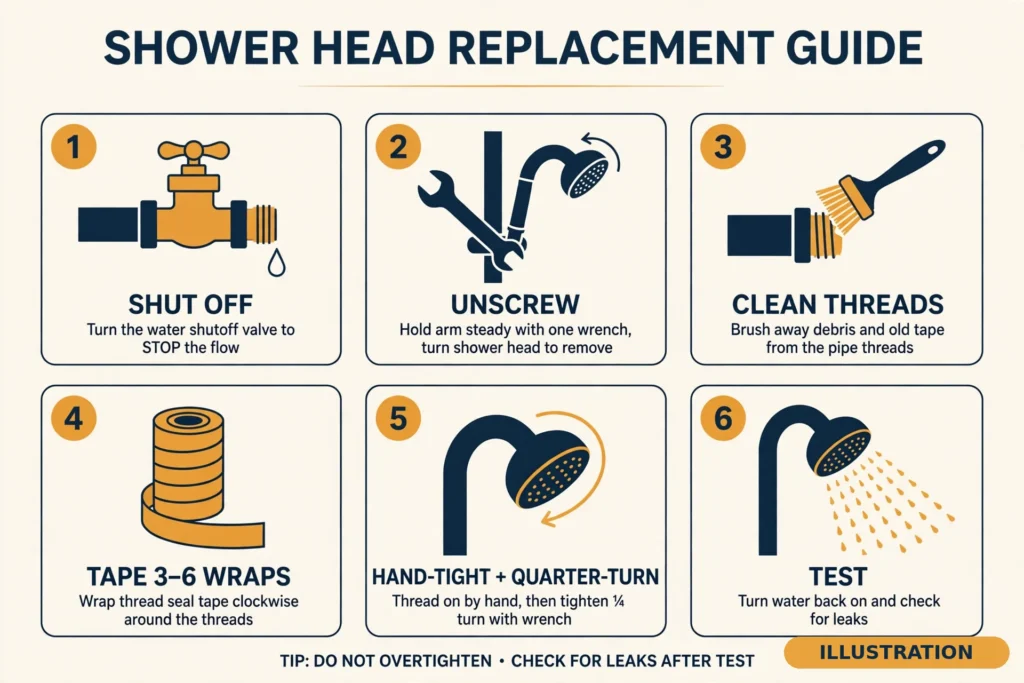
Tools: adjustable wrench, soft cloth or rag, PTFE (Teflon) thread tape, old toothbrush, small bucket, towel. Optional: strap wrench, pliers or channel locks, white vinegar, penetrating oil.
Materials: the new shower head; new washer or gasket if not included with the head; new shower arm and flange if the arm is being replaced (same 1/2-in. NPT, same finish).
The head swap (10–15 minutes)
- Shut the water off. Fixture stop if present, else the house main. Open the handle and confirm zero flow.
- Decide fix or replace first. If the old head only drips or sprays unevenly, the fix guide may save the purchase. See the link above. This article starts at “you’ve decided to replace it.”
- Remove the old head. Try by hand first — counterclockwise. If it will not move, wrap the connection nut in a cloth and use the adjustable wrench. Hold the arm with a second wrench while you turn the head. Twisting the arm can loosen the fitting inside the wall — the same failure as the homeowner who broke corroded threads off inside the wall fitting in the fix guide.
A plumber’s voice, quoted in Roto-Rooter:
“Remove your old showerhead with a wrench while holding onto the shower arm so it doesn’t get twisted and break off at the wall.”
- Stuck head ladder — work down it, stop at the step that works. Cloth-protected wrench first. Then a vinegar bag soak around the joint, several hours or overnight. Then penetrating oil, let it sit. Then a strap wrench or pipe wrench. Then remove the whole arm and replace it. Do not force it. Forcing can snap the arm or strip the threads inside the wall. Keep any oil off the washer and gasket — no maker page suggests penetrating oil, and petroleum reacts with rubber seals.
- Clean the arm threads. Old tape and grit off with the toothbrush. Check the washer inside the old head’s coupling nut. If it is stuck on the arm, remove it. The new head brings its own.
- Tape the arm threads — clockwise, 3 to 6 wraps. The sources disagree on the count, so the honest range is 3 to 6, same as the fix guide. This Old House says 3 to 4, Angi says 3, EngineerFix says 2 to 4, SensibleDigs says 2 to 3, one small guide says 6 to 8. Start at the second thread. Do not cover the first thread heavily. Do not use pipe joint compound on the head connection. It ends up inside the head and the screen.
- Install the new head. Hand-tight, clockwise, until snug — then a quarter-turn to a half-turn with the cloth-protected wrench. Do not overtighten. It cracks plastic connector nuts, strips threads, and damages the washer.
- Test for leaks. Turn the water on, check the joint dry, run the shower, turn it off. A drip at the joint means one more quarter-turn, or re-tape. A drip from the spray face for a minute or two after shutoff is normal drain-down, not a leak.
Time: 10 to 15 minutes for a head-only swap, under 30 minutes on one guide, under an hour on another. Skill: beginner. No plumbing experience needed.
The arm swap (add about 15 minutes — only when the arm must change)
Do this when the arm is corroded, too short or low, the wrong finish, or the threads are damaged. Or when the height table above says the head needs height or reach the old arm cannot give.
- Remove the head (steps 1 to 4 above).
- Slide the flange or escutcheon away from the wall. Cut any caulk around its edge with a utility knife first.
- Unscrew the old arm — counterclockwise, gripping near the wall. If it is stuck, insert a screwdriver or pliers handle into the open end as a lever. Turn only — no side load on the internal fitting. Penetrating oil 10 to 15 minutes for seized threads. If the arm wiggles or the fitting moves inside the wall, stop. Pro.
- Clean the drop-ear elbow threads inside the wall. Brush out old tape and sealant.
- Tape both ends of the new arm. Wall end: 3 to 4 wraps clockwise. Head end: same as step 6 above. Slide the new flange onto the arm BEFORE threading it into the wall. Some plumbers add a thin layer of pipe dope over the tape on the wall end for a dual-layer seal. That is wall-end practice only. Never pipe dope on the head connection.
- Thread the new arm in by hand, clockwise, until snug — then a final half-turn with the cloth-protected wrench. The longer side of the arm goes into the wall. Align the arm’s angle before the final turn. Once it is tight, do not back it off to adjust the angle. That breaks the seal.
- Test the arm BEFORE the head and flange go on. Turn the water on briefly and check the wall connection dry. Then slide the flange flush, caulk its edge, and install the head (steps 6 to 8 above).
What does it cost to replace a shower head?
The head (2026, US):
| Item | Cost |
|---|---|
| Basic fixed head | $15–$50 |
| Single-spray head | $5–$50 |
| High-end head | Up to $300 |
| Handheld head | $30–$150 |
| Dual head (fixed + handheld) | $100–$1,000 |
| Slide-bar head | $60–$300 |
| Low-flow head, most | $50–$100; basic under $20; luxury over $1,000 |
The job (2026, US):
| Item | Cost |
|---|---|
| Full DIY swap, including tools | ~$75 |
| Pro install of a new head | $75–$150 |
| Plumber labor, head install | $50–$100 + head |
| Pro labor + materials | $80–$220 |
| Full replacement project, head + install | $75–$700 total, national average $260 |
| Slide-bar or dual install, plumber | ~$250 |
One conflict, stated plainly: the national-average project cost conflicts across Angi’s own pages. The cost-to-replace page says $260, with most spending $100–$450. The unclog page says about $330, range $100–$450. The spread is scope. The unclog page’s figure is replacement when cleaning has failed, which skews toward pro visits and harder jobs. The draft quotes $260 as the project average and names the $330 figure as the harder-job average.
One modeled estimate puts installing a shower head at $175–$451 nationally. That is a model, not observed prices — flag it, do not quote it as a price.
Fix first, for the cost logic: a washer job is $2–$15 in parts and 15 minutes. A washer kit is $5–$15 and a DIY repair $5–$40. The point: try the $2 washer before buying the $50 head. A basic head is $15–$50 and the whole DIY swap is about $75 including tools.
Lifespan, for the cost logic: showerheads last 6 months to 15 years depending on type and care. Replace on low pressure, leaks, rust, mineral deposits, sediment buildup, or black mold.
No permit is needed for this swap. Replacing a head, or an arm threaded into the existing drop-ear fitting, changes no piping and opens no wall. That is below the permit threshold — like the fix guide, and unlike the hub’s full valve-body replacement, which needs a permit in most places. If the job escalates to opening the wall, it stops being DIY, and the permit question becomes the pro’s.
When it is not a head swap
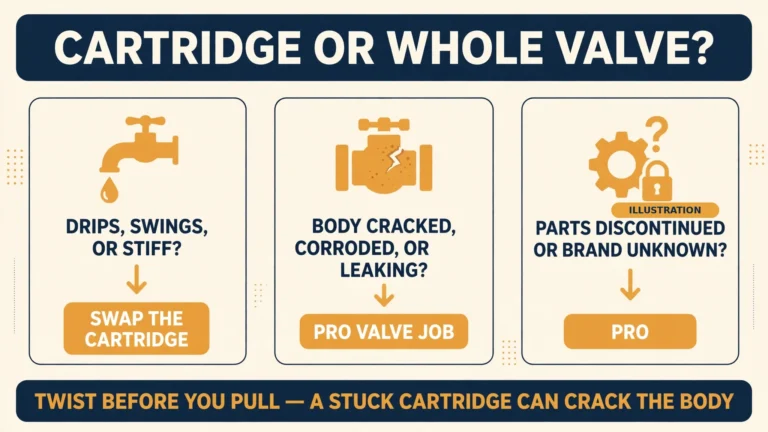
- Drip continues with the valve off after a new head and tape → valve or cartridge. Hub and spoke 1, linked below. One pointer, then stop — no cartridge steps here.
Shower Valve Replacement: The Complete Homeowner’s Guide
- Water from the tub spout while the shower runs → diverter, not the head.
- Low pressure or weak flow after a new head → the low-pressure spoke. A new head cannot raise house pressure. If the old head was clogged, cleaning it may have been the cheaper fix.
- Arm wiggles in the wall, water from the escutcheon, threads stripped, heavy corrosion → pro.
- Ceiling-mount rain head needing new pipe work → pro.
- Wall outlet too low for any arm to fix → moving the in-wall plumbing is pro work. An S-arm or adjustable arm is the DIY ceiling for height.
Don’t do this
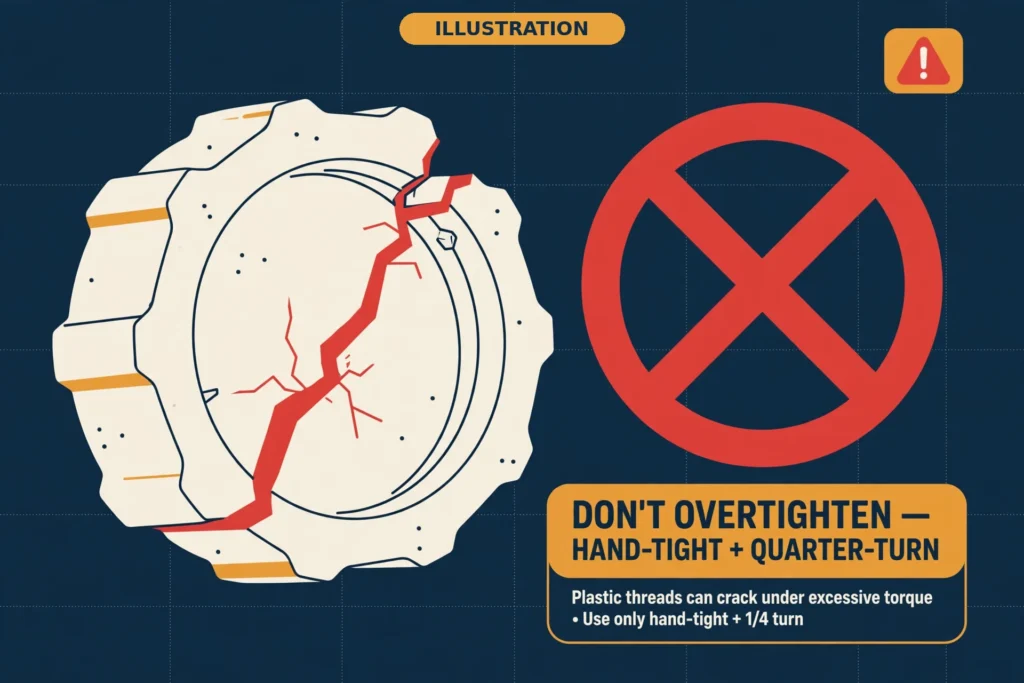
- Don’t overtighten the head. It cracks plastic connector nuts, strips threads, and damages the washer inside. Hand-tight plus a quarter- to half-turn is the finish. A slight weep gets one more quarter-turn, not a full turn.
- Don’t twist the arm while turning the head. Two-wrench rule, every time. Twisting the arm can loosen the fitting inside the wall.
- Don’t use pipe joint compound on the head connection. It ends up inside the head and the screen. Pipe dope over tape is wall-end arm practice only.
- Don’t force a stuck head or a corroded arm. Vinegar soak first, then a strap wrench. Forcing snaps the arm or strips the threads inside the wall.
- Don’t back off a tight arm to adjust its angle. That breaks the seal. Re-tape and redo it.
- Don’t buy a rain head before checking your pressure. A rain head needs at least 55 psi. Check first.
- Don’t remove the flow restrictor to chase pressure. It voids the WaterSense configuration and the warranty. The pressure guide owns that question.
Call a pro when
Water comes from the escutcheon or inside the wall. The arm is loose or spins in the wall. Threads are stripped or heavily corroded.
A part will not come out without force. The drip continues after a new head and tape — that is the valve. The wall outlet is too low for any arm to fix. A ceiling-mount rain head needs new pipe work.
The short version
Pick the head for your pressure first: rain heads need 55 psi, WaterSense heads use 2.0 gallons a minute or less, and a head cannot raise house pressure. Get the height right — 80 inches standard, 84 for rain, and 3 to 4 inches above the tallest user. Shut the water off, hold the arm with a second wrench, unscrew the old head, tape 3 to 6 wraps clockwise, hand-tight plus a quarter-turn. Swap the arm too only if it is corroded, too short, or the wrong finish. The whole job is a $15–$50 head and 15 minutes — unless the arm wiggles in the wall, and then it is a plumber.
FAQ
Can you just replace your shower head?
Yes. Nearly all US heads use a standard 1/2-inch NPT connection, so a new head screws onto the existing arm. Shut the water off, unscrew the old head by hand or with a cloth-protected wrench, tape the threads, and screw the new one on. Fifteen minutes, beginner level.
Do all shower heads fit any shower?
Nearly all US shower heads fit any US shower arm — the 1/2-inch NPT thread is the standard. Three things can break the fit. A head that needs more pressure than your house delivers. A rain head that needs more height than your arm gives. A head whose finish and style do not match the arm.
How much will a plumber charge to replace a shower head?
A pro install of a new head runs $75–$150, labor $50–$100 plus the head. A full replacement project averages $260 nationally. A slide-bar or dual install runs about $250. The DIY swap is about $75 including tools.
What is the lifespan of a shower head?
Six months to 15 years, depending on type and care. Replace it on low pressure, leaks, rust, mineral deposits, sediment buildup, or black mold. A head that only drips or sprays unevenly may not need replacing at all — the fix guide may save the purchase.
Do you have to turn the main water off to change a shower head?
Yes. Use the fixture stop if there is one, else the house main. Open the handle and confirm zero flow before the head comes off. Most showers have no accessible local shutoff.
Why is my shower head still running even though I’ve shut off the water?
The valve or cartridge is not sealing. It is not the head. The head only drips for a minute or two of drain-down after shutoff. A drip that keeps going is the valve. Read the hub and spoke 1.
Sources
- Angi — How to Change a Shower Head (updated Jul 9, 2026) — https://www.angi.com/articles/how-to-change-a-shower-head.htm
- SensibleDigs — Shower Head Height: Standard & Ideal Placement (updated 2026-09-26) — https://sensibledigs.com/shower-head-height/
- Angi — How to Choose the Best Showerhead (updated Aug 4, 2026) — https://www.angi.com/articles/how-pick-best-shower-head.htm
- EngineerFix — How to Replace a Shower Arm in 4 Easy Steps — https://engineerfix.com/how-to-replace-a-shower-arm-in-4-easy-steps/
- EPA WaterSense — Specification for Showerheads — https://19january2021snapshot.epa.gov/sites/static/files/2017-02/documents/ws-background-showerheads-draftspec.pdf
- Angi — 2026 Cost to Replace Shower Head (updated Oct 14, 2026) — https://www.angi.com/articles/cost-replace-shower-head.htm
Last verified: November 2026.