How to Fix a Leaking Shower Faucet
Quick answer
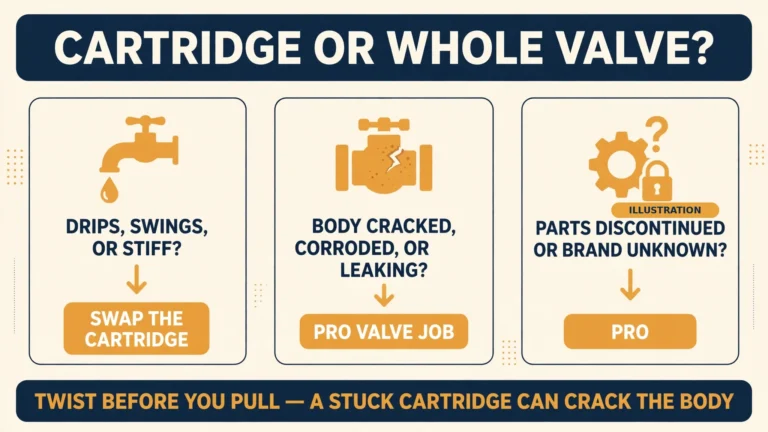
A shower that drips after shutoff is almost always the cartridge — the part inside the valve that shuts the water off. Match the part by brand before you buy: the wrong cartridge will not fit, and the right one swaps out from the front in under an hour. If the drip survives a new cartridge, the valve body itself is damaged — and that is a plumber’s job.
Is it the cartridge?
If you have not decided yet whether the problem is the cartridge or the whole valve body, start with the parent guide. It carries the decision ladder, the valve types, and the permit line for the body job.
Shower Valve Replacement: The Complete Homeowner’s Guide: the cartridge-vs-body decision, valve types, and when the body job needs a plumber.
Most drips are the cartridge. Use the table to confirm it before you buy anything.
| What you see | What it usually means | Fix |
|---|---|---|
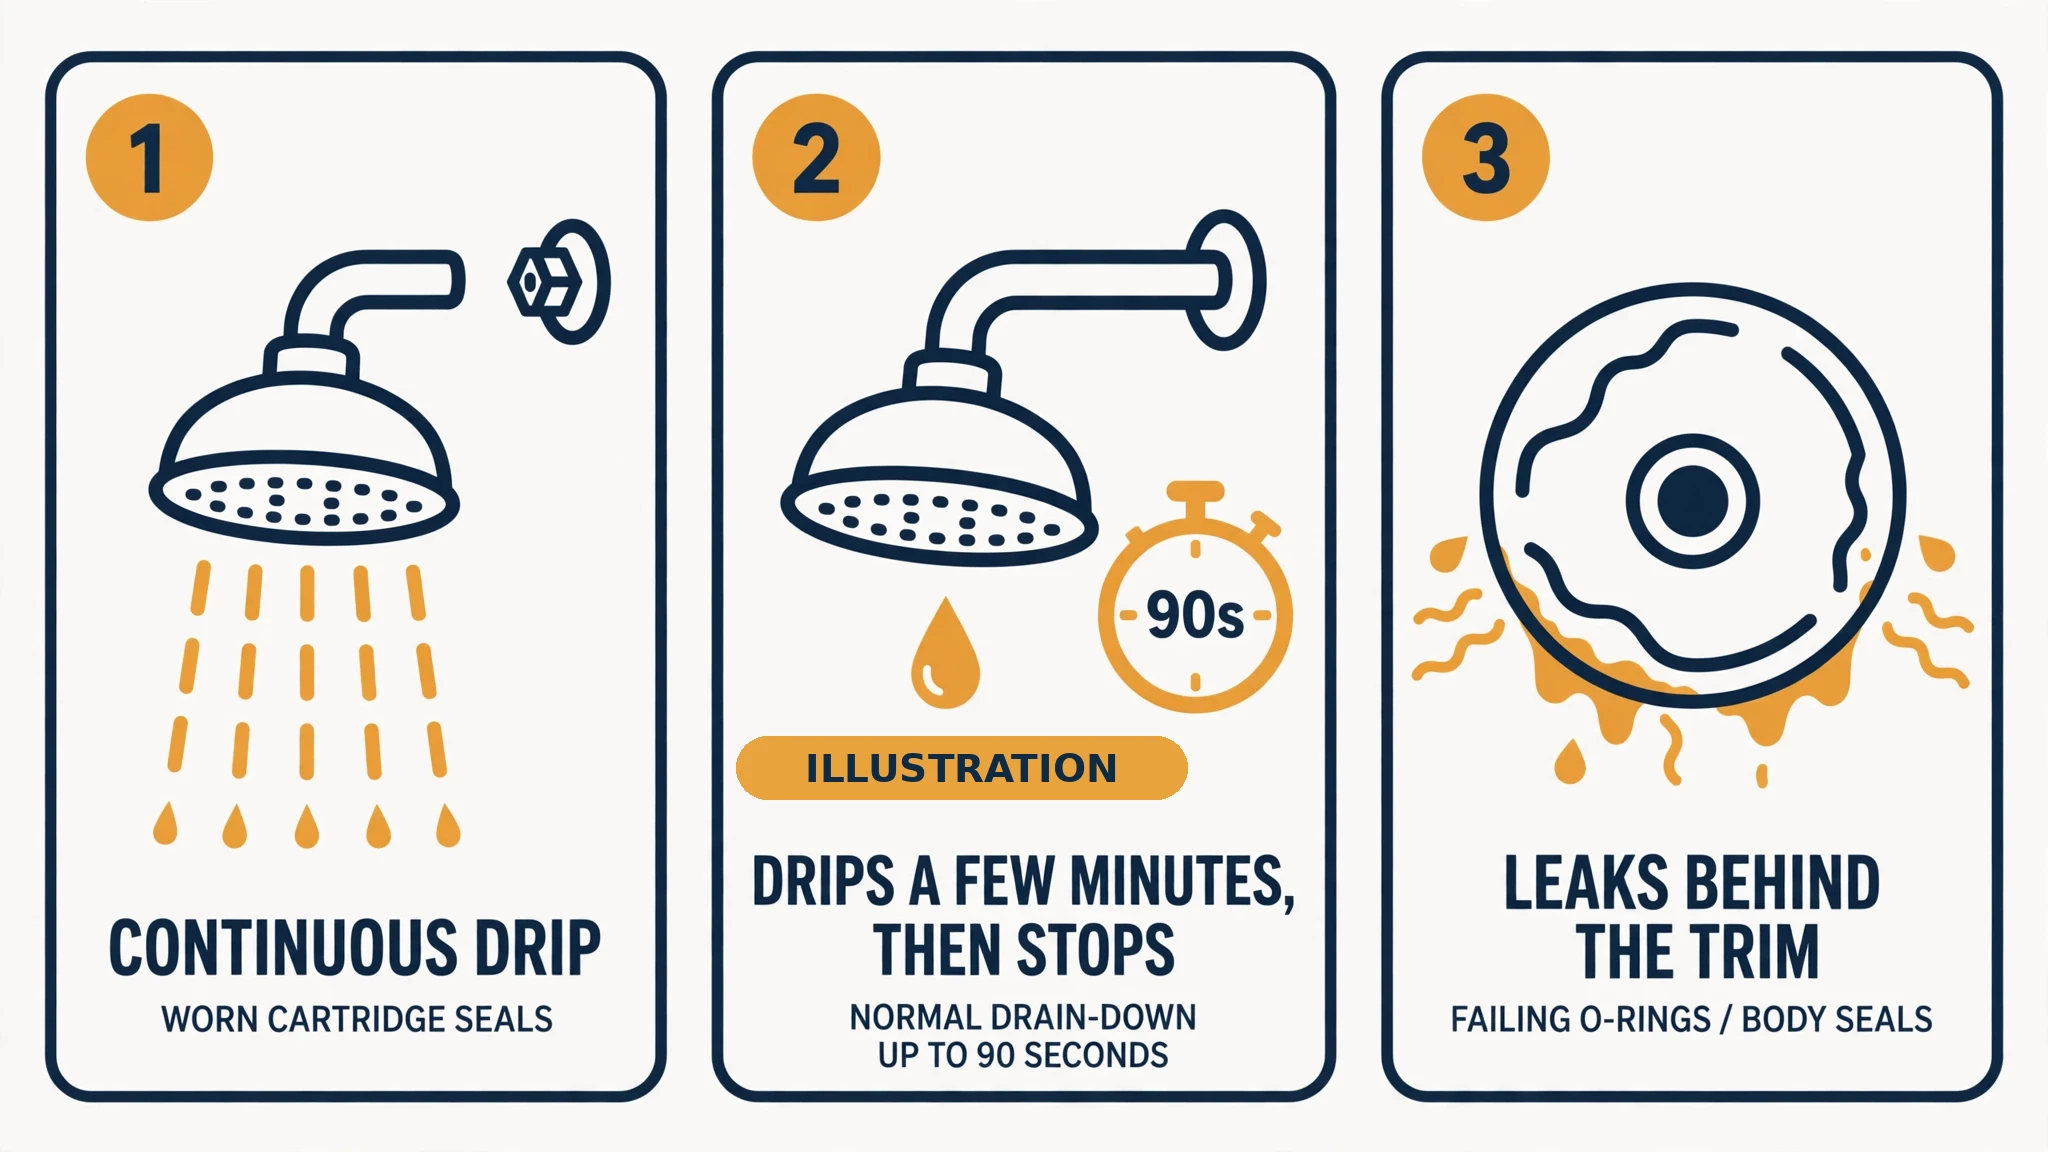
| Drips constantly from the showerhead or tub spout with the handle off | Worn cartridge seals or O-rings; seat not closing | Cartridge swap (single-handle) or stem washer (two-handle) |
| Drips for a few minutes after shutoff, then stops | Normal drain-down — the showerhead emptying its reservoir | No repair. Kohler: showerheads can drip up to 90 seconds after the valve is turned off. |
| Water leaks from behind the trim plate while running | Cartridge O-rings or body seals failing | Cartridge swap; grease the new O-rings |
| Water leaks from around the handle while running | O-ring on the cartridge or stem, or packing | Replace the O-rings, or the cartridge if they come with it |
| Handle stiff, loose, or spins without engaging | Mineral buildup seizing the cartridge; stem rounded; set screw loose | Cartridge swap; if the stem is stripped, new cartridge |
| Temperature swings when another fixture runs | Balancing spool stuck with scale or debris | Cartridge swap; if it still swings, body damage → pro |
| Drip continues after a NEW cartridge | Body or seat damage, wrong cartridge, or the seats and springs (Delta) | See the troubleshooting section below — do not buy a second cartridge first |
| Hot and cold reversed after a swap | Cartridge installed 180° off | Rotate the cartridge 180° |
Two-handle test: feel the dripping water. Warm means the hot side; cold after a long drip means the cold side. Replace the washers on both sides while you are in there. The other side is usually next.
A drip that continues with the valve off is the valve, not the head. The showerhead only drips when the valve lets water past it. If the head itself is the problem, the drip stops when the valve closes.
How to Fix a Leaking Shower Head: when the drip is the head, not the valve.
Why it wastes water: a faucet dripping once per second wastes more than 3,000 gallons a year, enough for more than 180 showers. That is the EPA WaterSense figure. A showerhead leaking at 10 drips a minute wastes more than 500 gallons a year. A smaller assumed drop size gives a lower number, but the leak is the same.
Which part do I buy?
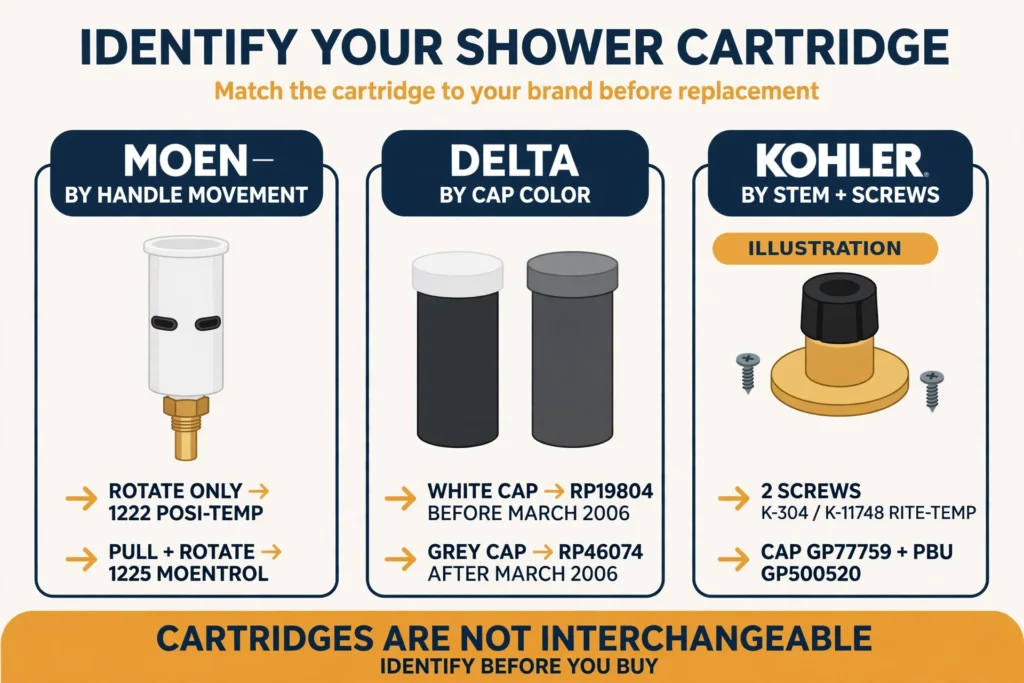
Cartridges are brand-proprietary and not interchangeable. Identify before you buy. Take the old part, or a photo of it, to a plumbing supply house.
Moen — go by how the handle moves
| Handle movement | Valve | Cartridge |
|---|---|---|
| Rotates only, no pull-out | Posi-Temp (pressure-balancing) | 1222 |
| Pulls out, then rotates | Moentrol | 1225 |
| Older standard single-handle | Standard | 1200 |
The 1222 fits Posi-Temp valves only. It does not fit Moentrol (1225) or standard (1200) valves. The 1222 vs 1222B is no functional difference — the B is bulk packaging of the same cartridge. The 1222 is identifiable by its white plastic shell, two black rubber oval seals on the sides, a brass piston stem, and an “HC” marking.
Delta — go by the cap color and the valve’s age
| What you see, trim off | Valve | Cartridge |
|---|---|---|
| White cap | Monitor 1300/1400 Series, made before March 2006 | RP19804 |
| Grey cap | MultiChoice 13/14 Series, made after March 2006 | RP46074 |
The two are not interchangeable. The RP19804 is 4-1/8 in. tall; the RP46074 is 4-7/16 in. tall — 5/16 in. apart. The RP19804 will not work in Delta 600 Series valves or with 17 Series trim.
The cheap fix first: on a Delta Monitor that drips when off, Delta’s own help page says to replace the seats and springs (RP4993) first. If the leak persists, replace the cartridge. The RP4993 kit is about $5–$15. Delta lists it at $8.08 online, $10.10 list. On 600 Series ball valves, worn seats and springs are the most commonly replaced parts.
Kohler — go by the stem, the cap, and the screw count, trim off
| What you see, trim off | Valve | Parts |
|---|---|---|
| Round brass stem, black plastic cap, 2 screws, no diverter button | K-304 Rite-Temp | Mixer cap GP77759 + pressure balancing unit GP500520, or kit GP76851/GP876851 |
| Same, with a diverter button | K-305 or K-11748 Rite-Temp with diverter | Same cap + PBU |
Kohler’s rule for what to replace: fixing a leak means replacing the mixer cap AND the pressure balancing unit together. Temperature swings only means the PBU alone. The K-305 was discontinued in June 2010, replaced by the K-11748. Kohler’s current number for the same PBU unit is GP800820, replacing GP500520.
Not covered here: K-8304 (4 screws), K-306 and K-2971 (6 screws), early brass-cap K-304, and square-stem Coralais valves. Their parts and steps differ. Take the old part to a supply house rather than guessing.
Pfister, one line: Pfister single-handle showers take their own cartridges, for example 974-074. Two-handle Pfister takes one cartridge per handle. Match by the old part, same rule as the big three.
Before you pay, make one phone call. Moen and Delta both offer lifetime warranties on many cartridges. Moen will ship a free replacement to the original purchaser — call 1-800-BUY-MOEN with the faucet model before buying.
Can I fix it myself?
A cartridge swap is a do-it-yourself repair if you can shut the water off and follow the steps. It takes 30 to 60 minutes straightforward, 1 to 3 hours with a stuck cartridge. A handyman can do it too. The job needs a plumber when the shutoff will not hold, the valve body turns in the wall, or water is coming from inside the wall. Or when the cartridge will not move after the clip is out, the twist steps, and a puller made for it.
How to tell if water is leaking behind the shower.
Staining or soft drywall on the wall behind or below the shower, a musty smell, or a water bill that climbs with no visible drip. A drip at the showerhead is not a behind-wall leak. A stain on the ceiling below the shower is. If you see staining, stop and call a plumber. That is wall work, not a cartridge swap.
Before you begin
Tools: Phillips and flathead screwdrivers, hex key set, needle-nose pliers, adjustable wrench or channel-lock pliers, utility knife, plumber’s silicone grease, thermometer, cloth or drain stopper, white vinegar, cartridge puller (brand-matched), towel.
Materials: the exact replacement cartridge for your valve; new O-rings if not included; for Delta, RP4993 seats and springs if the drip is seats-and-springs only; for Kohler, the GP876851 cap and PBU kit if fixing a leak.
Shut off the water first, and verify it. Use the fixture stops if present. Many Moen Posi-Temp and Delta MultiChoice valves have integral screwdriver stops behind the trim. Some Kohler K-304-K valves do not — close the main. Open the handle and confirm zero flow. If the shutoff will not hold, stop. That is a plumber’s job.
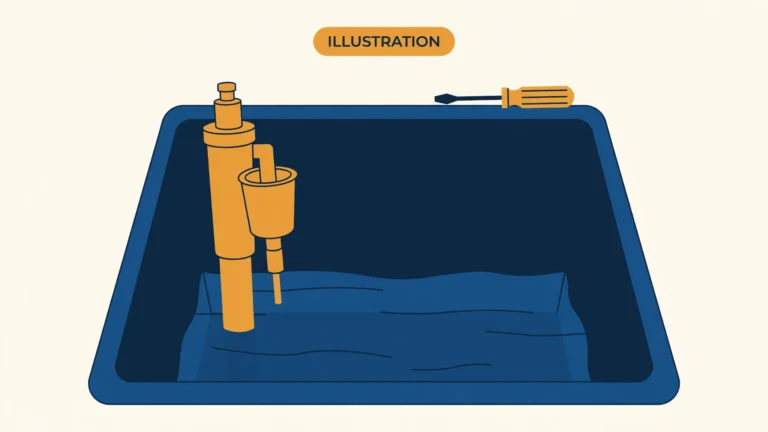
Cover the drain before you start. A cloth or stopper over the drain catches the screws, clips, and springs that otherwise vanish down it.
Safety — scald risk is the core hazard. Most adults suffer third-degree burns from 150°F water in 2 seconds. At 140°F it takes 6 seconds. At 130°F, 30 seconds. Those are the CPSC’s figures.
Water heaters should be set to 120°F, and the shower outlet must be 120°F or less. The limit stop is not optional trim. Set it with a thermometer at full hot, and re-check it any time the water heater setting changes.
No torch, no petroleum. Keep a torch away from any valve — Moen’s sheet warns excessive heat to the valve body may damage the cartridge. Petroleum-based grease or lubricants may react with the rubber seals. Silicone grease only.
The swap, step by step
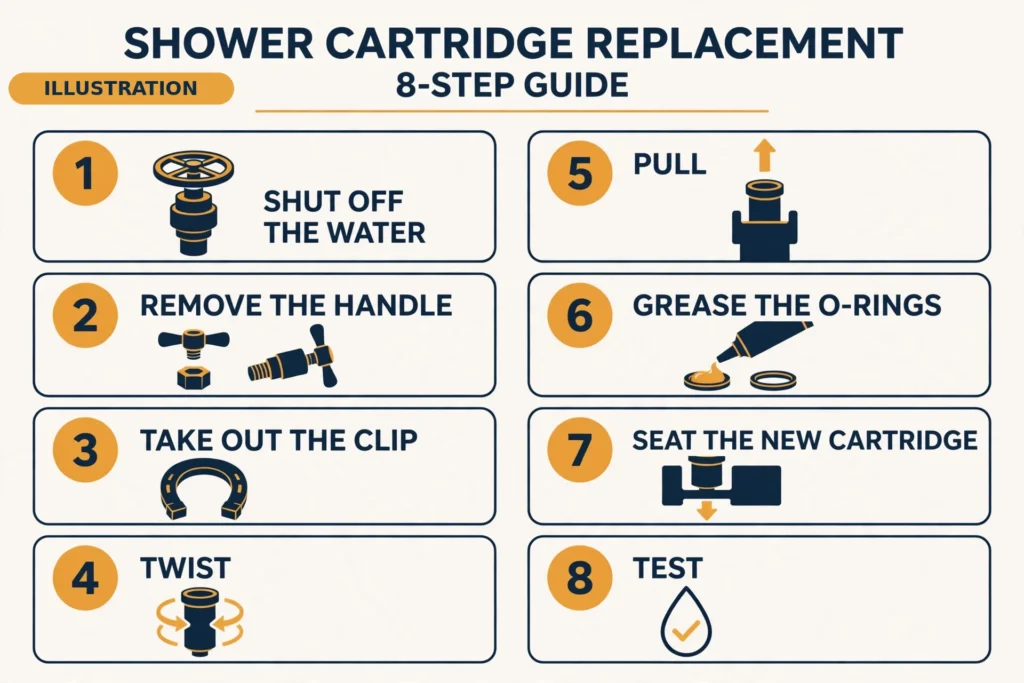
- Shut off the water and verify it. Fixture stops, or the house main. Open the handle and confirm zero flow.
- Cover the drain. A cloth or stopper catches small parts.
- Remove the handle. Pry off the decorative cap to expose the screw, or loosen the set screw on the underside. If the handle sticks, heat it with a hair dryer on hot. If it still will not come off, use a handle puller. Do not force it — Kohler warns forcing the handle damages the valve.
- Remove the trim and escutcheon. Cut any caulk with a utility knife. Note the cap position now. Kohler: note the tab or “UP” on the cap before anything else comes off.
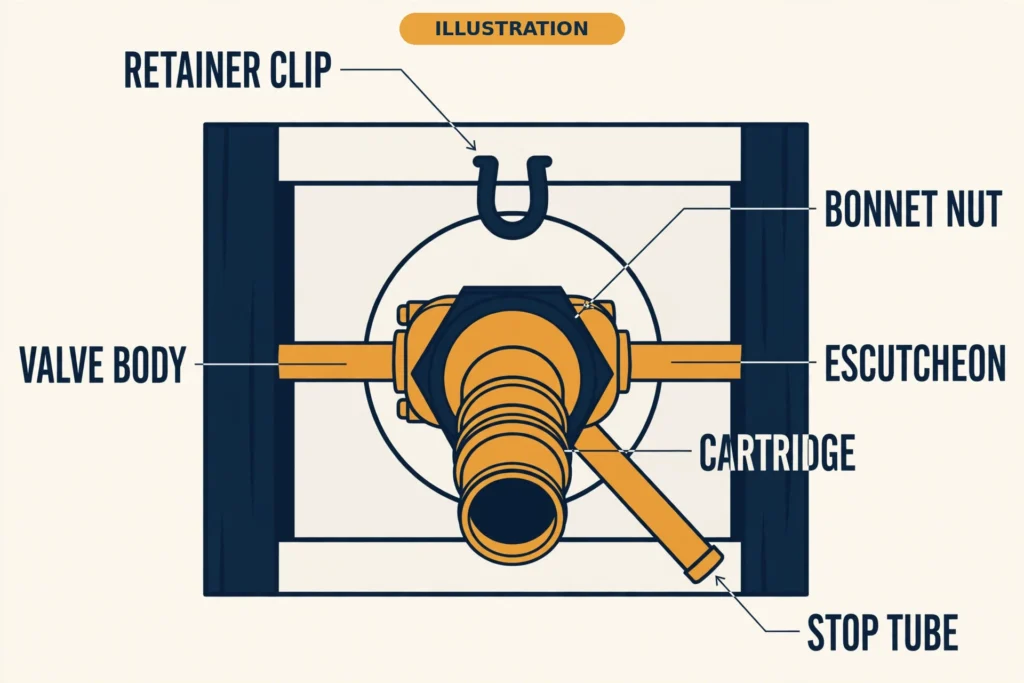
- Remove what holds the cartridge. Moen 1222 and 1225: the U-shaped retainer clip, pulled straight up with needle-nose pliers. Do not drop it behind the wall. Moen warns the water cannot go back on until the clip is replaced. Delta RP46074 and RP19804: the bonnet nut, unscrewed counterclockwise by hand. If the whole valve body starts to turn with it, stop — plumber’s job. Kohler K-304: two cap screws, then the collar, then the cap assembly, in that order.
- Note the orientation — photograph it. Moen: the “H” and “C” marks and the notched flat on the stem. Notch up in the mixed position; 180° off reverses hot and cold. Delta: the raised stop on the cap belongs on the hot side, left in a normal installation. The RP46074’s “Hot Side” marking faces the hot supply. Kohler: the tab inside the brass body lines up with the notch on the back of the PBU; “COLD” aligns with the cold inlet.
- Twist before you pull. Turn the cartridge to break the crusty O-ring seal, then pull straight out. Never pry with a screwdriver — Delta’s sheet says so explicitly. Never drill or screw-extract a cartridge. The stuck-cartridge ladder below covers what to do when it will not move.
- Clean and flush the valve body. Moen: scrub the inside walls with a nylon-bristle brush. Then turn the water on slightly with the cartridge out to flush the valve, turn it back off, and dry with a rolled paper towel. Stand outside the tub — the water comes out with considerable force. Kohler: clean debris and brass burrs with 50/50 white vinegar and water. Sediment destroys new cartridge seals on first use.
- Grease the new cartridge’s O-rings — silicone only. Moen: silicone-based grease only, never plumber’s grade faucet grease, silicone sprays, or any lubricant containing petroleum. Kohler: the same — petroleum-based lubricants harm the O-rings, seals, and plastic parts. Greasing the O-rings now also makes the next cartridge far easier to remove.
- Install the new cartridge in the correct orientation, fully seated. Moen 1222: “HC” facing up, ears aligned with the slots, fully seated and flush with the brass body. Delta: press in until the keys sit fully in the slots of the valve body. Do not twist the cap and lower housing apart. Kohler: line up the tab with the notch, “COLD” to the cold inlet, insert level. Do not place the PBU at an angle and rotate it — that moves the small O-rings out of position and the valve will leak.
- Re-seat the retainer. Moen: slide the horseshoe clip fully back into its slot. A clip not seated can be pushed out by water pressure. Delta: thread the bonnet nut back on by hand until snug. Kohler: black cap on top with the black top at 12 o’clock, then the metal collar over the cap, then the screws left and right. Kohler is firm on the order: do not install the metal collar before the black cap, or the cap will not seal.
- Flush before you finish. Delta’s method: slip the handle on without its screw. Turn it to full on, hot and cold mixed. Turn the water on and let it flush for one minute without moving the handle. If there is a showerhead, remove it, send water up to the shower, and flush another 30 seconds. Keep hands out of the stream — the limit stop is not set yet.
- Check that cold water comes first. Delta’s own safety check, printed in capitals on its sheet: after the repair, turn the valve on and make sure cold water flows first. If hot comes first, the cartridge is in backwards. Shut the water off, pull the cartridge, turn it half a turn, seat it again.
- Set the limit stop to a maximum of 120°F with a thermometer. Run the water until hot is as hot as it gets. Hold a thermometer in a plastic cup in the stream. Move the stop one tooth at a time and re-check after each move. Delta warns that failing to put the disc back after setting the stop could result in scald injury. The stop may need seasonal readjustment.
- Reassemble and test. Trim, handle, screw. Delta: do not overtighten. Run the handle through its full range once more and look for drips at the spout with the valve off.
The stuck-cartridge ladder

Work down this ladder in order. Stop at the step that works.
- Confirm nothing still holds it. Clip, bonnet nut, screws, collar. A cartridge that is still clipped or capped in will never come out.
- Twist before you pull. Turning breaks the seal years of use built up. Pull only after it turns. Moen 1222: the plastic twisting tool that ships with the new cartridge, rotate about 45°, then grab the stem with pliers and pull. Moen 1225: plastic tool, turn a quarter turn either way, then pull the stem with pliers. Delta 13/14: place the handle on the stem and rotate counterclockwise about a quarter turn, then lift out. Delta 1300/1400: put the handle back on the brass stem, rotate counterclockwise while lifting out of the two notches. Kohler Rite-Temp: no special tool — pull the PBU with pliers.
- Pull straight, or use a puller. A puller grips the cartridge and braces against the valve, so the pull stays straight. Moen’s 104421 puller removes single-handle cartridges 1200, 1225, and 1222. No Delta or Kohler puller turned up in the maker pages. For those valves, follow the twist-and-lift steps and do not pry.
- Soften the scale. White vinegar or a calcium and lime remover around the cartridge. Hunker suggests heating the cartridge with a hair dryer for 10 to 15 minutes and injecting vinegar into the valve housing with a syringe, left overnight. That is Hunker’s method, not a maker’s method. Penetrating oil — a real conflict, stated plainly: several trade blogs suggest spraying penetrating oil and letting it sit 10 to 30 minutes. None of the maker pages suggests it, and Moen warns petroleum-based lubricants may react with the rubber seals. This guide follows the makers: vinegar soak and puller, no penetrating oil.
- If the stem broke off, Moen’s tap method. A stiff handle puts extra stress on the brass stem. It occasionally snaps and leaves the white shell stuck in the brass body. For a 1222: remove the retainer clip, thread a 7/16-in. tap into the center opening of the shell so it bites the interior walls, then use the tap wrench to pull the shell out. Inspect for fragments. If it does not work, Moen says to contact Moen at 1-800-BUY-MOEN. Do not drill into the valve or use a screw extractor. Damage to the brass valve body is what turns a cartridge job into a valve replacement.
- Stop and call a plumber if:
- The cartridge will not move after the clip is out, the twist steps, and a puller made for it.
- The broken shell will not come out with the tap method, or pieces are left in the valve.
- The valve body is cracked, scored, or turns in the wall when you work on it.
- Water leaks behind the wall.
- The shutoff will not hold.
Richard Trethewey of This Old House, on forcing a stuck cartridge:
“I’m afraid that if I just try to pull it this way with pliers, I could break it and leave parts inside the wall. And that would be a disaster — I’d have to redo the whole shower valve.”
Two-handle showers — the compression-stem repair
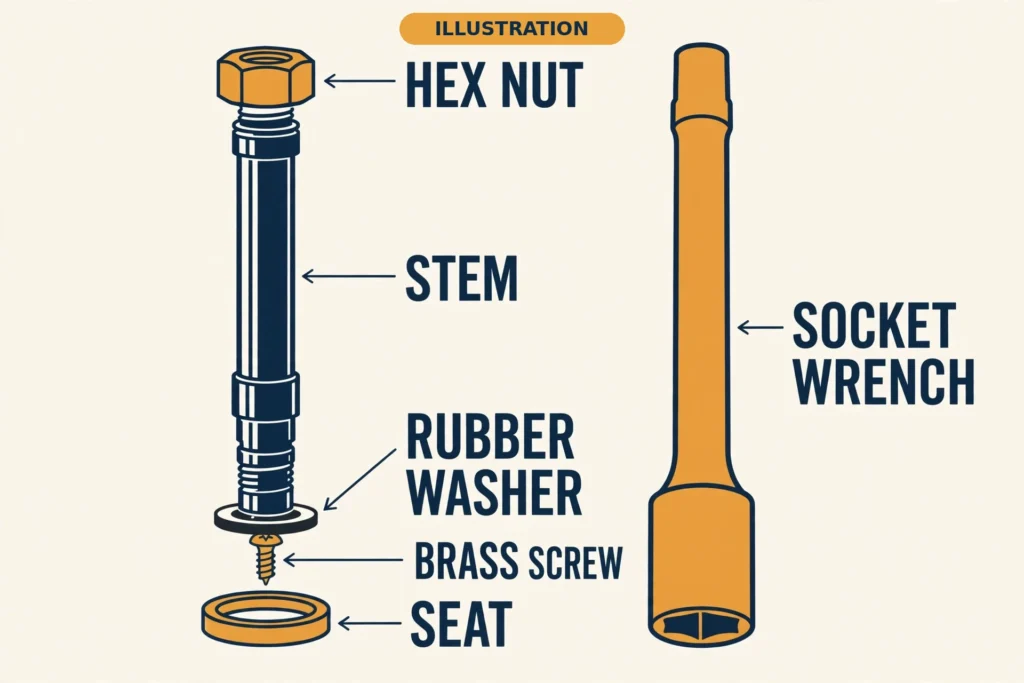
Two-handle showers are usually compression valves: separate stems for hot and cold, each pressing a rubber washer against a metal seat. The fix is a washer, not a cartridge.
- Find the leaking side. Feel the dripping water — warm means the hot side. Replace the washers on both sides while you are in there.
- Remove the handle and escutcheon. Index cap off, screw out, handle off; trim plate off.
- Remove the stem. A hex nut secures the valve stem inside the wall recess — a standard wrench usually will not fit. Use a shower valve socket wrench, a long metal tube, over the nut, counterclockwise.
- Replace the washer. At the bottom of the stem, a rubber washer held by a brass screw. Undo the screw, pop the old washer off, fit a new washer of the exact same size and material, tighten the screw. Do not overtighten and damage the new washer.
- Check the seat. The brass ring the washer presses against. If it feels rough or pitted, it will tear up the new washer immediately. Smooth it with a seat-dressing tool, or unscrew it with a seat wrench and replace it.
- Grease and reassemble. Plumber’s grease on the stem threads and the new washer. Screw the stem back in, tighten the nut, reassemble the handle. Replace all O-rings on the stem at the same time.
- If the drip persists after a new washer and a dressed or replaced seat, the body is damaged. That is a pro job — see the hub.
Why is it still leaking after a new cartridge?
This is the most common question people ask after the swap, and the answer is almost never “buy another cartridge.”
- Delta: try seats and springs first. If the drip persists after new seats and springs (RP4993), replace the cartridge. If it persists after a new cartridge, the body or seat is damaged. That is a pro job.
- Wrong cartridge. The most common error is buying by appearance: Delta RP19804 vs RP46074 (white vs grey cap), Moen 1222 vs 1225 (rotate-only vs pull-and-rotate). Re-check the part tables above against the old part.
- Cartridge in backwards. Hot and cold reversed means it went in 180° off. Rotate and re-seat.
- Limit stop set wrong. A shower that will not get hot enough, or gets too hot, is the limit stop — not the cartridge.
- Weak flow after the swap. Repeat the flush with the showerhead off. Check the flow restrictor in the showerhead is not clogged. If a showerhead drips after a new cartridge, the head is emptying its reservoir — up to 90 seconds is normal. If flow does not come back, call a plumber.
One homeowner put the symptom plainly:
“My shower head drips water constantly, even when the knob, which controls both hot and cold temperatures, is turned off. How can I fix this?”
And the price confusion that follows a first cartridge purchase, from a homeowner’s own message:
“I BOUGHT THE CARTRIDGE FROM MENARDS I PAYED ALMSOST 50.00 DOLLARS FOR IT. HOW MUCH IS THE CARTRIDGE YOU ARE TALKING ABOUT COST?”
The plumber’s answer in the same thread: call 1-800-BUY-MOEN and Moen will send it free.
What does it cost to fix a leaking shower faucet?
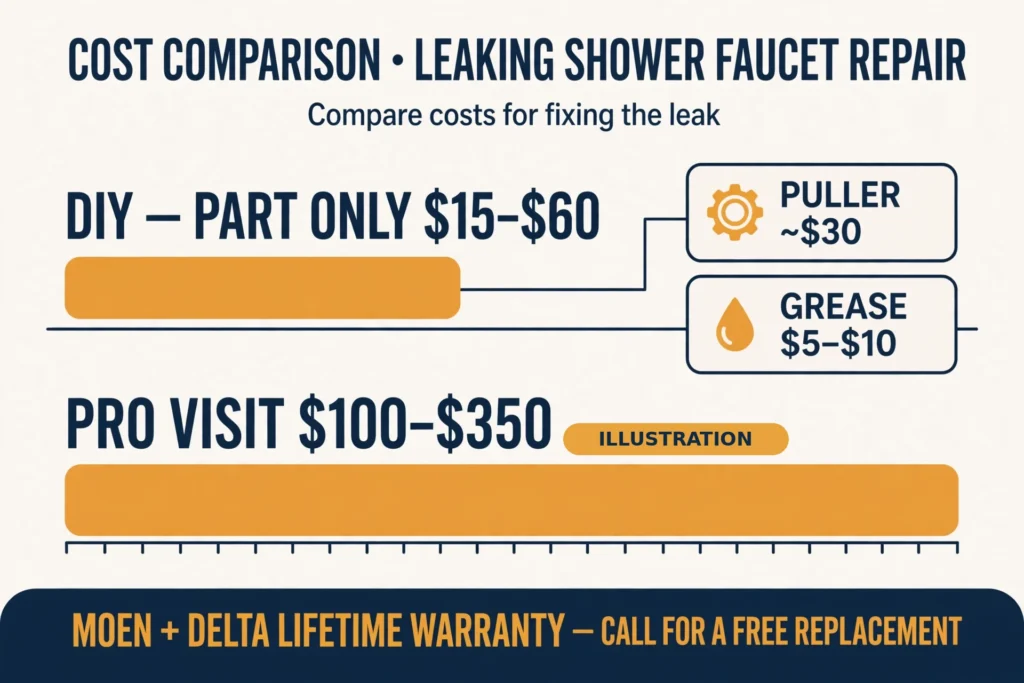
DIY parts (2026, US):
| Item | Cost |
|---|---|
| Moen 1222 cartridge, OEM, online | $33.45 |
| Moen 1222 cartridge, OEM, big-box or trade | $71.69–$71.98 |
| Delta RP19804 / RP46074, OEM, major retailers | High $40s to low $70s |
| Delta RP19804 / RP46074, aftermarket copies | $19–$35 |
| Kohler GP500520 / GP800820 PBU | ~$26–$35 |
| Kohler GP876851 cap and PBU kit | ~$30–$45 |
| Delta RP4993 seats and springs | $5–$15 (Delta lists $8.08 online / $10.10 list) |
| Washer kit, two-handle stems | $5–$15 |
| Cartridge puller, Moen 104421 | ~$30 |
| Plumber’s silicone grease | $5–$10 |
| DIY, part only | $15–$60 |
| DIY, first-timer all-in (part + puller + grease) | $40–$120 |
Pro cartridge swap (2026, US):
| Source | Cost |
|---|---|
| HomeGuide | $100–$350 |
| Angi, via The Pricer | $100–$400, average ~$275 |
| Western Rooter | $150–$350 |
| ABSPipes | $120–$250 |
| Remove and Replace | $120–$180 |
| Greer Plumbing | $75–$200 |
One conflict, stated plainly: the same Moen 1222 OEM cartridge is $33.45 from an online supplier and $71.69–$71.98 at Ferguson and Lowe’s. The spread is channel, not part — online discounters undercut big-box retail by more than half. Aftermarket copies run cheaper still, but they are not OEM.
The pro swap range runs $75–$200 at the low end to $151–$399 for a modeled national average. The spread is geography, access, and whether the figure is a single-source quote or a modeled average. The most-cited national figures cluster at $100–$350.
One figure to ignore: Angi’s national page on bad shower cartridges says plumbers charge $45 to $200 per hour, plus $150 to $350 for the replacement cartridge itself. That $150–$350 conflicts with every parts-only price in this guide: $10–$75 for a single-handle cartridge. It appears to fold labor into the part line. Do not quote it as the price of the part.
The minimum-visit pattern holds here too. A cartridge costs $15–$60 in parts, but a pro visit runs $100–$350. You are paying for the visit, the diagnosis, and the stuck-cartridge risk, not the part.
Lifespan, for the cost logic: a quality cartridge lasts 10 to 30 years, but hard water and wear eventually kill it. Cartridge-style valves last 5 to 15 years; ceramic disc lasts 10 to 25 years. Hard water can halve the lifespan.
Low pressure in the shower alone has several causes, and a clogged cartridge is only one of them.
[LINK → How to Fix Low Water Pressure in a Shower: the full diagnosis, from the showerhead to the supply.]
Don’t do this
- Don’t buy the cartridge by appearance. Delta RP19804 vs RP46074 and Moen 1222 vs 1225 look alike and do not interchange. Match by cap color, handle movement, and the old part.
- Don’t force a stuck cartridge. It can crack the body and turn a roughly $30 fix into a $600+ valve replacement. Twist first, then use a puller.
- Don’t pry with a screwdriver or drill a stuck cartridge out. Both damage the body. Use a vinegar soak, a puller, and the tap method instead — no penetrating oil.
- Don’t use petroleum grease on O-rings. Plumber’s silicone grease only. Petroleum reacts with the rubber seals.
- Don’t skip the limit stop. Set it to a maximum of 120°F and verify it with a thermometer. A stop left too high is a scald risk. Delta’s cold-water-first check catches a backwards cartridge.
- Don’t open a wall for this job. A cartridge swap is front-access only. If the fix needs the wall opened, it is a body job, and that is a plumber’s job.
- Don’t buy a second cartridge when the first one did not stop the drip. Check the seats and springs, the part number, the orientation, and the body first.
Call a pro when
The shutoff will not hold. The valve body turns in the wall when you work on it. Water leaks behind the wall, or there is staining on the wall or ceiling below. The cartridge will not move after the clip is out, the twist steps, and a puller made for it. The broken shell will not come out with the tap method, or pieces are left in the valve. The drip persists after a new cartridge and new seats and springs — the body or seat is damaged.
The short version
Confirm it is the cartridge: constant drip with the handle off, not a few minutes of drain-down. Match the part by brand — Moen by handle movement, Delta by cap color, Kohler by screw count — and try the RP4993 seats and springs first on a Delta drip. Shut the water off, pull the trim, twist and swap the cartridge, grease the O-rings with silicone only, set the limit stop to 120°F. If the drip survives a new cartridge, stop buying parts and call a plumber.
FAQ
How do I get a shower faucet to stop dripping?
Replace the worn cartridge, washer, or O-rings that let water bypass the valve. For a single-handle shower, that means a cartridge swap from the front. For a two-handle shower, it means new stem washers. A drip that lasts a few minutes after shutoff and then stops is normal drain-down, not a leak.
Why is my shower still leaking even after I replaced the cartridge?
Check the seats and springs first on a Delta — they are the usual culprit after a new cartridge. Then check the part number, the orientation (180° off reverses hot and cold), and the body itself. A pitted or scored body tears up a new cartridge immediately, and that is a pro job.
How much does it cost to have a plumber fix a leaky shower faucet?
A pro cartridge swap runs $100–$350 on the most-cited national figures. The range across sources is $100–$400. The part itself is $15–$60, or $5–$15 for Delta seats and springs. You are paying for the visit and the stuck-cartridge risk, not the part.
Can I fix a leaking faucet myself?
A cartridge swap, yes — it is a 30 to 60 minute front-access repair with basic tools. A handyman can do it too. Call a plumber when the shutoff will not hold, the valve body turns in the wall, or water is coming from inside the wall. Or when the cartridge will not move after the twist steps and a puller.
Can I replace a shower cartridge without turning off water?
No. The water must be off before the cartridge comes out, or water will flow from the open valve. Use the fixture stops if present, else the house main, and confirm zero flow before you start.
Why does my shower drip for a few minutes after I turn it off?
The showerhead is emptying its reservoir. Kohler says showerheads can drip up to 90 seconds after the valve is turned off. That is normal drain-down. A drip that continues past that, or never stops, is the cartridge.
Sources
- Family Handyman — How to Fix a Leaky Shower Faucet (updated Jul 25, 2024) — https://www.familyhandyman.com/project/how-to-fix-a-dripping-shower/
- This Old House — How To Replace a Shower Cartridge (updated May 28, 2026) — https://www.thisoldhouse.com/bathrooms/how-to-replace-a-shower-cartridge
- EngineerFix — How to Use a Shower Valve Puller for a Stuck Cartridge — https://engineerfix.com/how-to-use-a-shower-valve-puller-for-a-stuck-cartridge/
- Delta Faucet — RP4993 Seats & Springs (online price $8.08, list $10.10) — https://www.deltafaucet.com/bathroom/product/3597LF-MPU.html
- Lowe’s — Moen 1222 cartridge (OEM, $71.98, in stock) — https://www.lowes.com/pd/Moen-1-Handle-Brass-and-Plastic-Tub-Shower-Valve-Cartridge/3306744
- Western Rooter — Shower Valve Replacement: Signs, Costs, DIY vs Pro (Sep 4, 2026) — https://westernrooter.com/shower-valve-replacement-guide/
Last verified: November 2026.