How to Recaulk a Bathtub
Quick answer
Old caulk fails because water, soap film, or the wrong product got underneath it, and new caulk laid over that mess fails the same way. Strip the old bead out completely, clean the joint with rubbing alcohol, let it dry, and lay one steady bead of 100% silicone. Then leave the tub alone for a full 24 hours — the tube is cheap, and the prep is the job.
Why does my new caulk keep peeling off?
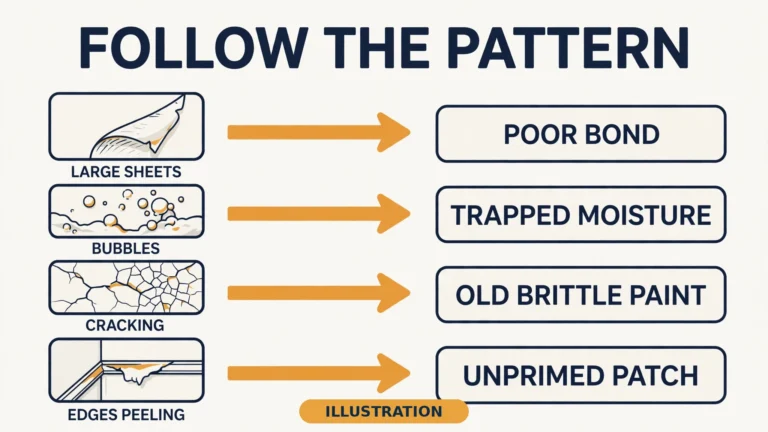
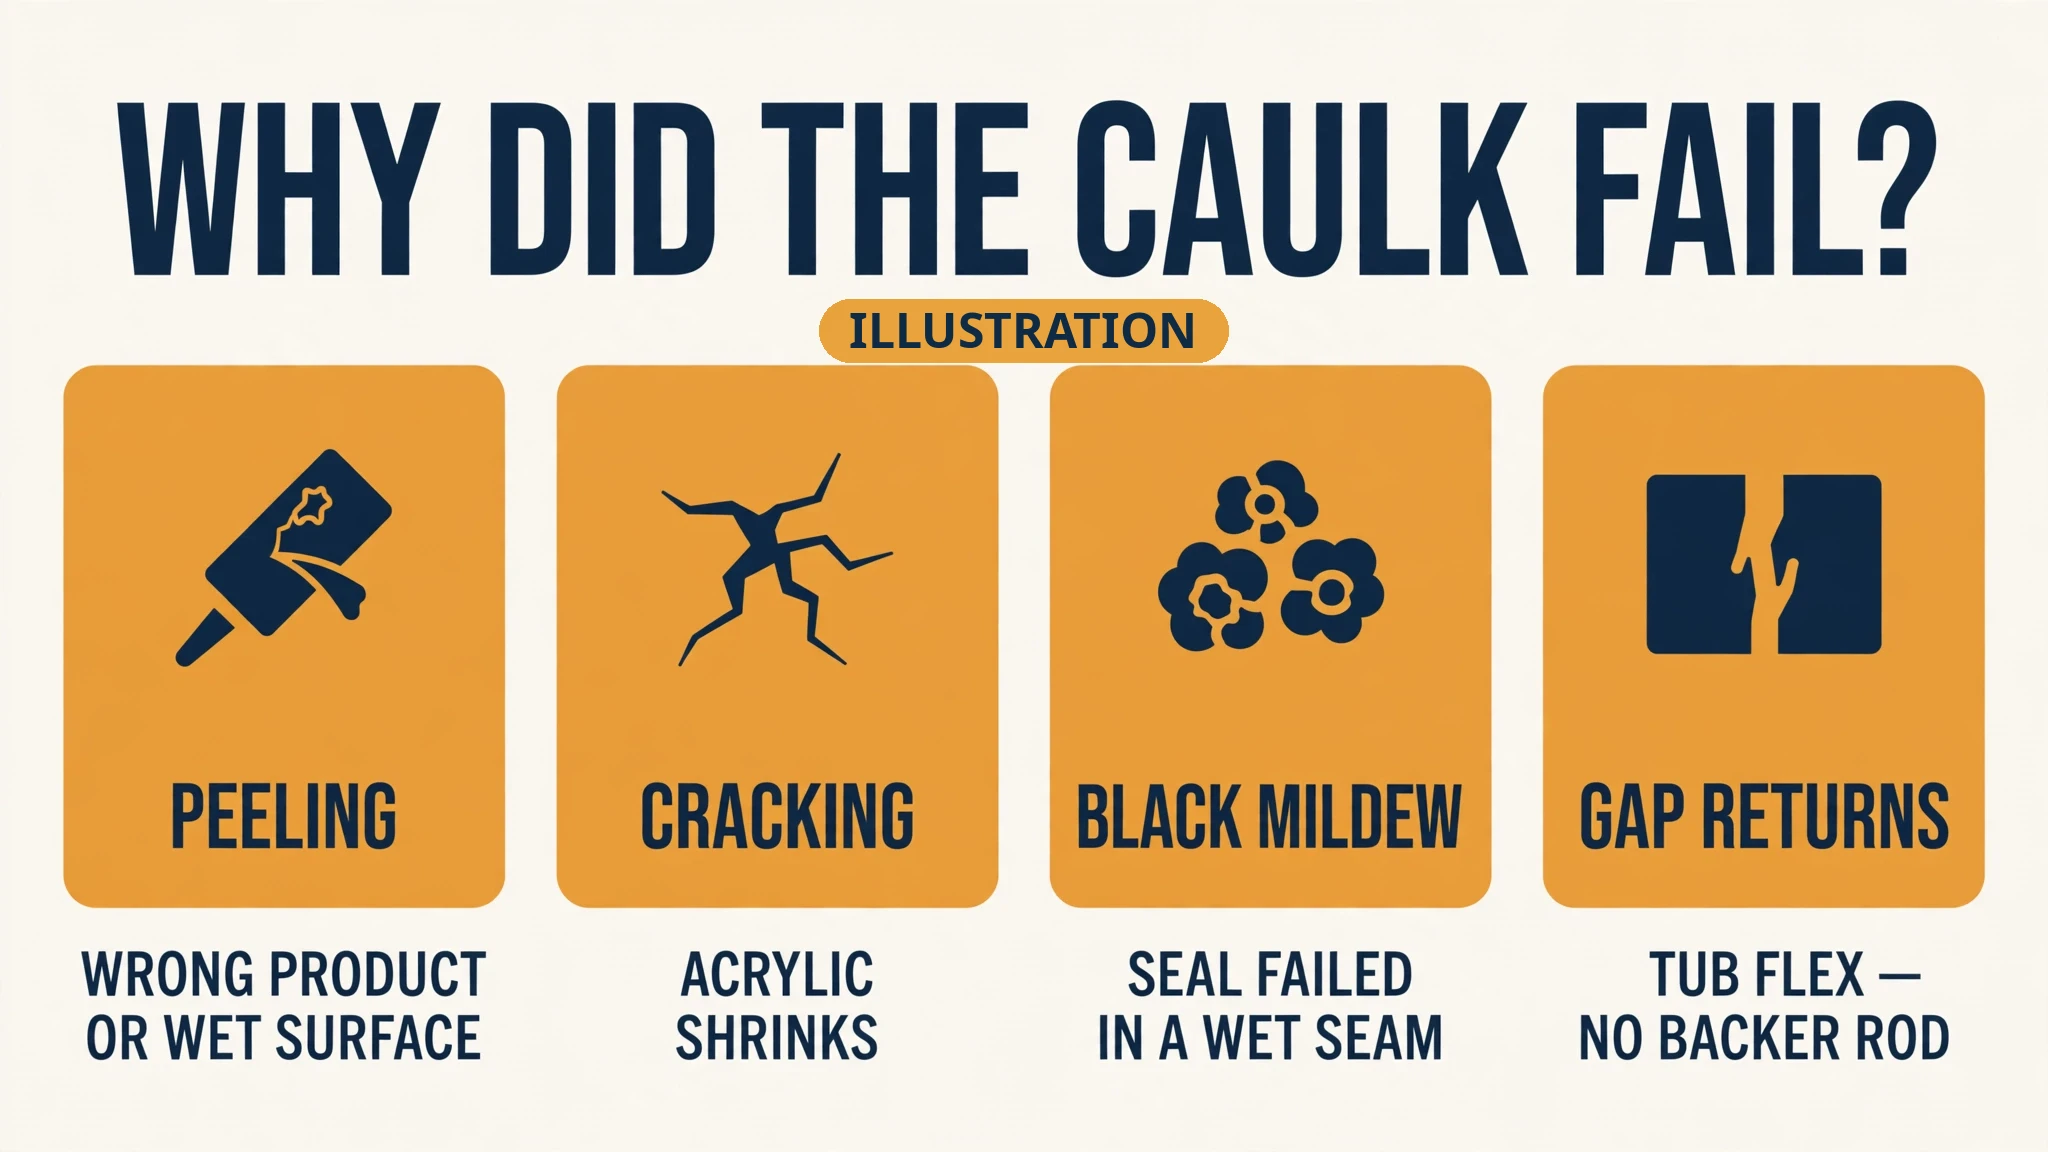
Follow the symptom. The way caulk fails tells you why it failed.
| What you see | Likely cause | What fixes it |
|---|---|---|
| Peeling at the tile or tub edge | Old caulk residue left behind, or the joint was never cleaned with alcohol | Remove 100% of the old bead and film; wipe with isopropyl alcohol; dry 2+ hours |
| Cracking down the middle of the bead | Bead too thin for the gap, or the tub flexed because it was caulked empty | Backer rod if the gap is over ~1/4 in; fill acrylic and fiberglass tubs before caulking |
| Bead pulls away when the tub fills | Tub flexes under load; caulk went on while the tub was empty | Fill the tub with water first; keep it filled until the bead skins over |
| Black spots that keep coming back | Mold on the surface, or moisture trapped behind the bead | 100% silicone only; dry the joint fully; leave the seam open 1–2 days with a fan if growth is found |
| Pink or orange slimy film | Serratia marcescens, an airborne bacterium — not mold | Clean it off; improve drying with the fan; it returns while the joint stays wet |
| Caulk turned to mush within a week | Wrong product — acrylic latex sold as “kitchen and bath” | Check the tube says 100% silicone; remove and redo |
| Same gap failing again and again | Failed grout, a loose tub, or a wet wall behind the tile | Stop — caulk is not the fix; see the call-a-pro section |
Most failed beads trace back to one of three mistakes. The old caulk was never fully removed. The joint was never truly dry. Or the tube was the wrong product. Silicone will not bond to old silicone, to soap film, or to a damp surface. It bonds to clean, bare material and to nothing else.
One homeowner asked it plainly after three failed seals on a flexible acrylic tub:
“What is the trick for installing a flexible acrylic self-rimming tub so that it does not flex and move and break the seal of the caulking?”
A contractor page describes the exact moment the same way:
“You scraped, you squeezed, you smoothed with a wet finger, and three weeks later the line of white around your tub is gray and peeling again.”
If the paint on the bathroom ceiling or wall is peeling while the caulk is also failing, the same moisture source is behind both.
How to Fix Peeling Paint: when the paint itself is the problem, not the seal underneath it.
Before you begin
Tools: utility knife, plastic razor scraper or caulk removal tool, stiff brush or old toothbrush, caulk gun (dripless, smooth rod), smoothing tool (optional), painter’s tape, rags, gloves, respirator and safety glasses, hair dryer (optional, low heat).
Materials: 100% silicone caulk labeled Kitchen & Bath or Tub & Tile, mold-resistant; caulk remover gel or solvent; mildew cleaner; rubbing alcohol (isopropyl); foam backer rod (closed-cell) if the gap is over ~1/4 in.
Check the joint first. Look for loose or cracked grout, hollow-sounding tile, soft wall board, rust stains, or rot. If you find any of those, stop. Caulk is a seal, not waterproofing. It cannot fix a wet wall.
Safety — read this before you scrape anything. In a pre-1980 home, old caulk, grout, and tile adhesive may contain asbestos. Cut the old caulk out by hand. Never sand, grind, or power-scrape it. If you are unsure, have it tested first.
In a pre-1978 home, scraping or sanding paint around old tile can disturb lead paint. The EPA’s renovation rule binds paid work, not a homeowner fixing their own wall. The lead-safe practices still apply to you, though. Test first, use wet methods, contain the dust, and use a HEPA vacuum. If the test is positive and the job is large, hire a certified firm.
Silicone releases acetic acid as it cures — that is the vinegar smell. Ventilate the room. Caulk removers and mildew cleaners are chemicals, so follow their labels and keep the fan running. Never mix a bleach product with an ammonia or acid cleaner.
Silicone or latex caulk for a tub?
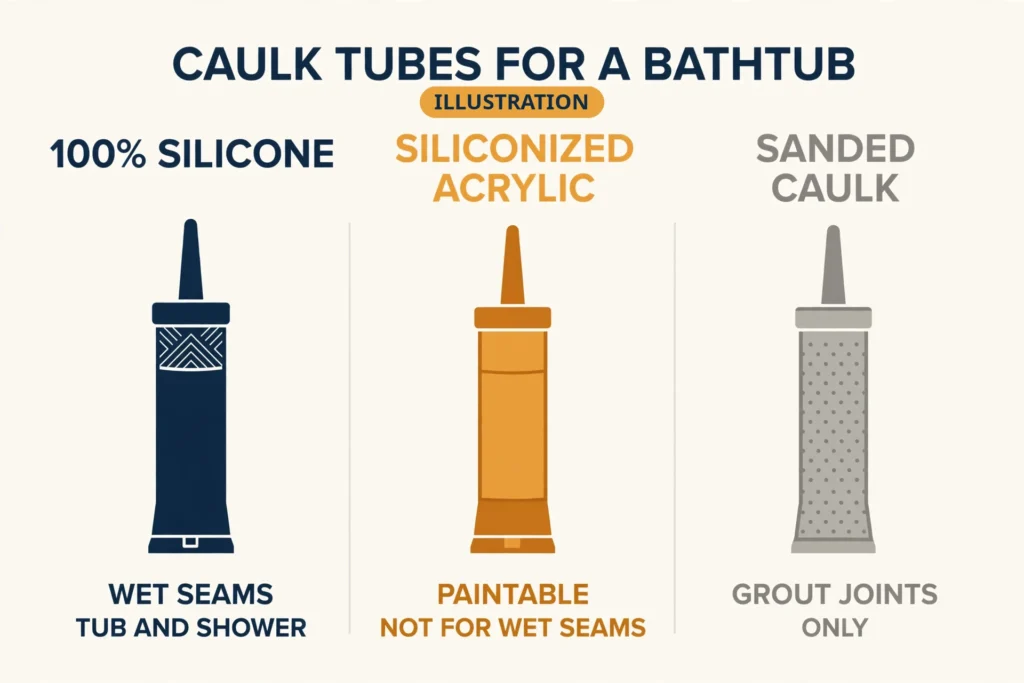
Silicone, every time, for a wet tub joint. The rest belong elsewhere.
| Product | Best for | Don’t use for |
|---|---|---|
| 100% silicone, Kitchen & Bath / Tub & Tile, mold-resistant | Every wet tub-to-tile joint; longest life, best flexibility, best mold resistance | Can’t be painted; messy to tool; won’t bond to old silicone |
| Siliconized acrylic (“siliconized latex”) | Painted trim, dry joints outside the shower | Wet tub seams — shrinks, softens when constantly wet, peels sooner |
| Acrylic latex (painter’s caulk) | Paintable trim, low-moisture joints | Bathtubs — not fully waterproof, shrinks and cracks in wet joints |
| Sanded caulk (siliconized acrylic + silica sand) | Joints ≥1/8 in wide where the caulk must match sanded grout texture | The tub-to-tile wet seam — harder, more brittle, shorter life in constant water |
Joint width decides sanded versus unsanded. Sanded suits joints 1/8 in and wider where the caulk must match sanded grout. Unsanded suits narrow joints under 1/8 in. For the tub seam itself, smooth 100% silicone wins even in a wide gap. Use a backer rod for body, not sand.
Watch the label trap. DAP Kwik Seal says “kitchen and bath” and “100% waterproof” on the pack, but it is acrylic latex, not silicone. One verified buyer removed all the old caulk, dried the joint for 24 hours, and let it cure for 36 hours. The result, in their words:
“Within a week it was mushy like wet paper and peeling away from the tub/tile.”
They tried again. Same result. Check that the tube says 100% silicone. “Kitchen and bath” on the label is not enough.
Two more product notes. Standard silicone smells of vinegar while curing, and the acid can stain marble and natural stone. Use neutral-cure or stone-rated silicone there. Clear silicone shows every trace of residue and later mold. White, or a grout-matched colour, is more forgiving.
The fix, step by step
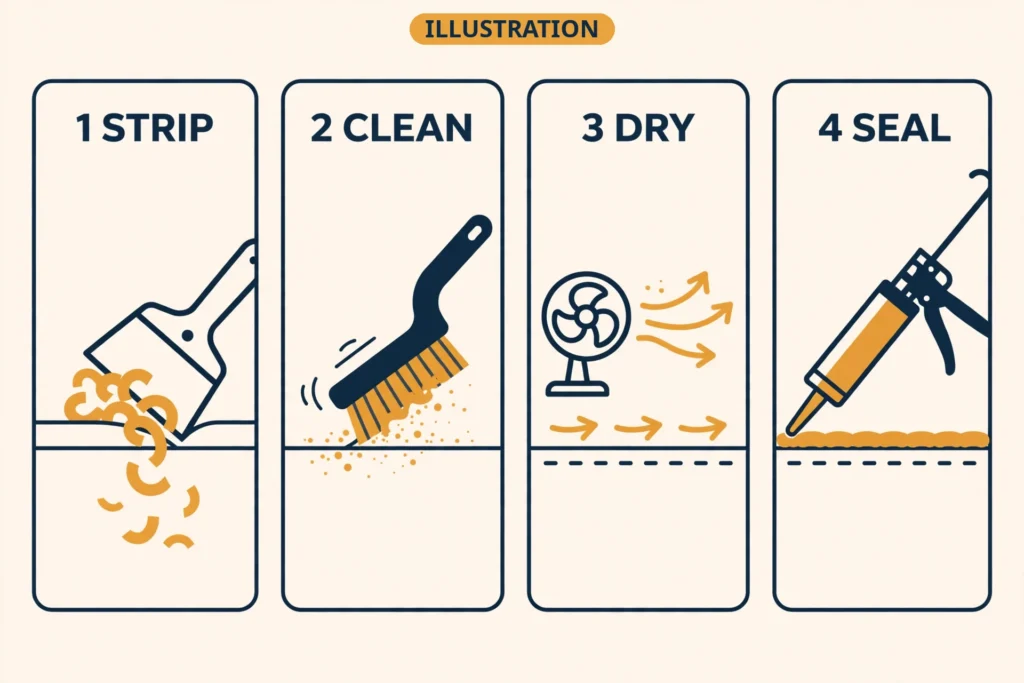
- Ventilate and protect yourself. Open a window or run the exhaust fan. Wear gloves, glasses, and a respirator. Removal solvents need ventilation too.
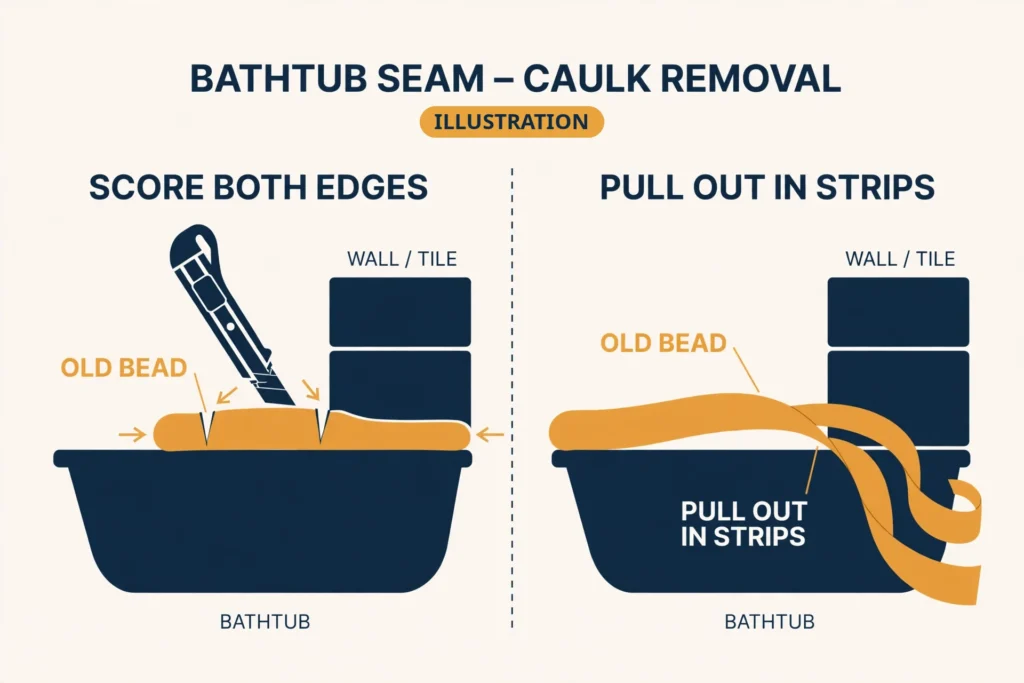
- Remove every trace of the old caulk. Score along both edges of the bead with a utility knife, blade parallel to the wall so you don’t scratch tile. Pull the bead out in strips. Scrape the rest with a plastic scraper. For stubborn bits, apply caulk remover gel and wait per the label — 15 to 30 minutes for most gels, up to 2 hours for heavy silicone. Use plastic blades on acrylic and fiberglass tubs. No sanding, no grinding, no power tools on the joint.
- Scrape the film and clean the mildew. Scrub the gap with mildew cleaner and a stiff brush. Rinse, then wipe with rubbing alcohol to remove soap film, oils, and residue. Silicone sticks to clean, bare material and to nothing else — including old silicone.
- Dry the joint completely. After a water rinse, let it air out for at least 24 hours, helped by a fan. After an alcohol wipe-down of an already-dry joint, 2+ hours is enough. A hair dryer on low speeds it up. Never caulk a damp joint. Trapped moisture feeds mold from behind.
- Inspect before you seal. Look again for loose grout, hollow tile, soft board, or rot. If you find them, stop and read the call-a-pro section.

- Fill the tub with water (acrylic and fiberglass tubs). Fill to about the overflow level. A full tub plus a bather’s weight pulls the tub down about 1/16 in and opens the joint to its loaded width. Caulk laid in this position won’t tear the first time you step in. Leave the water in until the caulk has skinned over. Cast-iron and steel tubs barely move, so filling matters less. The bead still needs to be flexible, never grout.

- Tape both sides. Run painter’s tape along the tile and along the tub, leaving a gap about 1/8 to 1/4 in wide for the bead. Tape is the beginner’s best friend for a straight edge.
- Cut the tip small. Cut the tube tip at a 45-degree angle, smaller than you think — a bead around 3/16 in. You can always cut more off. Puncture the inner seal, load the gun, and squeeze until caulk just reaches the tip.
- Lay one steady bead. Start in a corner, gun at 45 degrees, one continuous pass at a steady pace with even pressure. Work in sections of about 3 feet. Silicone skins over in minutes, and tooling a skinned bead leaves ridges.
- Tool it once and pull the tape. Run a gloved finger or smoothing tool along the bead once, with light, even pressure. Pull the tape immediately, while the silicone is still wet, at a low angle away from the bead. Wipe strays with a dry rag before it skins.
- Cure. Keep water off the bead for the full time on the tube, then drain the tub if you filled it. See the cure times below.
One conflict to name: the most repeated tip online is to tool with a wet finger dipped in water with a drop of dish soap. Contractor advice says skip the soap. Soap can coat the bond line and weaken the bead. Tool dry, or with a gloved finger or smoothing tool, and wipe excess with a dry rag. This guide follows the contractor side.
How long after caulking can I shower?
It depends on the bead, the room, and the product. The tube’s “water-ready in 30 minutes” is not “shower in 30 minutes.”
| Stage | Time |
|---|---|
| Silicone skin / tack-free | 10–30 min (warm dry room: 5–10 min) |
| Silicone water-ready (fast-cure formulas) | 30 min–3 hrs, conditions apply |
| Silicone full cure, standard bead | 24–48 hrs |
| Silicone full cure, thick or deep bead | Up to 7 days |
| Siliconized latex, light use | 2–4 hrs |
| Siliconized latex, full cure | 24–48 hrs |
The 30-minute trap is in the fine print. GE’s own data sheet for Advanced Silicone 2 sets strict conditions on 30-minute water-ready. The bead must be at most 3/16 in, the temperature at least 65°F, and the humidity at least 50%. Otherwise the same sheet says no water exposure for 8 hours, and do not touch or clean it for 24 hours. Full cure is 24 hours.
Silicone cures from the outside in, at roughly 1/8 in per day. The surface can feel solid while the inside is still soft. Showering too soon can wash out the bond, cause bubbling, or trap moisture that feeds mold later.
The safe rule: plan for 24 hours without using the tub or shower, unless your product specifically says otherwise. Make it 48 hours if the bathroom is cool or poorly ventilated.
Don’t do this
- Don’t caulk over old caulk. Silicone will not bond to cured silicone. The new bead peels off with the old one.
- Don’t skip the dry step. A damp joint traps moisture behind the bead. That is mold food.
- Don’t use latex or paintable caulk in the wet seam. It softens in constant water and peels sooner. Save it for trim.
- Don’t smooth with soapy water. Soap can coat the bond line and weaken the bead. Tool dry or with a gloved finger.
- Don’t use the tub before the full cure. Showering too soon washes out the bond. Wait the 24 hours.
- Don’t bridge a wide gap with caulk alone. Gaps over ~1/4 in need a foam backer rod behind the bead. Over 3/8 in, the rod is mandatory. The bead should grip two faces, not three, so it can flex.
- Don’t sand or grind old caulk in a pre-1980 home. Cut it out by hand. Old caulk and grout can contain asbestos.
What does it cost to recaulk a bathtub?

DIY materials (2026, US):
| Item | Cost |
|---|---|
| 100% silicone caulk, kitchen & bath, mildew-resistant | $8–$15 per tube |
| Caulk gun (dripless, smooth rod) | $8–$30 |
| Caulk remover gel or solvent | $6–$12 |
| Plastic razor scraper + utility knife | $5–$10 |
| Painter’s tape | $5–$8 |
| Mildew cleaner + rubbing alcohol | $5–$10 |
| Respirator, gloves, safety glasses | $10–$25 |
| Smoothing tool (optional) | $3–$8 |
| Foam backer rod (if the gap is wide) | a small roll covers one tub |
| DIY total, if you already own basic tools | ~$15–$40 |
| DIY total, first-timer buying everything | ~$40–$70 |
Tube prices check out against Angi: latex caulk $4–$8 per tube, silicone $8–$12 per tube.
Pro costs (2026, US):
| Job | Cost |
|---|---|
| Professional bathroom caulking (Angi, updated July 2026) | $65–$300 |
| Handyperson to caulk a shower or bathtub (HomeAdvisor) | $105–$290 |
One conflict, stated plainly: Angi says $65–$300 and HomeAdvisor says $105–$290. Both are published figures. Present them as a range, not a single number. What moves the estimate is the number of fixtures and the size of the job. It is also the condition of the old caulk, and whether hidden water damage is found once the old bead is out.
The minimum-visit pattern holds here too. Materials run under $25–$40, but a pro visit starts around $65. You are paying for the visit and the prep, not the tube.
If it is not just caulk, the stakes climb fast. Tile removal runs about $4–$12 per square foot. Waterproofing runs about $3–$10 per square foot. New bathroom tile installed runs about $30–$80 per square foot on walls and showers. Those are the numbers behind the call-a-pro section, not the recaulk price. No permit fees are expected for recaulking itself, and no disposal fees.
Call a pro when
The wall board is soft or spongy. Tiles sound hollow or wiggle. Grout is crumbling or missing along the tub edge. There are stains on the ceiling below, or the floor feels spongy near the tub. The tub visibly moves when you step in.
The same gap keeps failing after a proper redo. Or there is more than a few square feet of black mold behind the old caulk.
If the wall behind the tile is soft or stays wet, the drywall itself is the job now.
Drywall Repair: The Complete Homeowner’s Guide: the full size ladder for patching the wall underneath, and when water damage means a pro.
Any job where the tub comes out, a drain moves, or a wall opens up is permit work in most places, and pro work. Check your local rules before you open anything up.
The short version
Strip every trace of the old bead. Clean the joint with alcohol and let it dry completely. Fill an acrylic or fiberglass tub with water, tape both sides, and lay one steady bead of 100% silicone. Tool it once, pull the tape wet, and leave the tub alone for 24 hours. The tube is cheap. The prep and the wait are the job.
FAQ
Can you caulk over old caulk?
No. Silicone will not bond to cured silicone, and latex over latex only works if the old bead is sound and clean. Strip the old bead out completely, including the film, or the new bead peels off with it.
How long after caulking can I shower?
Wait 24 hours. Fast-cure formulas can be water-ready in 30 minutes, but only under strict conditions — a bead no thicker than 3/16 in, at least 65°F, and at least 50% humidity. In a cool or poorly ventilated bathroom, make it 48 hours.
How often should I recaulk my bathtub?
Inspect it yearly and replace it on signs, not on a fixed date. A tub bead typically lasts 3 to 5 years, or 5 to 10 years for premium silicone in a ventilated bathroom. A brand-new home can need a fresh bead after about a year, because the framing settles and pulls the joint apart. Replace it when you see cracking, gaps, peeling, or black mold that won’t clean off.
Silicone or latex for a tub?
Silicone. A 100% silicone kitchen and bath caulk stays flexible, resists mold, and holds up in constant water. Latex and siliconized acrylic shrink and soften in a wet seam. They belong on trim, not on a tub.
Why did my caulk turn black again?
Either the bead itself grew mold, or moisture is trapped behind it. Surface mold means the product wasn’t mold-resistant silicone, or the bathroom never dries out. Mold behind the bead means the joint wasn’t dry before application, or the caulk got wet before the 24-hour cure. Strip it fully, dry the joint, and redo it in 100% silicone. If it comes back a third time, look for another water source — a leaking valve or gaps in the grout.
Do I need a backer rod?
For gaps over about 1/4 in, yes. Push a closed-cell foam backer rod into the gap before you caulk. It gives the bead something to sit on and lets it grip two faces instead of three, so it can flex. Over 3/8 in, the rod is mandatory. Without it, a deep bead cures slowly, shrinks, and goes concave.
Sources
- Renovation Services — How to Re-Caulk a Bathtub the Right Way in NYC (Oct 2026) — https://www.renovationservices.com/most-people-are-re-caulking-their-nyc-bathtub-wrong-heres-the-right-way
- GE / Henkel — Advanced Silicone 2 Kitchen & Bath TDS (rev. Apr 15, 2023) — https://cdn.menardc.com/main/items/media/HENKE004/Prod_Tech_Spec/14ad1b17-145a-470b-b8e9-f9a00200e449.pdf
- Angi — Latex vs Silicone Caulk (updated Aug 4, 2026) — https://www.angi.com/articles/latex-vs-silicone-caulk.htm?entry_point_id=33796995
- Angi — Who to Hire for Bathroom Caulking Services (updated Jul 9, 2026) — https://www.angi.com/articles/need-someone-remove-old-tub-caulk-and-re-caulk.htm?entry_point_id=33796995
- HomeAdvisor — Who Should I Hire to Do Bathroom Caulking? — https://www.homeadvisor.com/r/who-to-hire-bathroom-caulking?comm_auth_dt=202411301721&comm_auth_hash=493ee9f802ef6db285dd09633f82fd53&comm_auth_id=respcons&entityID=79335408&entry_point_id=39615603&m=relevant_sr
- EPA — Lead Renovation, Repair and Painting Program — https://www.epa.gov/lead/lead-renovation-repair-and-painting-program
Last verified: November 2026.