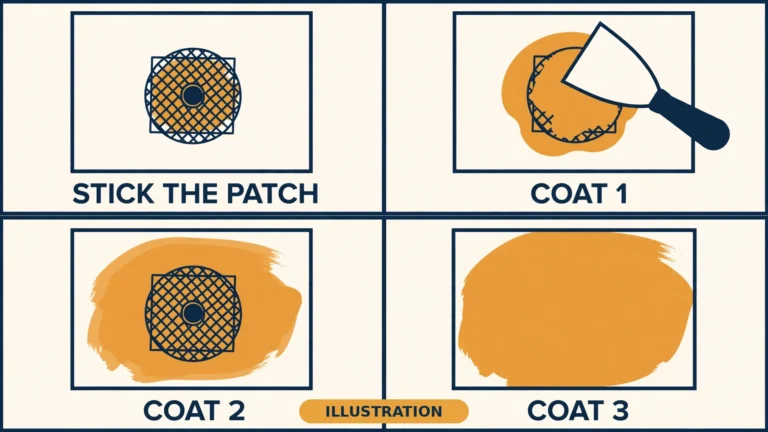
How to Fix Peeling Paint
Quick answer
Peeling paint is a symptom, not the problem — find the cause first. Moisture, bad prep, or the wrong primer cause most peels, so fix that before you open a paint can. Then scrape back to firm paint, feather the edges, prime for the cause, and repaint in two thin coats — skip the cause and the new paint peels again.
Why is your paint peeling?
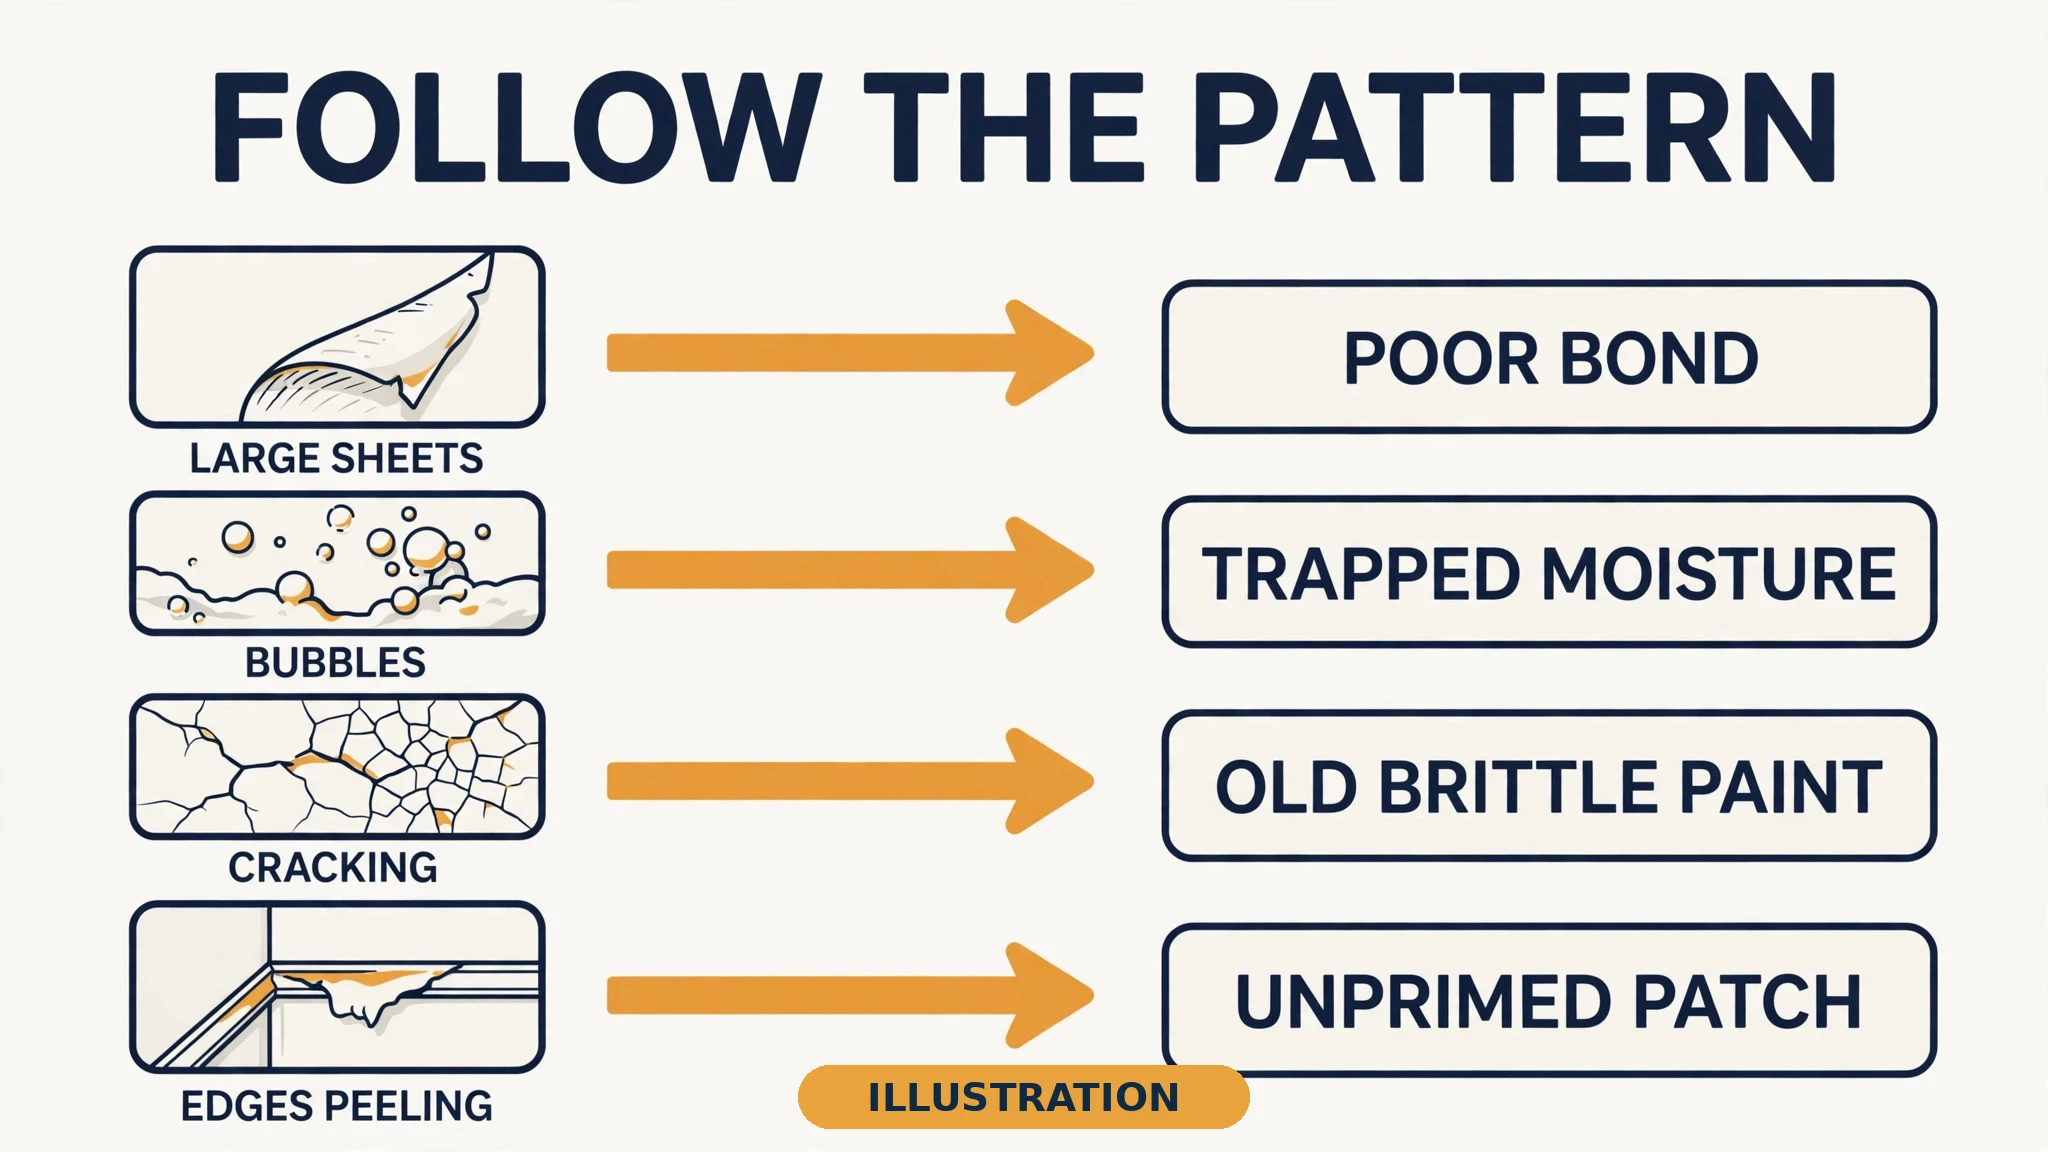
Follow the pattern. The way paint peels tells you why it peeled.
| Pattern | Likely cause | Check |
|---|---|---|
| Large sheets lifting, clean surface underneath | Poor bond — bad prep or missing primer | Tape test; was it primed? |
| Bubbles or blisters, then peeling | Trapped moisture or heat | Moisture blister reaches the substrate; heat blister is top coat only |
| Cracking, then flaking | Old brittle paint or coats too thick | Age of the paint; old oil-based layers |
| Peeling at edges, seams, or trim | Unprimed patch or missed prep | Look for bare compound under the peel |
| White powder under lifted paint on masonry | Efflorescence — moisture plus salts | Find the water source |
| Same spot after a repair | Cause still active | Moisture — leak, flashing, condensation |
| Peeling to bare plaster, chalky residue | Calcimine, an old chalk paint on pre-1940s plaster | Must be removed fully back to bare plaster |
Moisture is the number one cause. Water breaks the bond between paint and surface. It comes from roof or plumbing leaks, failed caulk or flashing, condensation, or water working in from outdoors. A dry painted surface gets wet, the wood or the film swells, and the paint loosens, cracks, and falls off over time.
The second cause is poor prep. Paint will not stick to dust, grease, soap residue, chalky old paint, or a glossy finish that was never scuff-sanded. The third is incompatible layers. Latex paint over old oil-based paint, without a bonding primer and scuff sanding, can look fine and then peel like a sticker.
One cheap test tells you if the problem is adhesion. Press a strip of painter’s tape firmly onto the area and pull it off. If paint lifts with it, the bond has failed. The formal version of this test is ASTM D3359.
Drywall Repair: The Complete Homeowner’s Guide: the full size ladder for patching the wall underneath a peel.
Before you begin
Tools: sharp scraper or 5-in-1 tool, sanding block, 120-grit and 220-grit sandpaper, putty knife, wire brush (optional), drop cloth, moisture meter (optional).
Materials: spackle or joint compound, degreaser or TSP solution, primer matched to the cause, paint matched to the existing type and sheen, painter’s tape.
Check the moisture first. Fix the leak, flashing, gutter, or condensation source. Let the wall dry completely before you touch paint. A moisture meter helps. Otherwise wait until the surface is dry to the touch and has stayed dry through normal weather. Do not paint over a damp surface or an active leak. The new coat lifts as the moisture escapes.
Safety — test for lead before you scrape or sand anything. Lead-based paint was banned for residential use in 1978. In a pre-1978 home, treat old paint as lead-suspect until tested. The EPA’s renovation rule binds paid work, not a homeowner fixing their own wall. The lead-safe practices still apply to you, though.
Test first, use wet methods, contain the dust with plastic sheeting, wet-wipe, and use a HEPA vacuum. Never dry-sweep, burn paint off with an open flame, or power-sand at high speed without dust controls. If the test is positive and the job is large, hire a certified firm.
The fix, step by step
- Stop the cause. Fix the leak, flashing, gutter, or ventilation problem. Dry the area completely. For a bathroom, fix the ventilation first.
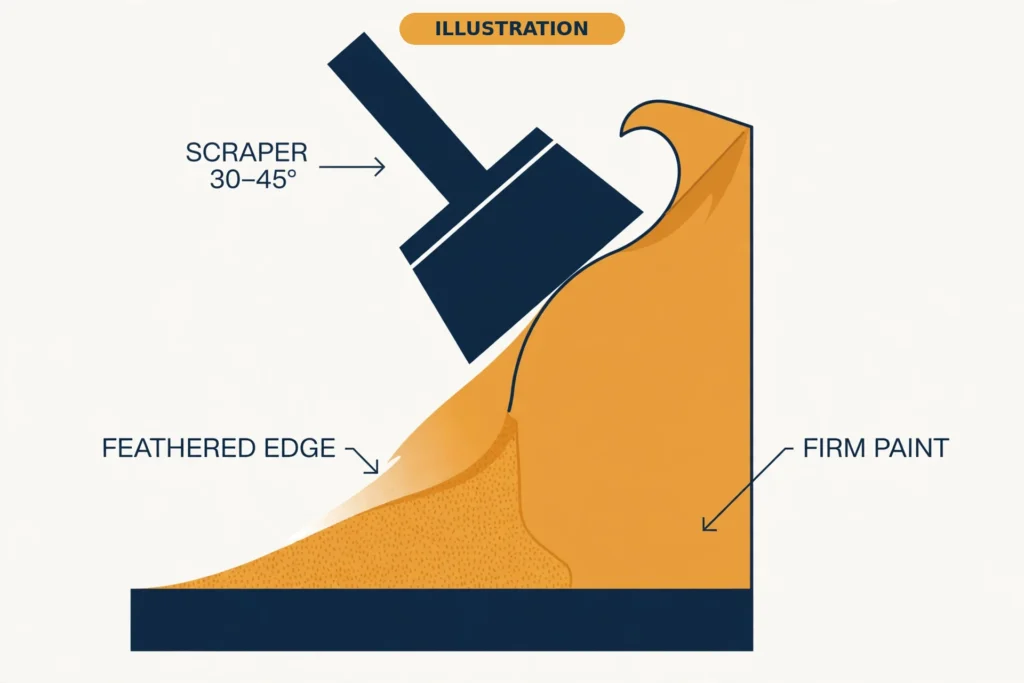
- Scrape back to firm paint. Use a sharp scraper or 5-in-1 tool held at 30 to 45 degrees. Keep going until the edge no longer lifts. If the paint comes off easily, it was going to peel anyway. Do not pry. Let the blade glide.
- Feather the edges. Sand the transition with 120-grit, then finish with 220-grit, until you cannot feel a ridge. If peeling covers more than 30 percent of a wall, scrape and repaint the whole surface rather than spot-repairing it.
- Repair the substrate. Fill divots and gouges with spackle or joint compound. Let it dry — spackle takes about 30 minutes, compound can take a few hours and up to a day. Sand smooth with 220-grit.
How to Patch a Drywall Hole: the full step-by-step for every hole size, with drying times.
- Clean. Wash with a degreaser or TSP solution, especially in kitchens and hand-contact areas. Rinse, wipe sanding dust with a damp cloth, and let it dry for at least 30 minutes. Moisture trapped under primer causes the same peeling again.
- Prime — the step most repairs fail on. Match the primer to the cause. Extend it 2 to 3 inches past the repair into intact paint. Let it dry fully before the topcoat.
- Repaint in two thin coats. Two thin coats beat one thick coat. Match the existing paint type and sheen. Paint to a natural break — a corner or trim line — rather than stopping mid-wall. A spot repair in the middle of a wall shows even when the colour matches.
Drying times between steps: primer 1 to 2 hours, binding primer recoat in 2 hours, latex topcoat about 4 hours between coats. Paint needs to stay above its minimum temperature and above the dew point for about 48 hours after it goes on.
Which primer should you use?
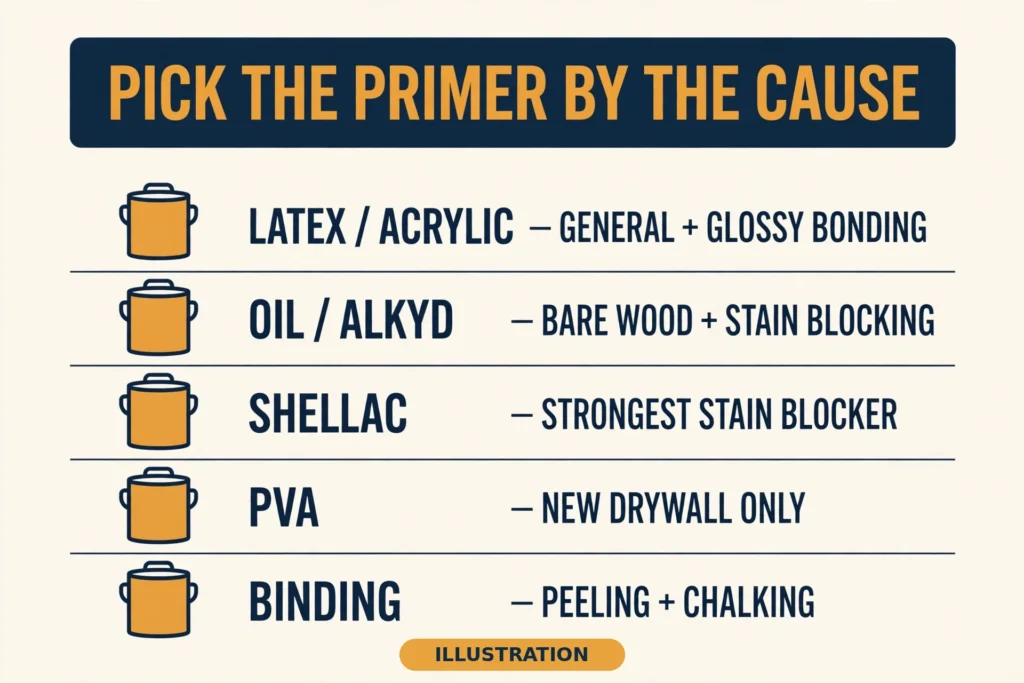
Primer choice is where most repairs fail. Pick by cause, not by habit.
| Primer type | Best for | Don’t use for |
|---|---|---|
| Water-based latex or acrylic | General interior drywall and patched areas; bonding primer for glossy surfaces; fast dry | Weakest stain blocking — won’t hold back heavy water stains or rust |
| Oil-based or alkyd | Bare wood, old glossy paint, stain blocking, tannin bleed | Slow dry, often 24 hours; high VOCs; never on masonry |
| Shellac-based | Strongest stain blocker — severe water or smoke damage, rust, tannin, odour | Highest fumes; alcohol cleanup; interior use |
| PVA drywall primer | New drywall and joint compound only | Not a stain blocker, not a bonding primer — wrong for a peeling repair |
| Stabilising or binding primer | Peeling, chalking, cracking surfaces — glues down old coating edges | Does not reattach lifted edges — scrape to a tight surface first |
The rule: bonding primer for glossy or previously oil-painted surfaces. Stain-blocking primer for water stains, tannin, or smoke. PVA only for fresh drywall and mud. A binding primer like Zinsser Peel Stop penetrates and glues down the edges of old coatings, but it does not reattach lifted edges and it does not fix moisture.
Bathrooms: why paint peels there
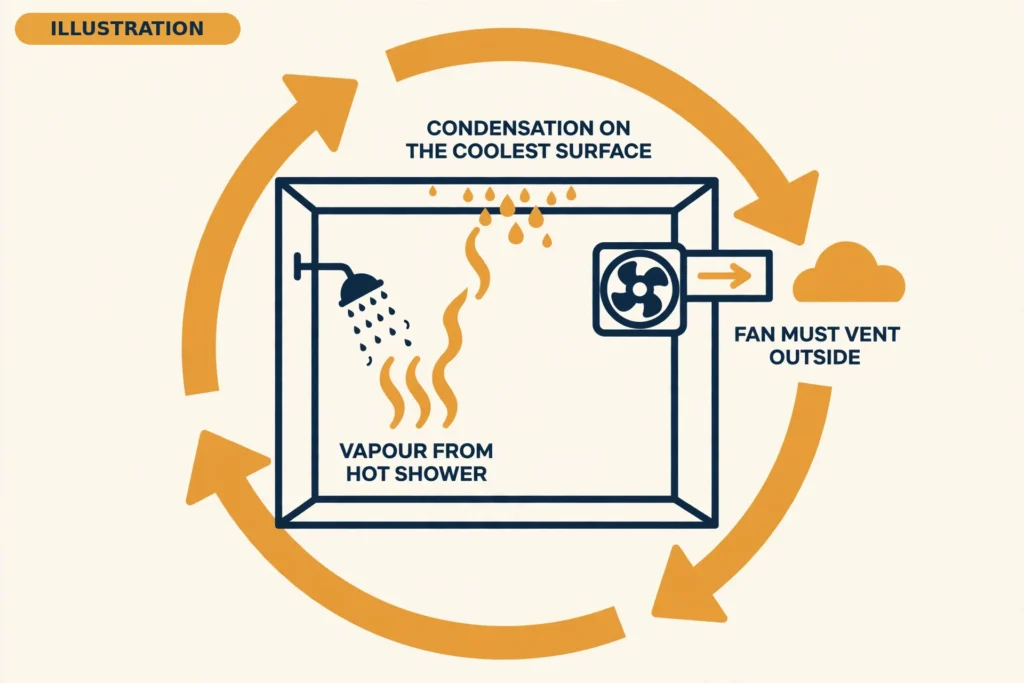
Every hot shower puts a cloud of vapour into a small room. It condenses on the coolest surface — usually the ceiling or an outside wall — and the daily wet and dry cycle lifts the film. Paint cannot overcome constant steam. An undersized or unvented exhaust fan will defeat even premium products.
Fix the ventilation first. The fan must vent outside, never into the attic or a wall cavity. The common rule of thumb is about 1 CFM per square foot of floor area, with a minimum around 50 CFM. Run it for 20 to 30 minutes after every shower. That sizing is a rule of thumb from contractor guides, not a code requirement.
For a bathroom ceiling, the repair runs: scrape, clean and treat mildew, then patch. Prime the whole ceiling with a bonding mould-inhibiting primer, not just the patches. Then two thin coats of bathroom-rated paint. Use a mould-killing cleaner or Borax solution. Plain bleach may not kill mould spores on porous surfaces. Keep ventilating for 24 to 48 hours after the final coat so the paint cures.
Use a moisture or mildew-resistant acrylic in satin or semi-gloss for bathrooms and kitchens. Flat paint is porous and acts like a sponge.
How to Recaulk a Bathtub: when failed caulk is letting water behind the paint.
Don’t do this
- Don’t paint over peeling paint. The old layer keeps letting go and takes the new coat with it. The texture shows through and the cracking comes back.
- Don’t skip the cause. As one repair guide puts it, the lesson learned the hard way is this: if you only patch the peeling spot without fixing the reason it let go, the new paint will peel again, sometimes within a season.
- Don’t skip primer. Bare compound and bare wood drink paint unevenly. The repair shows as a dull patch or peels again.
- Don’t use PVA primer on a peel. PVA seals fresh drywall. It does not bond old paint or block stains.
- Don’t lay on one thick coat. Thick coats crack while drying and trap moisture. Two thin coats.
- Don’t scrape or sand pre-1978 paint without testing. Test for lead first. Wet methods, containment, HEPA vacuum.
- Don’t stop mid-wall. Paint to a corner or trim line. A spot repair in the middle of a wall shows even when the colour matches.
Why does my paint keep peeling after I repaint?
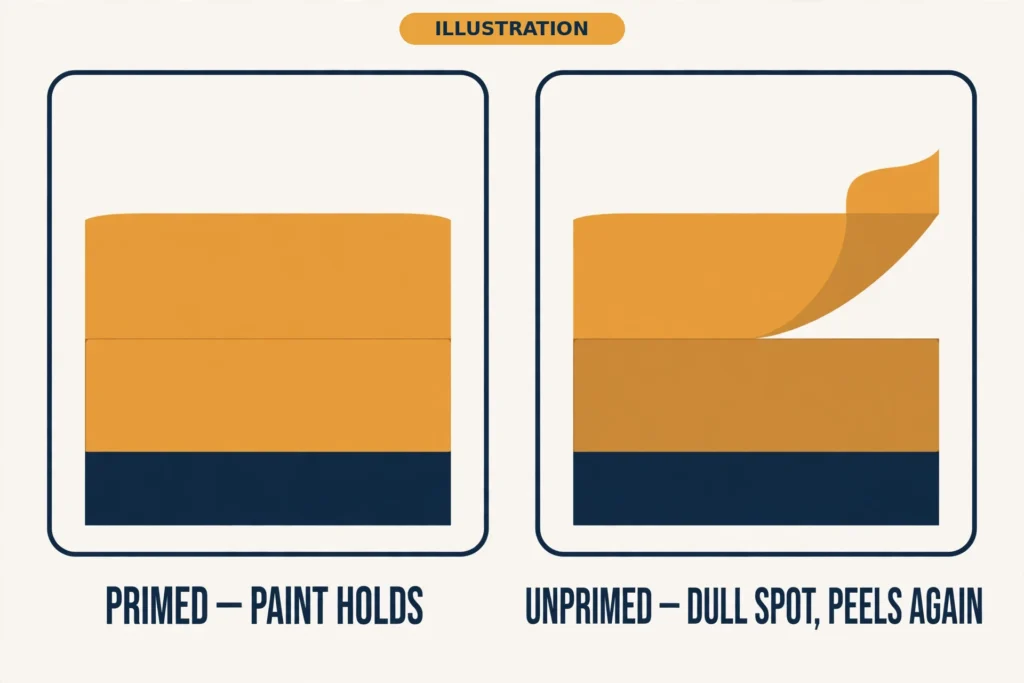
Because the cause was never fixed. Repainting over the problem without fixing the root cause almost always leads to the same peeling returning. The new coat’s tension as it dries can pull loose lower layers straight off.
Work the pattern table again. If it peels in the same spot, assume there is still moisture — a slow plumbing leak, missing flashing, or chronic condensation. If it peels in large sheets, the prep or primer was wrong. If it bubbles, water or heat is trapped underneath.
One more trap: painting over chalky or dusty surfaces, recoating before the first coat is dry, painting in direct sun, or painting below the can’s minimum temperature. Any one of those can undo a good repair.
What does it cost to fix peeling paint?
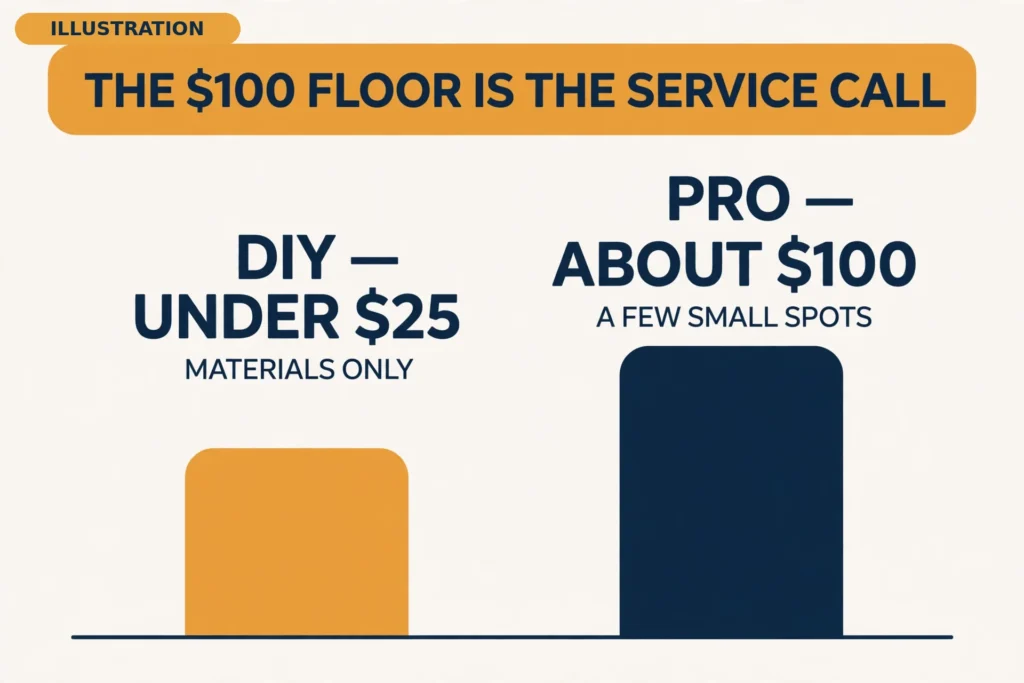
DIY materials (2026, US):
| Item | Cost |
|---|---|
| Small peeling spots, materials only | Under $25 |
| Small repair, materials | $30–$60 plus a free afternoon |
| Bathroom ceiling, all materials from scratch | $45–$75 |
| Paint, per gallon | $20–$70 |
| Primer, per gallon | $20–$60 |
Pro costs (2026, US):
| Job | Cost |
|---|---|
| A few small spots | About $100 |
| Touch-up work | $50–$300 |
| Whole room | $2–$6 per square foot |
| Room, national average | About $1,100; most $400–$1,600 |
| Whole interior | Average $2,022; most $965–$3,089 |
| Lead abatement, if the test is positive | $1,480–$5,520 |
One conflict, stated plainly: published guides disagree on painter hourly rates. Angi reports $20–$40 an hour. HomeGuide reports $50–$80 an hour. Both are published figures. Present them as a range, not a single number.
The minimum-visit pattern holds here too. A small spot costs under $25 in materials but about $100 from a pro. The per-square-foot rates would price a few square feet at almost nothing. The $100 floor is the service call. You are paying for the visit, not the paint.
Call a pro when
The wall is soft or spongy. There is visible mould growth. Staining keeps returning. The peeling worsens after rain or showers.
The job is large and the lead test came back positive. The peeling covers most of a wall or a whole ceiling. And any time the moisture source is a roof or plumbing problem you cannot find or reach.
The short version
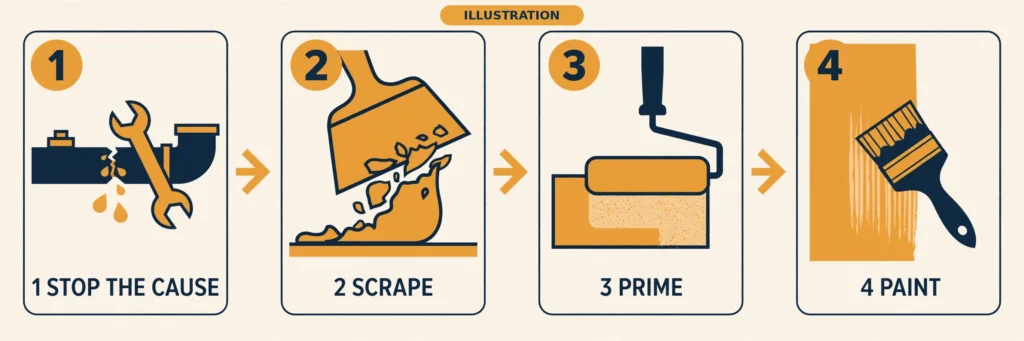
Diagnose first — moisture, prep, or the wrong primer. Fix the cause, let the wall dry, scrape to firm paint, feather the edges, clean, prime for the cause, and repaint in two thin coats to a corner. The paint itself is the easy part. The cause is the job.
FAQ
Can peeling paint be repaired?
Yes, if the cause is fixed first. Scrape back to firm paint, feather the edges, prime for the cause, and repaint. Repairing the spot without fixing the cause only buys a season.
Can I paint over paint that is peeling?
No. The old layer keeps letting go and takes the new coat with it. The texture shows through and the cracking comes back. Scrape it first.
What is the main cause of peeling paint?
Moisture, first. Then poor surface prep, then incompatible paint layers, then wrong conditions. Work the pattern table to tell them apart.
Will primer stop peeling paint?
The right primer for the cause helps a lot. A binding primer glues down the edges of old coatings after you scrape to a tight surface. But no primer fixes an active leak or reattaches lifted edges. Fix the cause first.
Does peeling paint mean damp?
Often, but not always. Damp is the top cause, and peeling that worsens after rain or showers points straight at it. Bad prep, incompatible layers, and old brittle paint also peel without any damp at all.
Is peeling paint a health hazard?
In a pre-1978 home it can be. Old paint may contain lead, and scraping or sanding it without testing puts lead dust in the air. Test before you disturb it. Otherwise peeling paint is mainly a warning that water is getting in somewhere.
Sources
- Sherwin-Williams — How to Fix Flaking, Cracking, and Peeling Paint — https://www.sherwin-williams.com/en-us/project-center/maintenance-repair/how-to-fix-paint-flaking
- Benjamin Moore — Cracking and Flaking Paint — https://www.benjaminmoore.com/en-ca/contractors/job-solutions/troubleshooting/cracking-flaking-paint
- EPA — Lead Renovation, Repair and Painting Program — https://www.epa.gov/lead/lead-renovation-repair-and-painting-program
- Zinsser Peel Stop Plus — Technical Data Sheet (Rust-Oleum Canada) — https://www.rustoleum.ca/~/media/DigitalEncyclopedia/Documents/RustoleumCA/TDS/English/Peel-Stop-PLUS-TDS-EN.ashx
- Angi — How Much Do Painters Charge? (updated September 2026) — https://www.angi.com/articles/how-much-do-painters-charge.htm
- True Value — Choose the Right Primer: Oil, Latex or Shellac — https://www.truevalue.com/diy-projects/paint-and-stain/choose-the-right-primer/
Last verified: November 2026.