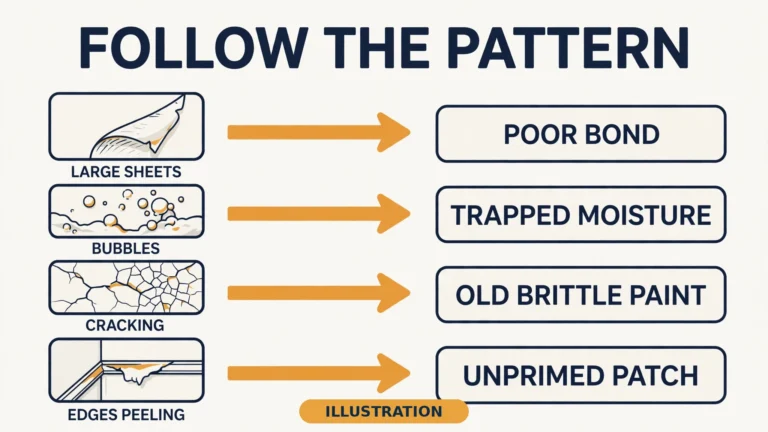
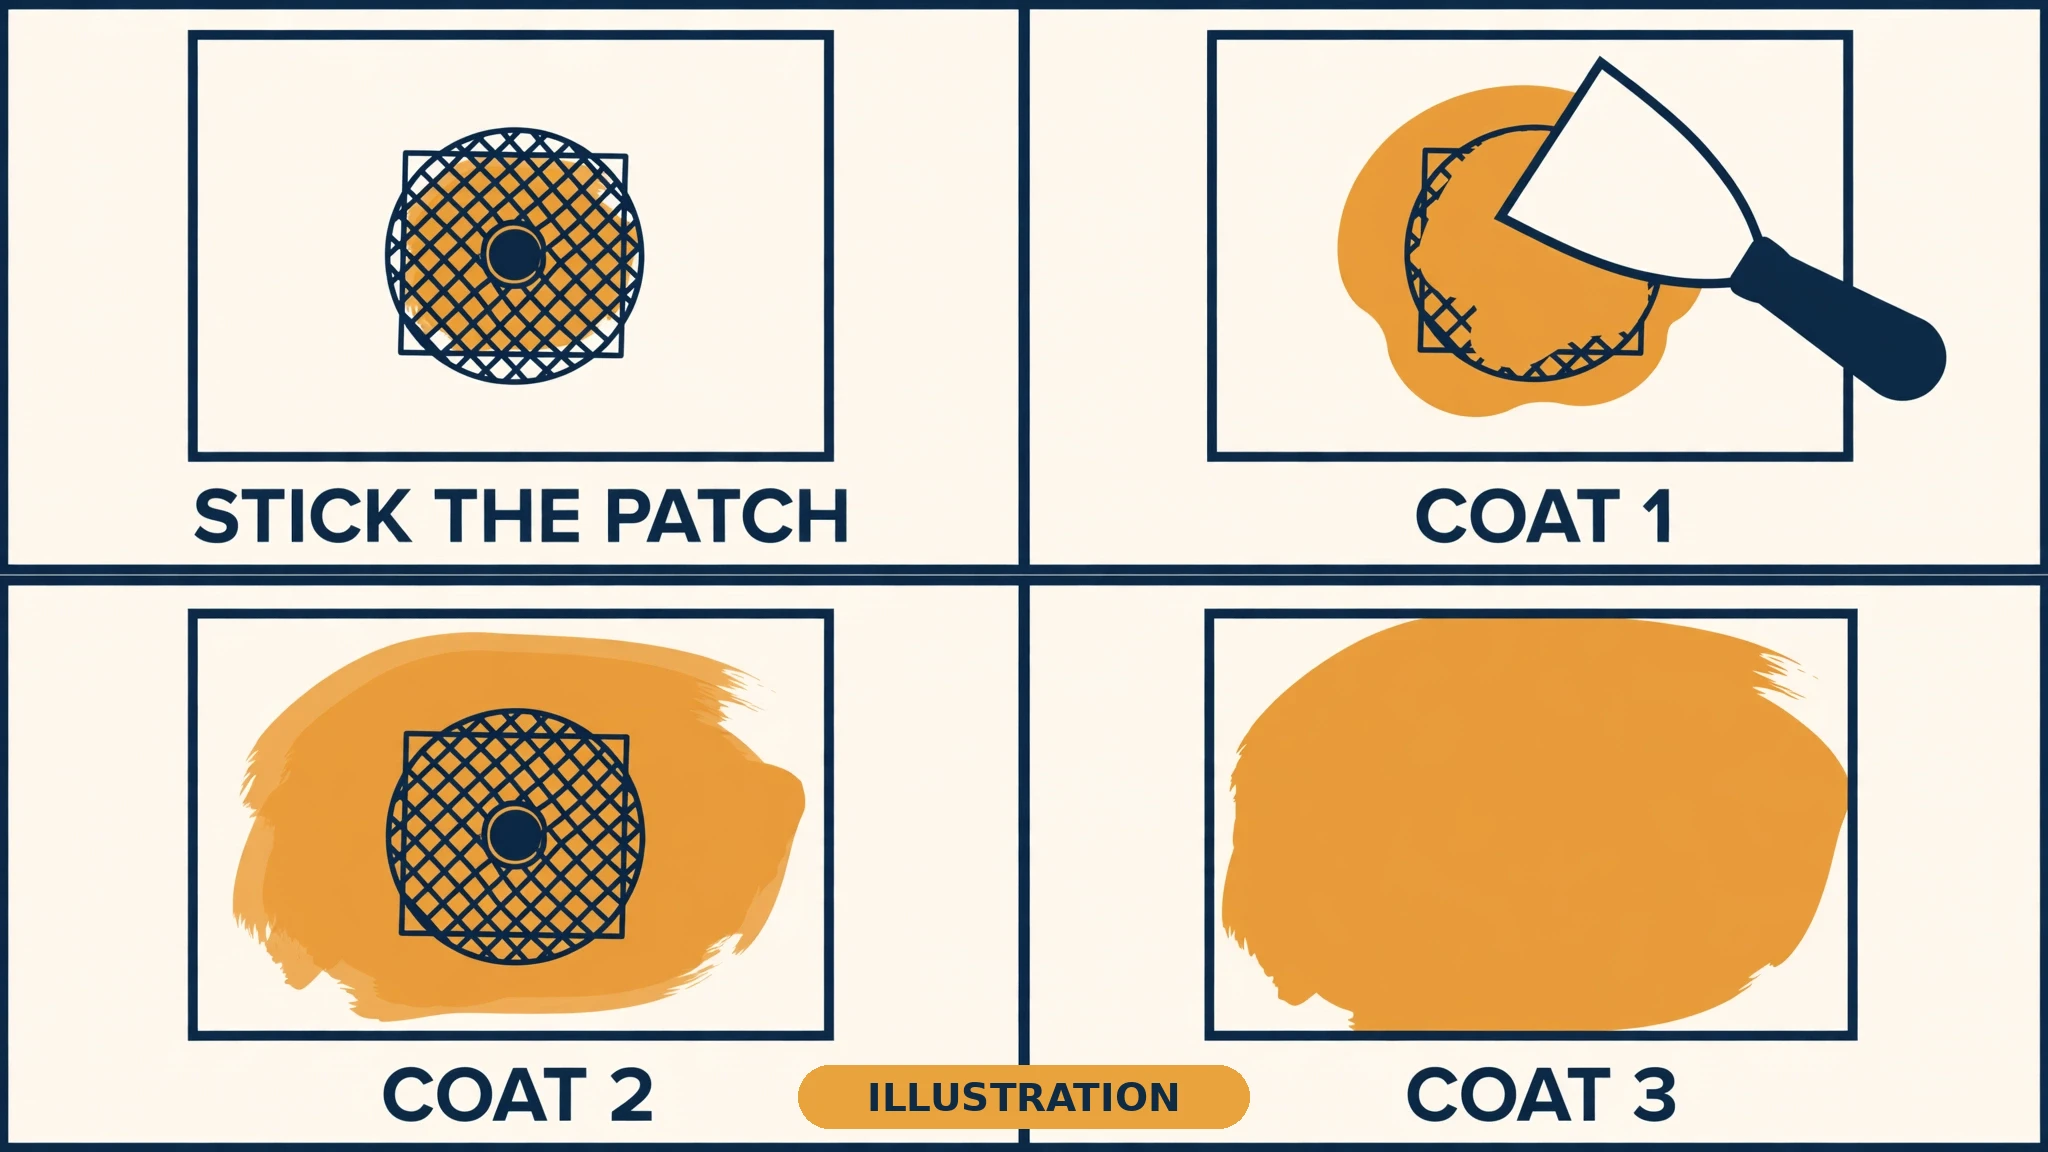
How to Patch a Drywall Hole
Quick answer
Patch a drywall hole by matching the method to the size. Spackle handles nail holes, a mesh patch covers holes up to a few inches, and anything bigger needs a California patch or a cut-in piece with wood backing. The patch itself is quick work — thin coats, full drying time, primer, and texture matching are what make it disappear.
What size hole is this?
Measure first. The size picks the method, not the other way round.
| Hole | Size | Your fix | Time |
|---|---|---|---|
| Nail hole, pinhole | Up to about 1/2 inch | Spackle only | About 30 minutes plus paint |
| Small hole | About 1/2 to 4 inches | Self-adhesive mesh patch | An afternoon, mostly drying |
| Medium hole | About 3 to 6 inches | California patch | An afternoon, mostly drying |
| Large hole | Over about 6 inches | Cut-in piece with wood backing | Two to three days with drying |
| Very large hole | Over about 12 inches | Cut back to the studs | A weekend, or a pro |
One honest note on the cutoffs: the big guides disagree. Lowe’s puts the mesh-patch limit at about 1 inch. Other guides put it at 1 to 4 inches, and patch kits claim up to 5 inches. Home Depot draws the cut-in line at about 4 inches. This Old House and Lowe’s draw it at about 6 inches.
When in doubt, go one method up. A stronger method on a small hole costs you ten minutes. A weak method on a big hole costs you the repair.
Drywall Repair: The Complete Homeowner’s Guide: the full size ladder, drying times, and when a patch is a pro job.
Before you begin
Tools: utility knife, 6-inch and 12-inch taping knives, drywall saw or jab saw, sanding sponge (150–220 grit), mud pan, drill, stud finder with wiring detection, voltage tester, work light you can hold flat against the wall.
Materials: lightweight spackle, pre-mixed joint compound, setting-type compound (“hot mud”) if you use mesh tape, self-adhesive mesh patch or patch kit, a drywall offcut, 1×3 wood backing strips, drywall screws, paper tape, PVA drywall primer, paint.
Check before you cut. Shine a light into the hole. Run the stud finder. If an outlet or switch sits nearby, switch the circuit off and test with the voltage tester. Cut in shallow passes.
Safety — read this before sanding anything. Sanding is the dust moment. Every patch ends in sanding, and that is when lead or asbestos dust becomes airborne if it is present. In a pre-1978 home, test the paint before you disturb it. In a pre-1982 wall, test the joint compound before you sand or cut it. Wet-sand to keep dust down. Wear a dust mask and safety goggles.
One more line: patching a ceiling is harder than patching a wall, and the dust falls on you. A ceiling patch is a pro job in most cases.
Nail holes and pinholes — spackle only
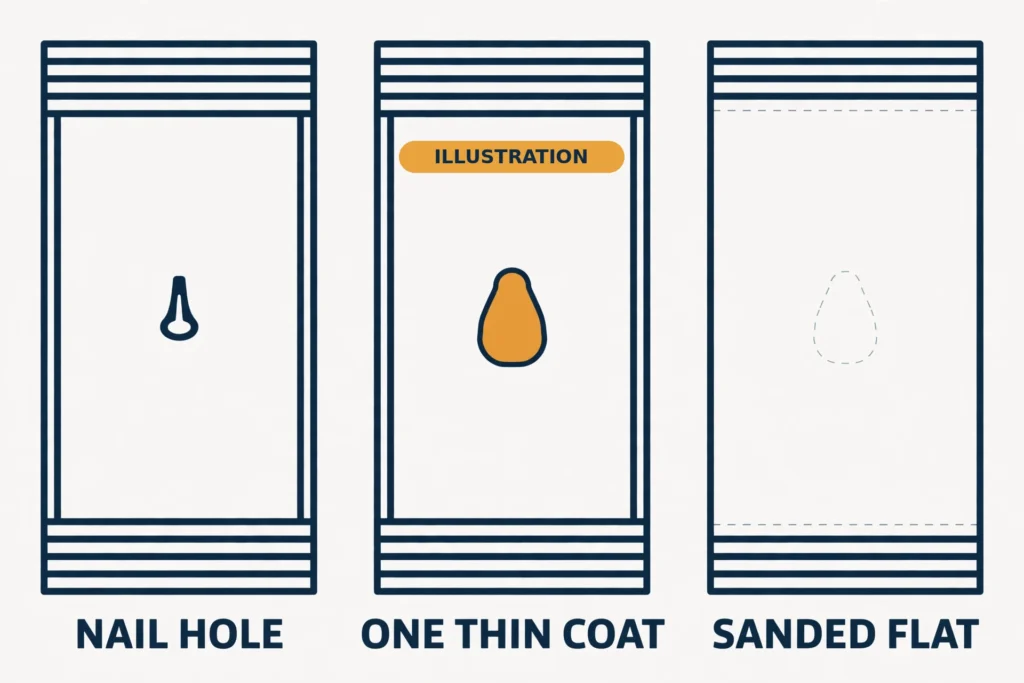
- Press a small dab of spackle into the hole with a putty knife held at about 45 degrees. Hold the blade almost flat and pull cleanly across to scrape it flush.
- Let it dry about 30 minutes. Sand it smooth with 220-grit.
- Add one more thin coat if it shrank. Spot-prime, then touch up the paint.
One coat of spackle covers repairs under about 1/8 inch deep. Deeper than that, it needs multiple thin layers. Each layer dries in one to five hours depending on temperature and humidity.
Small holes — mesh patch
- Trim torn paper and loose gypsum with a utility knife. Knock down any edges standing proud of the wall.
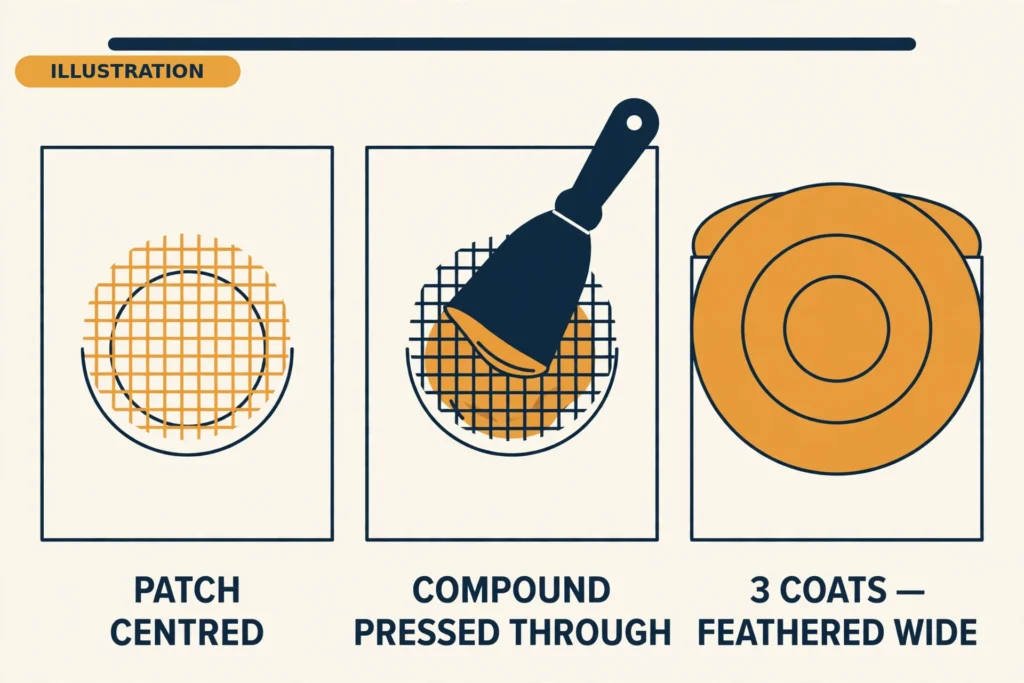
- Stick the patch centred over the hole, overlapping the wall by about an inch on every side.
- Spread compound over it in a thin first coat, pressing it through the mesh. Do not try to hide the patch in one coat.
- Let it dry fully. Add a second coat a few inches wider, then a third with the widest knife, feathering out to roughly 12 to 16 inches across.
- Sand lightly between coats. Check your work with a light held flat against the wall. It shows every ridge.
Rushing the drying is the most common reason a patch fails. A patch kit covers holes up to about 5 inches across. Larger than that, you need to cut and replace.
Medium holes — the California patch
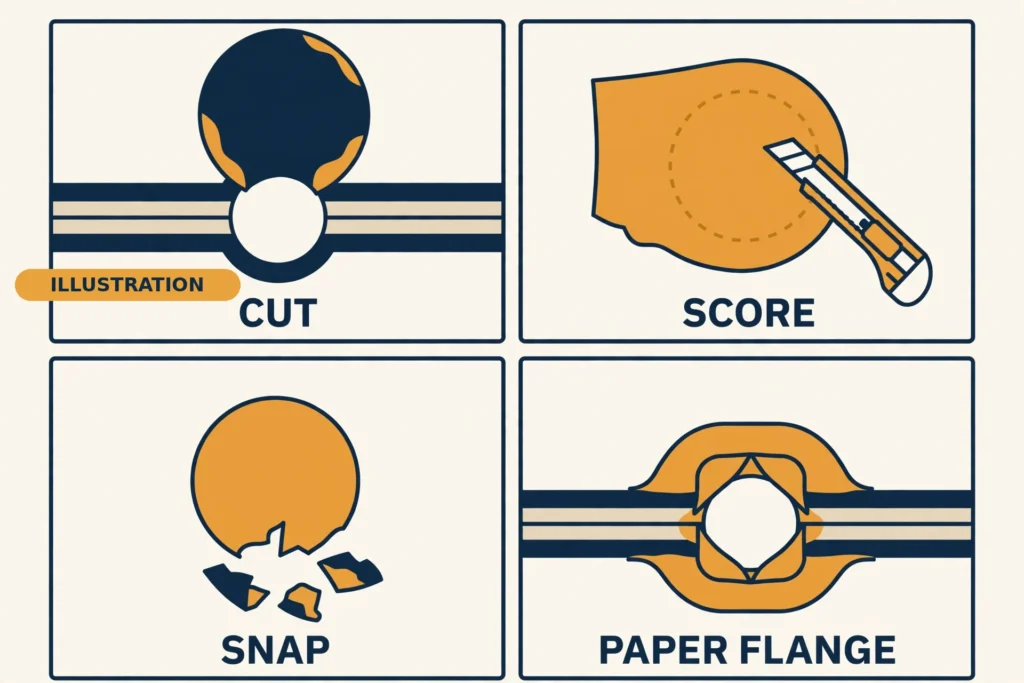
- Square up the hole with a drywall saw.
- Cut a new drywall piece about 2 inches larger than the hole in each direction.
- On the back, score and snap the gypsum about an inch in from each edge. Peel the gypsum off the face paper, leaving a paper flange all around.
- Butter the hole edges and the back of the flange with compound. Press the patch in and squeegee the flange flat.
- Finish with two or three thin coats, feathered wide.
It needs no wood backing and no tape. The paper is the tape. This is the flattest finish for holes too big for mesh but too small to cut back to studs, roughly 3 to 6 inches. The store-bought version of the same idea is a Presto Patch, a 4-inch circle of drywall with a larger paper section around it.
Large holes — cut in a new piece
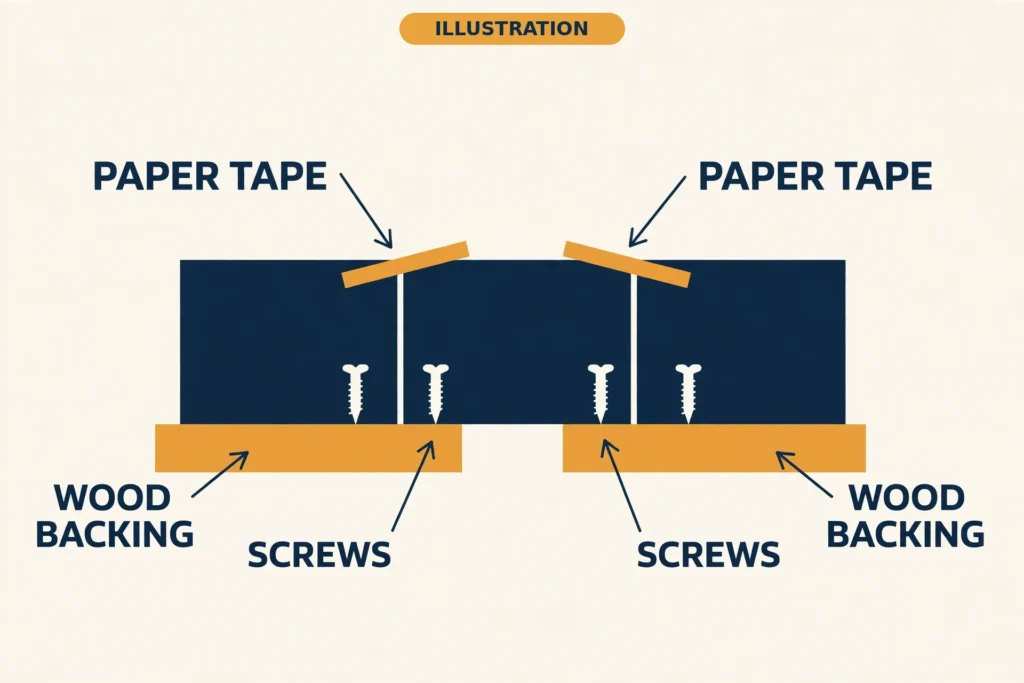
- Mark a rectangle around the damage. Check what is behind it first — light, stud finder, voltage tester, shallow passes.
- Cut out the rectangle. Screw two lengths of 1×3 strapping inside the opening, behind its edges, as backing. Or extend the cut to the centre of the nearest stud on each side.
- Cut new drywall the same thickness, leaving about a 1/8-inch gap all round. Screw it in roughly every 6 inches, heads just below the surface without tearing the paper.
- Fill the gaps with setting compound. Bed paper tape over every seam.
- Add two finishing coats over the tape, each wider than the last.
This is the only honest method for anything over about six inches. It is also the method for any hole where the board is crushed rather than cleanly broken.
Very large holes — cut back to the studs
- Cut back to the centres of the nearest two studs. Screw in scrap 2×4 cleats inside the wall to back the seams.
- Screw the new drywall in, tape and mud with paper tape.
Beyond about 12 inches, or anything spanning most of the gap between two studs, replace the section stud to stud. At this size, honestly assess whether the pro price is worth your weekend.
Which filler should you use?
It depends on the size. Spackle wins for nail holes. It dries fast and sands easy. Pre-mixed joint compound wins for patches. It feathers further and shrinks less. Setting-type compound wins for deep fills and for mesh tape.
| Product | Use for | Don’t use for |
|---|---|---|
| Lightweight spackle | Nail holes, dents under about 1/8 inch deep | Seams, tape, large patches — no structural bond |
| Pre-mixed joint compound | All patch finishing, seams, skim coats | Deep fills in one coat — shrinks, needs 2 to 3 coats |
| Setting-type compound | Deep fills over 1/2 inch, big patches, mesh tape bedding | A first patch — short working time, must be mixed |
The rule of thumb: joint compound for seams and big repairs, spackle for tiny spots. And one hard rule: mesh tape must be bedded in setting-type compound. Mesh plus pre-mixed is the classic failure combination.
Drying times: the part nobody budgets for
Drying time is where most first patches go wrong. Lightweight spackle dries in about 30 minutes. DAP DryDex, the pink-to-white kind, dries in one to five hours. Pre-mixed joint compound needs 12 to 24 hours per coat, longer in cold or damp rooms. Setting-type compound cures chemically in 20, 45, 90 or 210 minutes depending on the formula, so you can recoat the same day.
Two rules underneath all of it. First, one coat thicker than about 1/8 inch sharply raises the risk of shrinkage cracks. Second, heat or direct airflow causes flash drying and cracking. The best drying temperature is 55 to 70 degrees. Thin coats dry fast and flat. Thick coats shrink, crack, and take forever.
Matching the texture
Texture is the hardest part of this job. As one repair guide puts it, somebody filled a doorknob dent and sanded it. Then they rolled paint over the top. Now there is a smooth pale circle floating in the middle of an orange-peel wall. The hole is gone. The repair is extremely visible.
First, name what is on your wall. Orange peel is a fine sprayed mist. Knockdown is sprayed, then flattened with a trowel. Smooth walls have no texture at all.
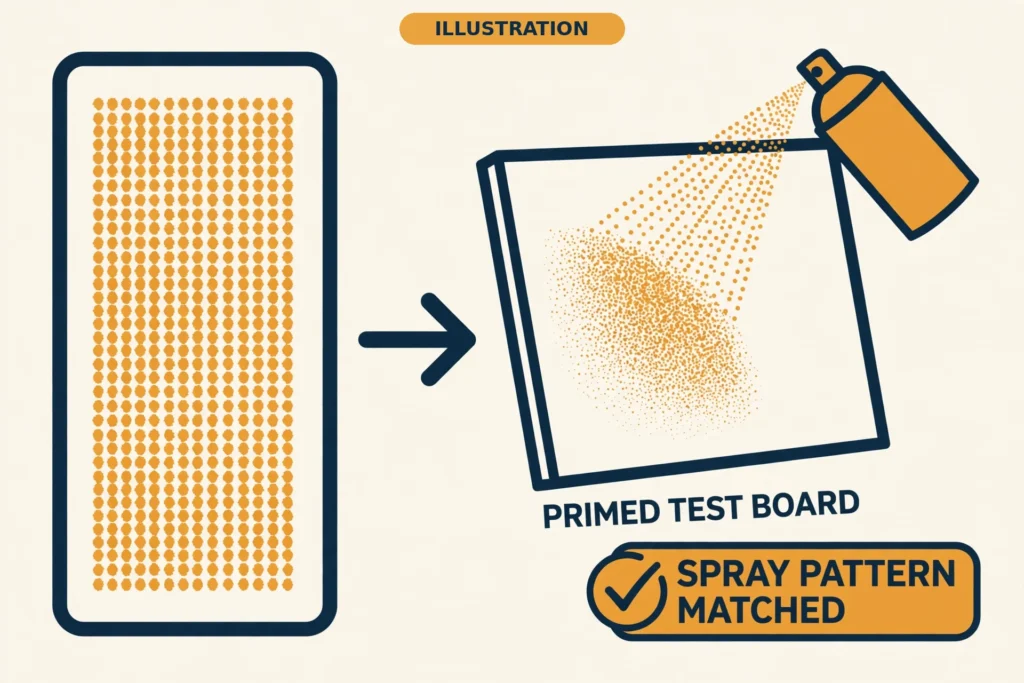
Second, test on a board, never on the wall. Prime two scrap boards exactly the way the wall is primed. If the test board is not primed like the wall, the test tells you nothing. Dial the pattern in on the scrap board first.
To match orange peel with a hopper gun, thin the compound to a thick pancake-batter consistency and spray at 30 to 50 PSI. Hold the gun 18 to 36 inches from the wall. Overlap each pass by about half. Higher pressure makes finer dots. Lower pressure makes larger, heavier droplets. Adjusting the pressure by only 5 PSI can drastically change the pattern.
For a small patch, an aerosol texture can works. Shake it hard for at least a minute. Hold it 12 to 24 inches away. Spray in short bursts. It dries to the touch in 5 to 15 minutes and takes topcoat in about 30 minutes.
For knockdown, spray as for heavy orange peel, then wait until the peaks have skinned over and lost their wet shine, typically 10 to 20 minutes. Then draw an 18-inch knife across in long overlapping strokes with almost no pressure, wiping the blade often. Knock it down too early and it smears. Too late and it will not flatten.
Always carry the texture past the repair so it thins into the existing texture instead of stopping in a line. On a small or badly mismatched wall, do the whole wall corner to corner.
Don’t do this
- Don’t fill a hole with compound alone and no patch. Compound has almost no tensile strength on its own. It fills, it smooths, it sands beautifully, and it splits the moment the two surfaces move even slightly. A patch installed with compound alone will crack. It is a matter of when, not if.
- Don’t use mesh tape with pre-mixed compound. Mesh tape must be bedded in setting-type compound. Mesh plus pre-mixed is the classic failure combination. It cracks.
- Don’t lay on one thick coat. Thick coats shrink and crack. Three thin coats, feathered wider each time.
- Don’t skip primer. Bare compound is porous. It soaks up paint and leaves a dull spot called flashing.
- Don’t spackle a hole with nothing behind it. Spackle is a filler, not a bridge. Past about half an inch, it sags or falls in.
- Don’t sand old compound without testing. Pre-1982 walls can hold asbestos. Test first.
- Don’t paint over a patch the same day you mudded it. Wet compound under paint bubbles and peels.
Why did my patch crack?
Because something moved, something was missing, or something underneath is still wrong. A crack along the patch outline means no tape bridged the seam. A crack through the middle means the coat was too thick, or the second coat went on while the first was still damp.
The fix is to cut back to sound material, back the opening, tape every seam, and build the repair in thin layers. Let each layer cure before the next. That way the shrinkage happens in small increments.
If the same crack keeps coming back after two repairs, the wall is moving. That is a diagnosis problem, not a patching problem. Find the movement first.
Why does my patch show through the paint?
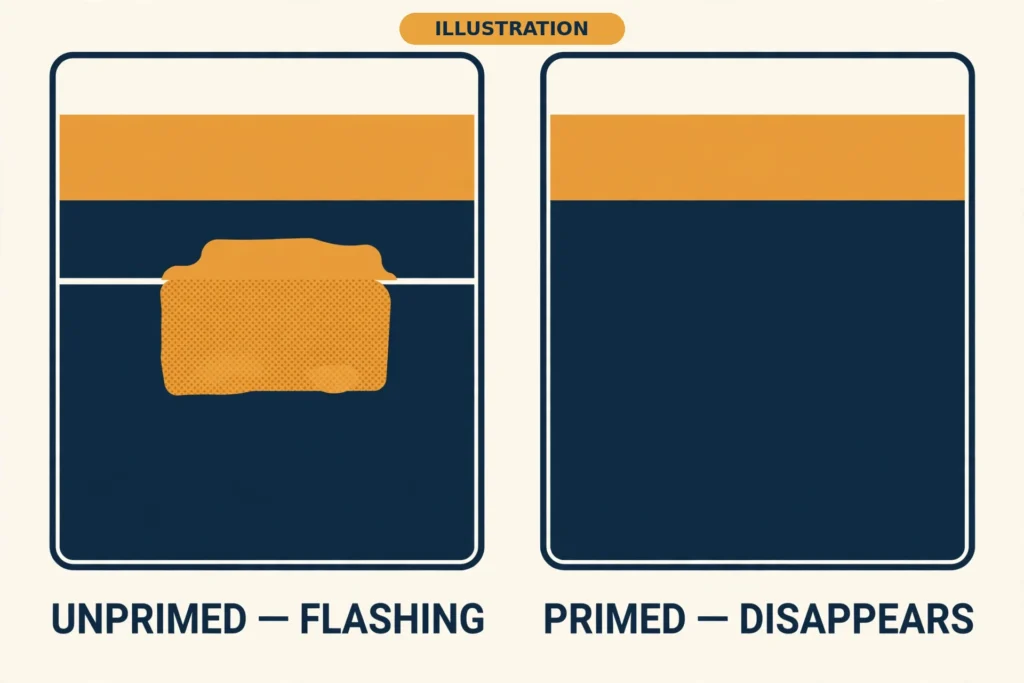
Almost always flashing: unprimed compound. Prime it, and the patch disappears. If it still shows after priming, check the texture. A smooth patch in an orange-peel wall catches light differently. The fix is texture, not more paint.
If the patch shows as a hairline crack running straight through its middle, or a thin line tracing the exact outline of the patch, the seam was never taped properly. That one needs re-taping, not re-painting.
How to Fix Peeling Paint: when the paint itself is the problem, not the wall underneath.
What does it cost to patch a drywall hole?
DIY materials by size (2026, US):
| Repair | Materials |
|---|---|
| Nail hole | About $5 |
| Small hole, under 3 inches | $30–$100 (kit $10–$30) |
| Doorknob hole to 12 inches | About $40 |
| Large patch, 2×2 to 4×4 feet | About $80 |
A patch kit alone runs $10–$30. Tools cost $50–$150 if you are buying them new.
Pro costs (2026, US):
| Repair | Pro cost |
|---|---|
| Small hole, under about 4 inches | $20–$120 (Angi) |
| Medium hole, 4 to 12 inches | $200–$500 |
| Large hole, 12 inches and up | $400–$1,000+ |
| Single hole patch, all-in (HomeWyse, Jan 2026) | $297–$472 |
One conflict, stated plainly: Angi says $20–$120 for a small hole. Other guides report $100–$250, $150–$300, and $300–$500 for the same visit. All of them are real.
The difference is the minimum service call and the number of visits. Most contractors charge $125–$200 just to show up, and a patch needs two or three visits with drying time between coats. You are paying for the visits, not the patch. Get the callout fee in writing before you book.
Call a pro when
Water damage you have not traced to its source. A ceiling, where gravity and overhead sanding turn a small job into a miserable one. Cracks that keep coming back after two patches. Any wall that is fire-rated, shared with a neighbour, or load-bearing. Any pre-1978 or pre-1982 wall where testing came back positive for lead or asbestos. And any hole bigger than about a foot across, where a pro crew’s day beats your three weekends.
The short version
Measure the hole, pick the method from the ladder, and go one method up when you are unsure. Thin coats, full drying time, primer before paint, texture tested on a primed board first. The patch itself is the easy part. The finish is the job.
FAQ
What is the easiest way to patch a hole in drywall? For a small or medium hole, a self-adhesive mesh patch kit. Stick it on, spread three thin coats of compound feathered wider each time, sand, prime, paint. No cutting, no backing, no screws.
Can I patch drywall without tape? Not with compound alone — an untaped seam cracks. The one exception is a California patch. Its paper flange works as the tape, so no separate tape is needed.
How big of a hole can you patch with drywall? A mesh patch kit covers holes up to about 5 inches across. A California patch covers about 3 to 6 inches. Anything bigger needs a cut-in piece with wood backing, and anything over about 12 inches needs cutting back to the studs.
What can I use instead of a drywall patch? A California patch made from a drywall offcut costs almost nothing if you have scrap. The store-bought version is a Presto Patch, a 4-inch circle of drywall with a larger paper section around it.
Can you just fill a hole in drywall? Only a nail hole. Anything bigger needs a patch behind it. Compound alone has nothing to hold onto past about half an inch. It sags, falls in, or cracks out.
What is the best material to patch drywall holes? It depends on the size. Spackle wins for nail holes — it dries fast and sands easy. Pre-mixed joint compound wins for patches — it feathers further and shrinks less. Mesh tape needs setting-type compound, never pre-mixed.
Sources
- Angi — How to Patch a Drywall Hole in 6 Simple Steps (updated May 2026) — https://www.angi.com/articles/patch-drywall-hole-6-simple-steps.htm
- DAP — DryDex Spackling Technical Data Sheet — https://assets.rsci.com/7079812330_datasheet.pdf
- EngineerFix — What Is the Difference Between Joint Compound and Spackling? — https://engineerfix.com/what-is-the-difference-between-joint-compound-and-spackling/
- Fine Home Building — What Can Go Wrong With Your Drywall Taping — https://www.finehomebuilding.com/project-guides/drywall/what-can-go-wrong-with-your-drywall-taping
- Angi — How Much Does Drywall Repair Cost? (updated September 2026) — https://www.angi.com/articles/how-much-does-drywall-repair-cost-small-holes.htm
- Drywall101 — How to Fix Drywall Cracks (So They Don’t Come Back) — https://drywall101.com/en/articles/taping/drywall-repair/repairing-drywall-cracks-overview
Last verified: November 2026.